1. Pengenalan
Thank you for choosing the Calor GV9820C0 Pro Express Vision Steam Generator Iron. This manual provides essential information for the safe and efficient use, maintenance, and troubleshooting of your appliance. Please read these instructions carefully before first use and keep them for future reference.
2. Arahan Keselamatan Penting
- Sentiasa sambungkan perkakas ke soket yang dibumikan.
- Jangan biarkan seterika tanpa pengawasan semasa ia dihidupkan atau disambungkan ke sesalur kuasa.
- Jauhkan seterika dan kordnya daripada kanak-kanak.
- Jangan sekali-kali merendam perkakas dalam air atau sebarang cecair lain.
- Jangan sentuh plat tapak yang panas atau wap.
- Unplug the appliance before filling the water tank, cleaning, or performing maintenance.
- Use only tap water. Do not add perfume, vinegar, starch, descaling agents, or other chemicals to the water tank.
- Ensure the steam generator is placed on a stable, heat-resistant surface.
3. Produk Lebihview
Familiarize yourself with the components of your Calor GV9820C0 steam generator iron.

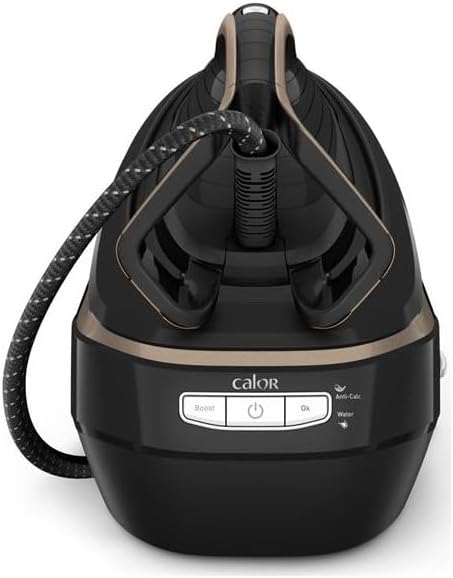
Rajah 1: Depan view of the steam generator base unit, showing the control panel with 'Boost', 'On/Off', 'OK', 'Anti-Calc', and 'Water' indicators.
Rajah 2: The iron securely docked on the base unit, ready for use or storage.
- besi: Equipped with a Durilium AirGlide Autoclean soleplate for smooth gliding.
- Hos Stim: Menyambungkan seterika ke unit asas.
- Unit Asas: Houses the water tank, boiler, and control panel.
- Tangki Air: Boleh ditanggalkan, kapasiti 1.1 liter.
- Panel Kawalan: Includes power button, steam boost button, and indicator lights for water level and descaling.
- Pengumpul Anti-Calc: Removable part for collecting limescale.
4. Persediaan
4.1 Membongkar
Keluarkan semua bahan pembungkusan dan pelekat dengan berhati-hati dari perkakas. Kekalkan pembungkusan untuk pengangkutan atau penyimpanan yang berpotensi pada masa hadapan.
4.2 Mengisi Tangki Air
- Pastikan perkakas dicabut dari sesalur kuasa.
- Keluarkan tangki air dari unit asas.
- Isi tangki dengan air paip bersih sehingga penunjuk aras 'MAX'. Jangan penuhkan.
- Reinsert the water tank firmly into the base unit until it clicks into place.
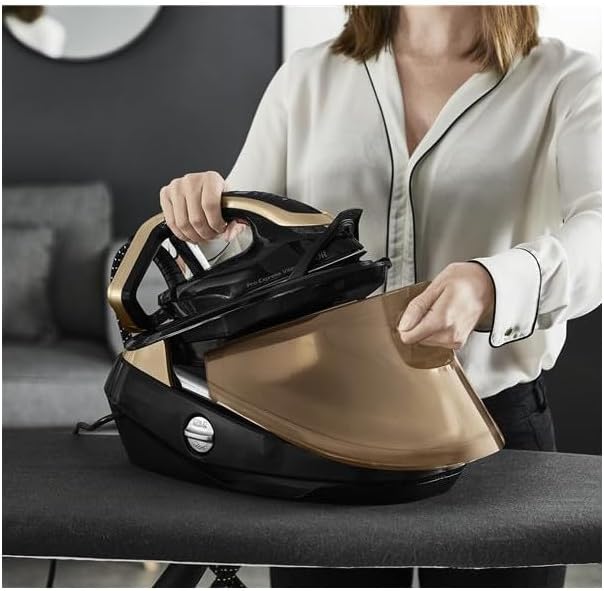
Rajah 3: The iron being placed onto the base unit, illustrating the accessible water tank for refilling.
4.3 Penggunaan Pertama
- Place the steam generator on a stable, heat-resistant ironing board or surface.
- Pasangkan kord kuasa ke soket elektrik yang dibumikan.
- Press the On/Off button. The appliance will begin to preheat. This takes approximately 2 minutes.
- Once the 'OK' indicator light stops flashing and remains solid, the appliance is ready for use.
- For the first use, or after a long period of storage, press the steam trigger several times away from garments to prime the steam system and remove any condensation.
5. Arahan Operasi
5.1 Menyeterika
- Adjust the temperature setting on the iron according to the fabric type.
- Press the steam trigger under the handle to release continuous steam.
- For stubborn creases, press the 'Boost' button on the control panel for an extra powerful steam shot (750g/minute).
- The iron can be used for vertical steaming of hanging garments or curtains. Hold the iron a few centimeters away from the fabric and press the steam trigger.
5.2 Pemadaman Automatik
For safety and energy saving, the appliance features an automatic shut-off function. If the iron is left unused for a certain period, it will automatically turn off.
6. Penyelenggaraan
Regular maintenance ensures optimal performance and extends the lifespan of your steam generator iron.
6.1 Mengosongkan Tangki Air
After each use, or when storing the appliance, it is recommended to empty any remaining water from the tank.
- Cabut plag perkakas dan biarkan sehingga sejuk sepenuhnya.
- Keluarkan tangki air dan tuangkan baki air.
- Gantikan tangki air.
6.2 Membersihkan Tapak Tapak
The Durilium AirGlide Autoclean soleplate requires minimal cleaning. If necessary, use a damp cloth to wipe it clean after the iron has cooled down. Do not use abrasive cleaners or metallic scouring pads.
6.3 Penyahkerak (Sistem Anti-Calc)
Your steam generator iron is equipped with an Anti-Calc collector to prevent limescale buildup. The 'Anti-Calc' indicator light will illuminate when the collector needs to be cleaned.
- Pastikan perkakas dicabut plag dan telah disejukkan selama sekurang-kurangnya 2 jam.
- Unscrew and remove the Anti-Calc collector located on the side of the base unit.
- Bilas pemungut dengan teliti di bawah air yang mengalir untuk menghilangkan mendapan kerak kapur.
- Screw the Anti-Calc collector back into its housing until it is secure.

Rajah 4: Removing the Anti-Calc collector for cleaning, a key maintenance step.
6.4 Penyimpanan
Once the appliance has cooled down, you can secure the iron to its base unit for easy transport and storage. The steam hose can be wrapped around the base. Store the appliance in a dry, safe place.
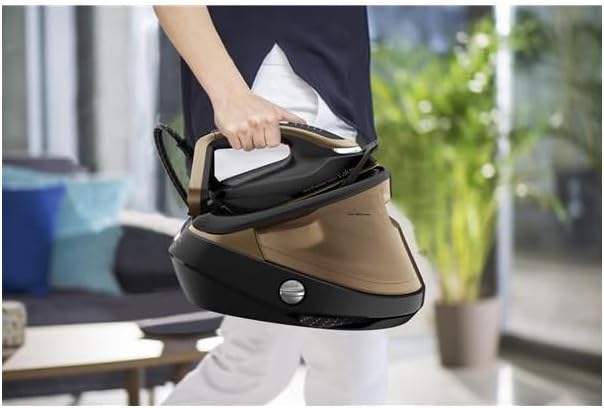
Rajah 5: The steam generator iron secured for carrying, demonstrating its portability.
7. Penyelesaian masalah
| Masalah | Kemungkinan Punca | Penyelesaian |
|---|---|---|
| Tiada wap dihasilkan. | Tangki air kosong. Perkakas tidak dipanaskan. | Refill the water tank. Wait for the 'OK' indicator light to become solid. |
| Water droplets appear on fabric. | Iron temperature is too low for steam. First use condensation. | Increase iron temperature. Press steam trigger away from fabric a few times. |
| 'Anti-Calc' light is on. | Anti-Calc collector needs cleaning. | Clean the Anti-Calc collector as described in Section 6.3. |
| Perkakas tidak dihidupkan. | Not plugged in. Power outage. | Check power connection. Verify power supply. |
8. Spesifikasi
| Ciri | Perincian |
|---|---|
| Nombor Model | GV9820C0 |
| Jenama | Kalor |
| kuasa | 3000 Watt |
| Tekanan Stim | 9 Bar |
| Keluaran Stim Berterusan | 180 g/minit |
| Boost Steam | 750 g/minit |
| Kapasiti Tangki Air | 1.1 Liter |
| Masa Prapemanasan | 2 minit |
| Teknologi Tapak Tapak | Durilium AirGlide Autoclean |
| Fungsi Khas | Automatic Shut-off, Anti-Calc Collector |
| Berat badan | 5.34 Kilogram |
| Voltage | 230 Volt (AC) |
9. Waranti dan Sokongan
This product is covered by a manufacturer's warranty. For detailed warranty terms and conditions, please refer to the warranty card included with your purchase or visit the official Calor website. For technical support, spare parts, or service, please contact Calor customer service or an authorized service center.