
1. Pengenalan
This manual provides essential information for the installation, maintenance, and specifications of the BAIONE Front Engine Guard Highway Crash Bar Protector. This accessory is designed to offer protection for your BMW R1200RT motorcycle's engine and fairings in the event of a low-speed tip-over or slide. It is compatible with BMW R1200RT models manufactured between 2004 and 2013.
Please read these instructions thoroughly before attempting installation to ensure proper fitment and safety.
2. Maklumat Keselamatan
- Always wear appropriate personal protective equipment (PPE) during installation.
- Ensure the motorcycle is stable and securely supported on a center stand or appropriate lift before beginning any work.
- Allow the engine and exhaust system to cool completely before handling any components to prevent burns.
- Jika anda tidak pasti tentang sebarang langkah proses pemasangan, rujuk mekanik motosikal bertauliah.
- Keep all fasteners and small parts away from children.
- Do not modify the crash bars or mounting hardware. Any modifications may compromise the integrity and protective capabilities of the product.
3. Kandungan Pakej
Sahkan bahawa semua komponen ada dan tidak rosak sebelum meneruskan pemasangan.
- Front Engine Guard Highway Crash Bars (Left and Right sections)
- Mounting Hardware (various bolts, washers, nuts)

Gambar 3.1: Lebihview of the crash bar components and included hardware.

Rajah 3.2: Terperinci view perkakasan pemasangan.
4. Pemasangan (Persediaan)
Nota: While basic instructions are typically included, detailed, step-by-step installation guides may vary. It is recommended to consult a service manual for your specific BMW R1200RT model or seek professional assistance if you are unfamiliar with motorcycle component installation.
The installation process generally involves mounting the highway bars directly onto the motorcycle's frame. No drilling, cutting, or welding is typically required. The provided fasteners are used to secure the bars to existing mounting points.
Langkah Pemasangan Umum:
- Sediakan Motosikal: Ensure the motorcycle is turned off, cooled down, and securely placed on a stable surface.
- Kenal pasti Titik Pelekap: Locate the designated mounting points on the motorcycle frame for the front engine guards. These are typically near the engine and lower fairings.
- Position the Crash Bars: Carefully position the left and right crash bar sections against the frame, aligning them with the identified mounting points.
- Lampirkan Perkakasan: Use the provided bolts, washers, and nuts to loosely secure the crash bars to the frame. Do not fully tighten any fasteners until all components are in place and properly aligned.
- Selaraskan dan Ketatkan: Once both crash bar sections are loosely attached and properly aligned, gradually tighten all fasteners. Ensure even tightening to prevent stress on the frame or bars. Refer to your motorcycle's service manual for specific torque specifications if available.
- Pemeriksaan Akhir: After tightening all fasteners, visually inspect the installation to ensure the crash bars are securely mounted, do not interfere with any moving parts (e.g., steering, suspension), and have adequate clearance from other components (e.g., exhaust pipes, fairings).

Figure 4.1: Front engine guard installed on a BMW R1200RT.

Figure 4.2: Close-up of the installed front engine guard.
5. Fungsi dan Penggunaan
The BAIONE Front Engine Guard Highway Crash Bars are designed to protect the motorcycle's engine, cylinder heads, and lower fairings from damage during accidental tip-overs or low-speed slides. Constructed from heavy-duty iron, these bars create a protective barrier that can absorb impact and prevent direct contact between the motorcycle's vulnerable components and the ground.
While providing significant protection, these crash bars are not intended to prevent all damage in high-speed accidents. They are primarily effective for stationary drops or minor incidents.

Figure 5.1: High-quality steel pipe construction for strength and sturdiness.
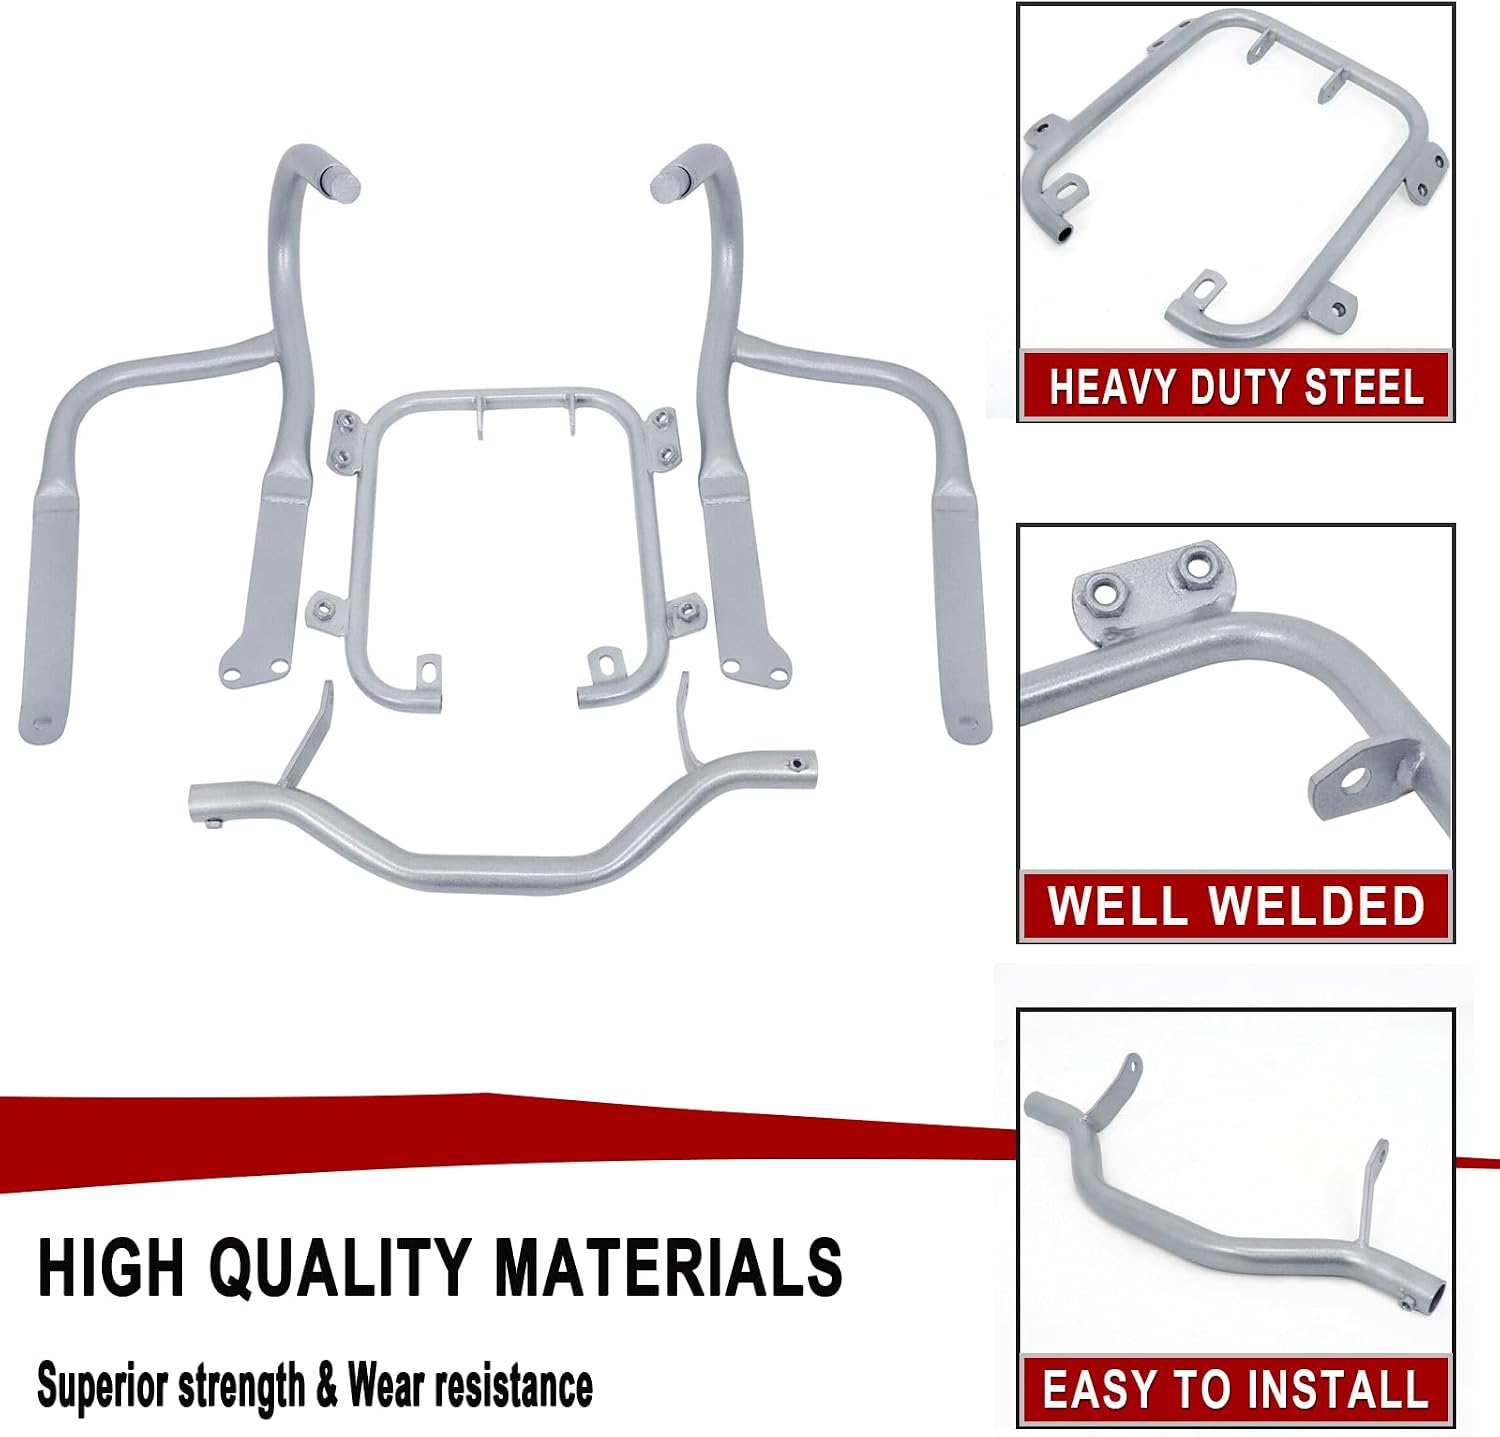
Figure 5.2: Features of the crash bar construction, including heavy-duty steel and quality welding.
6. Penyelenggaraan
Regular maintenance helps ensure the longevity and effectiveness of your crash bars.
- Pemeriksaan Berkala: Regularly check all mounting bolts for tightness. Vibrations from riding can cause fasteners to loosen over time. Re-tighten as necessary.
- Kebersihan: Clean the crash bars with mild soap and water to remove dirt, grime, and road salt. Avoid abrasive cleaners or solvents that could damage the finish.
- Semakan Kerosakan: After any incident or fall, thoroughly inspect the crash bars for bends, cracks, or significant damage. Damaged crash bars may not provide adequate protection and should be replaced.
- Pencegahan kakisan: If the finish is scratched or chipped, consider touching up the affected areas to prevent rust, especially if riding in corrosive environments.
7. Penyelesaian masalah
Bahagian ini membincangkan isu-isu biasa yang mungkin timbul semasa atau selepas pemasangan.
| Isu | Kemungkinan Punca | Penyelesaian |
|---|---|---|
| Poor Fitment / Misalignment | Manufacturing tolerances, incorrect positioning during initial installation. | Loosen all mounting bolts, adjust the position of the bars, and then re-tighten evenly. Ensure no components are obstructing the fit. Some minor adjustments may be required. |
| Perkakasan hilang | Packaging error or lost during handling. | Verify package contents against the list. Contact the seller or manufacturer for replacement parts. Local hardware stores may also carry suitable replacements if needed urgently. |
| Interference with other motorcycle parts (e.g., exhaust, fairing) | Incorrect alignment, manufacturing variation. | Ensure the bars are correctly positioned and not twisted. If interference persists, slight bending or shimming may be required, but proceed with caution to avoid damaging the bars or motorcycle. Professional assistance is recommended for such modifications. |
| Loose Crash Bars after riding | Vibration, insufficient tightening during installation. | Re-tighten all mounting bolts to appropriate torque specifications. Consider using thread-locking compound (e.g., Loctite) on fasteners to prevent loosening from vibration. |
8. Spesifikasi
| Ciri | Perincian |
|---|---|
| Nama Produk | Front Engine Guard Highway Crash Bar Protector |
| Jenama | BAIONE |
| Nombor Model | WO-R1200RT-2 |
| Compatible Motorcycle | BMW R1200RT (2004-2013) |
| bahan | High Quality Iron |
| warna | Perak |
| Kedudukan Bahagian Auto | Depan |
| Berat Barang | Kira-kira 10.08 paun (4.57 kg) |
| Dimensi Produk | 18 x 15.7 x 13.7 inci (45.7 x 39.9 x 34.8 cm) |
| UPC | 743645450990 |
9. Waranti dan Sokongan
Specific warranty information for this product is not provided in the available documentation. For details regarding warranty coverage, returns, or technical support, please contact the seller or manufacturer directly through their official channels.
Manufacturer: BAIONE
For further assistance, refer to the contact information provided at the point of purchase or on the manufacturer's official webtapak.