
1. Produk Lebihview
The G-MARK STUDIO 2 is a compact and versatile 2-channel audio interface mixer designed for various audio applications, including live shows, recording, DJ sets, podcasts, and streaming. It features two XLR combo inputs for microphones or instruments, switchable stereo line outputs, and individual volume controls for each channel. The mixer includes a 48V phantom power supply for condenser microphones and a Hi-Z input for direct guitar or bass connection. Its USB connectivity ensures simple plug-and-play operation with computers and other devices.

Figure 1: G-MARK STUDIO 2 Mini Audio Mixer, overall view.
2. Panduan Persediaan
2.1 Kuasa Penyambung
Connect the provided USB cable to the Type-B USB 2.0 port on the rear panel of the mixer and to a compatible USB power source (e.g., computer USB port, USB power adapter). The 'POWER' indicator light will illuminate when the device is powered on.
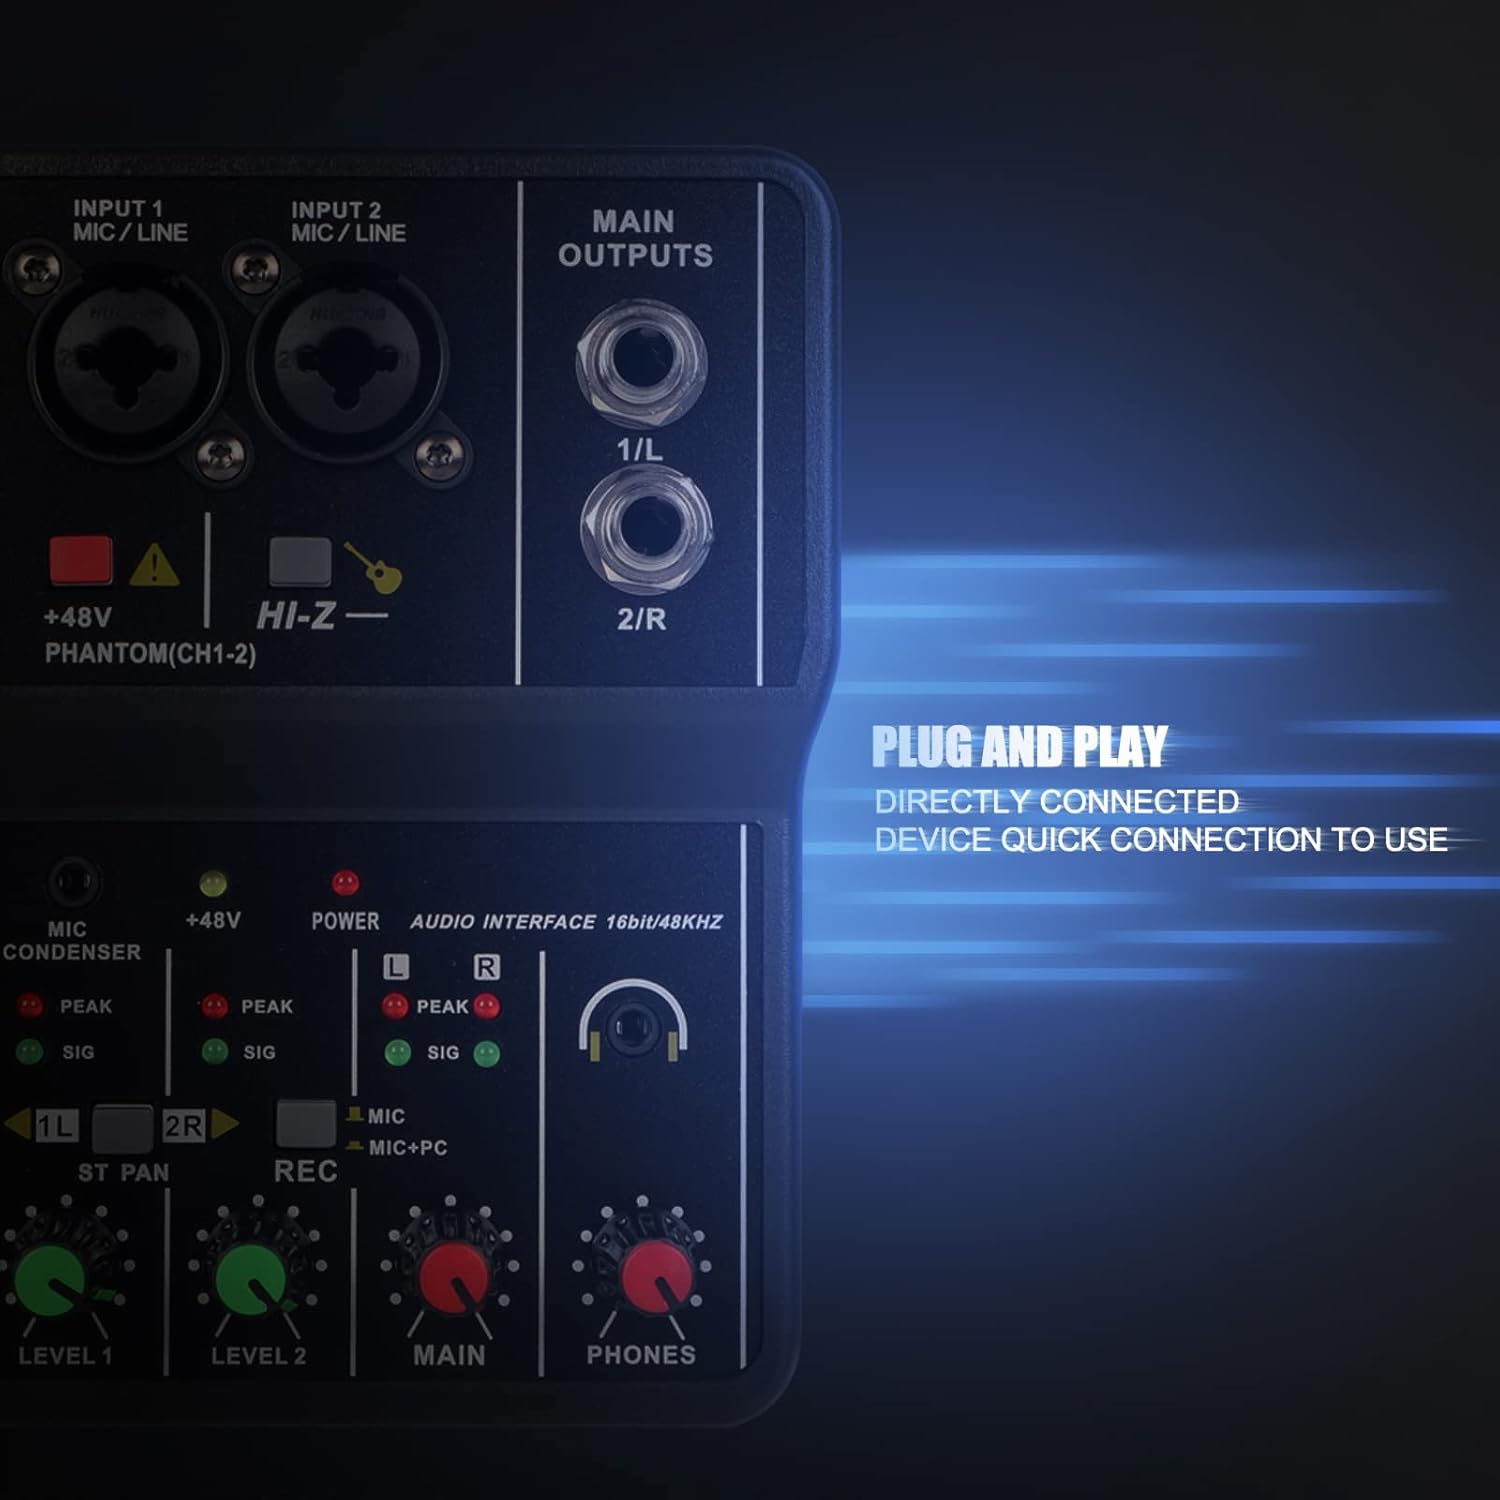
Figure 2: Rear panel showing the USB Type-B port for power and data connection.
2.2 Connecting Audio Inputs
The mixer features two combo inputs (INPUT 1 MIC/LINE, INPUT 2 MIC/LINE) that accept both XLR and 6.35mm (1/4-inch) TRS/TS connectors.
- Mikrofon: Connect XLR microphones to either combo input. For condenser microphones requiring power, press the +48V PHANTOM(CH1-2) butang. Penunjuk yang sepadan akan menyala.
- Instrumen: Connect instruments like guitars or basses using a 6.35mm (1/4-inch) TS cable. For high-impedance instruments, press the HI-Z button for optimal signal.
- 3.5mm Microphone: A dedicated 3.5mm microphone input is available for condenser microphones.

Figure 3: Close-up of the XLR/TRS combo input jacks.
2.3 Connecting Main Outputs
The mixer provides two 6.35mm (1/4-inch) TRS/TS MAIN OUTPUTS (1/L and 2/R) for connecting to external speakers, amppengangkat, atau peralatan audio lain.
2.4 Menyambung Fon Kepala
Plug your headphones into the 3.5mm PHONES jack for real-time monitoring of your audio. Adjust the headphone volume using the PHONES knob.
Video 1: G-MARK Mini Audio Mixer 2 Channel Setup and Features. This video demonstrates connecting power, audio inputs, and adjusting controls for recording and monitoring.
3. Arahan Operasi

Figure 4: Detailed diagram of the G-MARK STUDIO 2 mixer controls.
3.1 Input Level Controls
Laraskan TINGKATAN 1 dan TINGKATAN 2 knobs to set the input gain for each channel. Monitor the 'SIG' (signal) and 'PEAK' (overload) indicator lights. The 'SIG' light should illuminate green during normal operation, and the 'PEAK' light (red) should only flash occasionally. If 'PEAK' stays red, reduce the input level to prevent distortion.
3.2 Kuasa Hantu (+48V)
Tekan ke +48V PHANTOM(CH1-2) button to activate phantom power for condenser microphones connected to INPUT 1 or INPUT 2. Ensure this is only used with microphones that require phantom power.
3.3 Hi-Z Input
Tekan ke HI-Z button when connecting high-impedance instruments like electric guitars or basses directly to the mixer for proper signal matching.
3.4 Recording Mode Selection (REC)
The REC button allows you to select the audio source for computer recording:
- Button Up (MIC): Records only the microphone/instrument inputs (Channels 1 and 2).
- Button Down (MIC+PC): Records a mixed signal of the microphone/instrument inputs and the audio playback from your connected computer.
3.5 Stereo/Mono Channel Switching (ST PAN)
The ST PAN buttons (1L and 2R) control the stereo panning or mono summing of the input channels:
- Buttons Up: Channels 1 and 2 are treated as separate mono inputs, panned left and right respectively.
- Buttons Down: Channels 1 and 2 are summed to a mono signal. This is useful when using a single microphone and wanting the sound to be present in both left and right channels of the output.
3.6 Main Output and Headphone Volume
Laraskan UTAMA knob to control the overall output volume to your speakers or recording device. Use the TELEFON knob to adjust the volume for your connected headphones.
Video 2: G-MARK 2 Channel Interface Audio Mixer Overview. This video provides a quick look at the mixer's interface and basic functionality.
4. Penyelenggaraan
To ensure the longevity and optimal performance of your G-MARK STUDIO 2 mixer, follow these maintenance guidelines:
- Pembersihan: Gunakan kain lembut dan kering untuk membersihkan bahagian luar pengadun. Elakkan menggunakan pembersih cecair atau pelarut, kerana ia boleh merosakkan kemasan atau komponen dalaman.
- Storan: Simpan pengadun di tempat yang sejuk dan kering jauh dari cahaya matahari langsung, suhu yang melampau dan kelembapan yang tinggi.
- Pengendalian: Avoid dropping the device or subjecting it to strong impacts. Do not attempt to disassemble the mixer, as this will void the warranty.
5. Penyelesaian masalah
- Tiada Bunyi atau Kelantangan Rendah:
- Periksa semua sambungan kabel (input, output, fon kepala).
- Ensure input LEVEL knobs, MAIN knob, and PHONES knob are turned up.
- Verify that the correct input source is selected on your computer's audio settings.
- For condenser microphones, ensure +48V phantom power is activated.
- For instruments, ensure the HI-Z button is pressed if applicable.
- Bunyi Herot:
- Reduce the input LEVEL knobs if the 'PEAK' indicator lights are consistently red.
- Check the audio source for distortion before it reaches the mixer.
- Isu Rakaman:
- Ensure the REC button is set to the desired mode (MIC or MIC+PC).
- Verify your computer's recording software is configured to use the G-MARK STUDIO 2 as the input device.
- Tiada Kesambungan Bluetooth:
Please note that the G-MARK STUDIO 2 Mini Audio Mixer does not feature Bluetooth connectivity. Any mention of Bluetooth in external product descriptions may be inaccurate. The device connects via USB for digital audio transfer.
6. Spesifikasi
| Ciri | Penerangan |
|---|---|
| Jenama | G-MARK |
| Nombor Model | 2 STUDIO |
| Bilangan Saluran | 2 |
| Teknologi Ketersambungan | USB |
| Sumber Kuasa | Elektrik Berwayar (USB 5V) |
| Input Audio | XLR, 6.35mm (1/4-inch) TRS/TS, 3.5mm (MIC CONDENSER) |
| Jenis Penyambung Output | 6.35mm (1/4-inch) TRS/TS (Main Outputs), 3.5mm (Phones) |
| Kuasa Hantu | +48V (switchable for CH1-2) |
| Hi-Z Input | Yes (switchable for instruments) |
| USB Audio Interface | 16-bit / 48kHz |
| Berat Barang | 0.3 Kilogram |
7. Waranti dan Sokongan
7.1 Maklumat Waranti
This product comes with a 3-month warranty from the date of purchase. Please retain your proof of purchase for any warranty claims. The warranty covers manufacturing defects but does not cover damage caused by misuse, accidents, unauthorized modifications, or normal wear and tear.
7.2 Sokongan Pelanggan
For technical assistance, troubleshooting, or warranty inquiries, please contact G-MARK customer support through the retailer's platform or visit the official G-MARK webtapak untuk maklumat hubungan.