
pengenalan
Thank you for choosing the OUKANING 20-Inch Enclosed Low Profile Ceiling Fan with Light. This manual provides essential information for the safe installation, operation, and maintenance of your new ceiling fan. Please read these instructions thoroughly before installation and retain them for future reference.
Arahan Keselamatan Penting
- Baca semua arahan: Before beginning installation, read all instructions and safety information.
- Keselamatan Elektrik: All electrical connections must be performed by a qualified electrician or a person with electrical experience. Ensure the power is disconnected at the circuit breaker before installation or maintenance.
- Pemasangan: The mounting structure must be capable of supporting the weight of the fan (approximately 10-15 lbs). Ensure the fan is securely mounted to a ceiling joist or a suitable support structure.
- Pendawaian: Follow all local electrical codes and ordinances. Ensure proper grounding.
- Pembersihan Bilah: Ensure there is adequate clearance between the fan blades and any obstacles. This fan features enclosed blades for enhanced safety.
- Pembersihan: Sentiasa putuskan kuasa sebelum membersihkan kipas. Gunakan kipas yang lembut danamp kain untuk pembersihan.
- Non-Reversible Fan: Note that this fan model is not reversible.
Kandungan Pakej
Sahkan bahawa semua komponen ada dan tidak rosak sebelum memulakan pemasangan.
- Ceiling Fan Unit (x1)
- Alat kawalan jauh (x1)
- Screws Set (x1)
- Manual Arahan (x1)

Image: Contents of the OUKANING ceiling fan package, showing the remote control, mounting screws, and the instruction manual.
Spesifikasi
| Ketinggian Lekapan | 8.2 inci |
| Lebar Lekapan | 20 inci |
| Dimensi Produk (D x W x H) | 20"D x 20"W x 8.2"H |
| Jenis Mentol | LED bersepadu |
| Suhu Warna | 3000K (Panas), 4500K (Neutral), 6000K (Putih) |
| Wattage | 36-48W (Light), 48W (Fan) |
| Bilangan Bilah Kipas | 5 (Invisible/Enclosed) |
| Voltage | AC110-120V |
| Kaedah Kawalan | Alat Kawalan Jauh |
| Kelajuan Kipas | 3 (Rendah, Sederhana, Tinggi) |
| Fungsi Pemasa | 1H / 2H / 4H |
| bahan | Acrylic, Metal, Woodiness Case |
| Jenis Pemasangan | Gunung siram |
| Penggunaan Dalaman/Luar | Dalaman Sahaja |

Image: Detailed dimensions of the ceiling fan, indicating a 20-inch width and 8.2-inch height.

Image: Key components of the fan labeled, such as the metal mounting, wood-look casing, acrylic light cover, and the internal wind director.
Arahan Pemasangan
This ceiling fan is designed for surface (flush) mounting. Professional installation is recommended. Ensure power is OFF at the circuit breaker before starting.
Alat Diperlukan (Tidak Termasuk):
- Phillips pemutar skru
- Strippers wayar
- Pita elektrik
- Tangga
- Voltage penguji
Langkah Pemasangan:
- Matikan Kuasa: Locate the circuit breaker for the room where you are installing the fan and turn off the power. Verify power is off using a voltage penguji.
- Sediakan Lokasi Pemasangan: Ensure the ceiling junction box is securely mounted and capable of supporting the fan's weight. If replacing an existing fixture, carefully remove it.
- Pasang Pendakap Pelekap: Secure the provided mounting bracket to the ceiling junction box using the screws provided. Ensure it is firmly attached.
- Sambungan Pendawaian:
- Connect the fan's live wire (usually black) to the house's live wire.
- Connect the fan's neutral wire (usually white) to the house's neutral wire.
- Connect the fan's ground wire (usually green or bare copper) to the house's ground wire.
- Selamatkan semua sambungan dengan nat wayar dan pita elektrik.
- Pasang Kipas: Carefully lift the fan unit and align it with the mounting bracket. Secure the fan to the bracket using the provided screws.
- Semakan Akhir: Ensure all connections are secure and the fan is firmly mounted.
- Pulihkan Kuasa: Hidupkan semula kuasa pada pemutus litar.
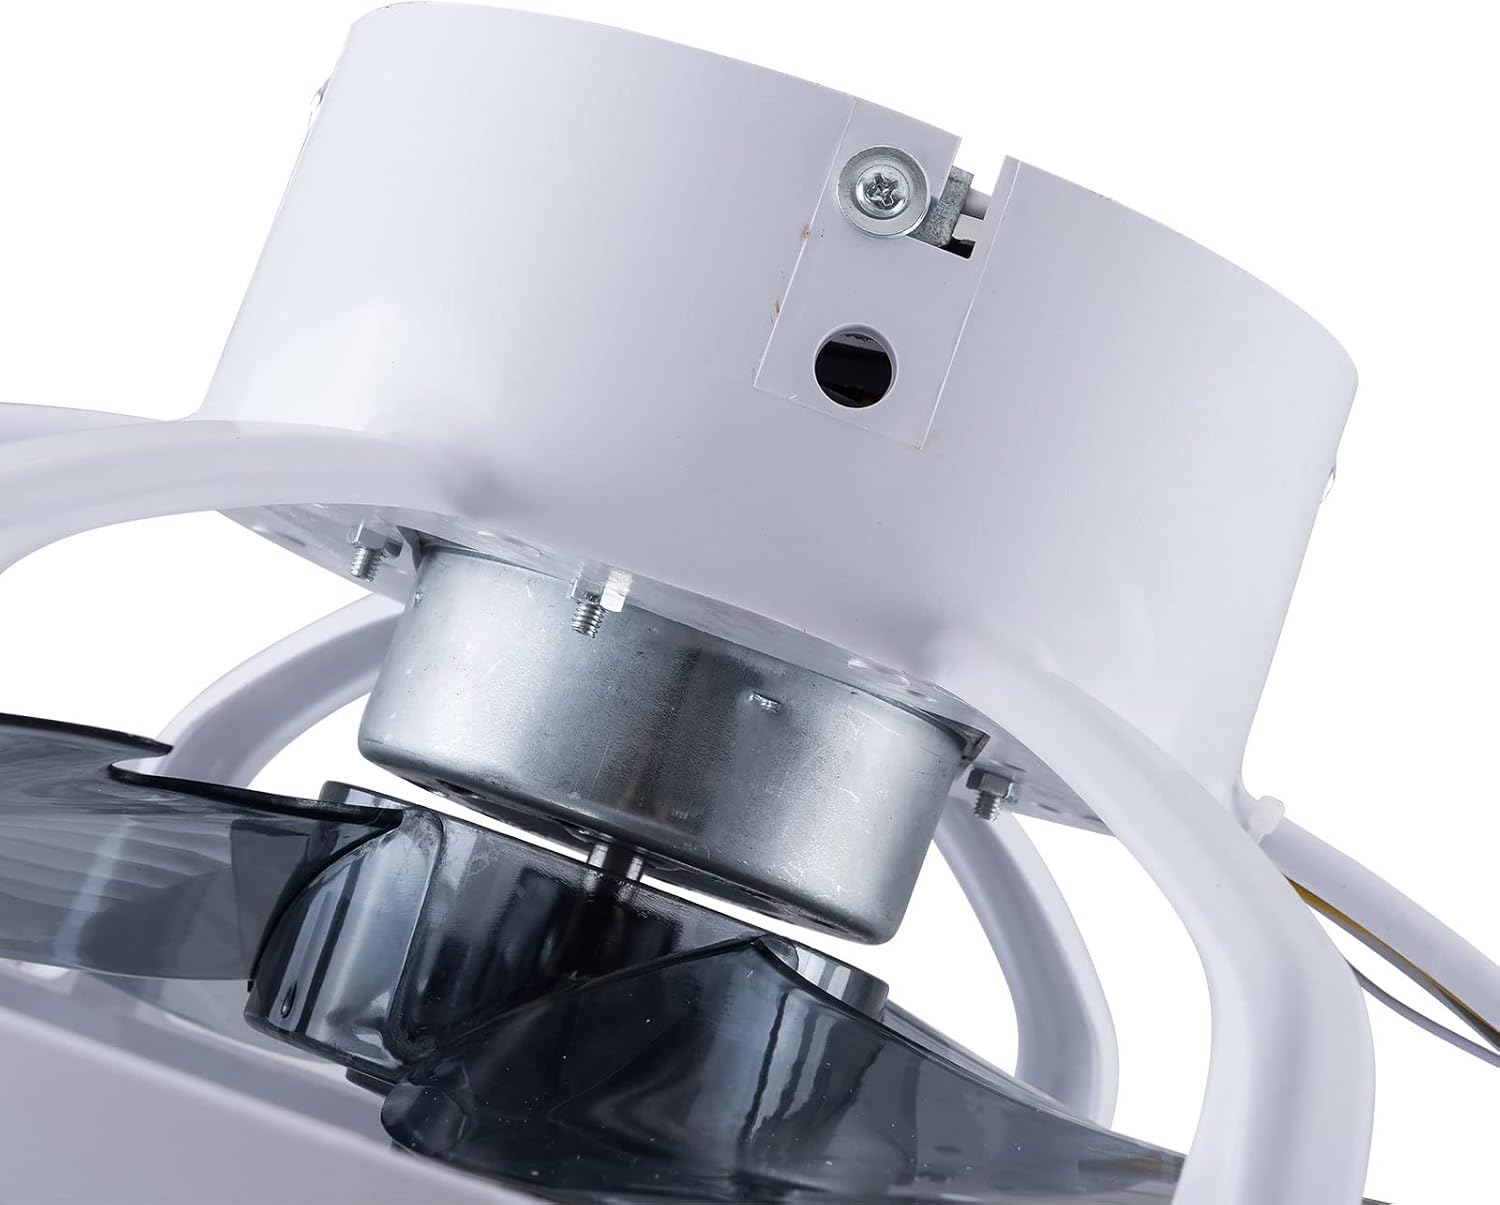
Imej: Dalaman view showing the motor and wiring area, crucial for understanding electrical connections during installation.

Imej: View of the fan's underside, illustrating the mounting bracket and internal components for flush installation.
Arahan Operasi
Your OUKANING ceiling fan is operated using the included remote control.
Fungsi Kawalan Jauh:
- HIDUP/MATI Kuasa: Press to turn the fan and light on or off.
- Kawalan Kelajuan Kipas: Cycle through 3 fan speeds: Low, Medium, High.
- Suhu Warna Cahaya: Switch between three light color temperatures:
- Lampu Hangat (3000K)
- Cahaya Neutral (4500K)
- Cahaya Putih (6000K)
- Fungsi Pemasa: Set the fan to automatically turn off after 1 hour, 2 hours, or 4 hours.


Imej: Cthamples of the three available light color temperatures: Warm Light, Neutral Light, and White Light, demonstrating the fan's lighting versatility.
Penyelenggaraan
Penyelenggaraan tetap memastikan jangka hayat dan prestasi optimum kipas siling anda.
- Pembersihan:
- Always turn off the power at the circuit breaker before cleaning.
- Gunakan yang lembut, damp cloth to wipe down the fan housing and light cover.
- Jangan gunakan pembersih atau pelarut yang melelas, kerana ia boleh merosakkan kemasan.
- The fan is designed for easy removal for thorough cleaning if necessary.
- Ketatkan Pengikat: Periodically check all screws and fasteners on the fan and mounting bracket to ensure they are secure.
- Tiada Pelinciran Diperlukan: The motor is permanently lubricated and does not require additional oiling.
Menyelesaikan masalah
Jika anda mengalami masalah dengan kipas siling anda, rujuk masalah dan penyelesaian biasa berikut:
| Masalah | Kemungkinan Punca | Penyelesaian |
|---|---|---|
| Kipas tidak bermula | Tiada kuasa kepada kipas; Sambungan wayar longgar; Bateri kawalan jauh lemah. | Check circuit breaker; Verify all wire connections are secure (power off first); Replace remote control battery. |
| Cahaya tidak berfungsi | Tiada kuasa pada lampu; Sambungan wayar longgar; isu pemacu LED. | Check circuit breaker; Verify wire connections; Contact customer support if LED driver is suspected. |
| Alat kawalan jauh tidak berfungsi | Battery low or dead; Remote not paired (if applicable); Obstruction between remote and receiver. | Replace battery; Ensure clear line of sight; Refer to remote pairing instructions (if provided separately). |
| Kipas membuat bunyi yang luar biasa | Loose mounting screws; Internal component issue. | Ensure all mounting screws are tight; If noise persists, contact customer support. |
Sokongan Pelanggan
For any questions, technical assistance, or if you encounter issues not covered in this manual, please contact our customer service team. Refer to your purchase documentation or the OUKANING webtapak untuk maklumat hubungan khusus.
Please provide your product model number and a detailed description of the issue when contacting support.