
johgee 2 Outlet Black
Digital Water Timer User Manual
Model: johgee 2 Outlet Black
For Garden, Lawn, Patio, Farm
pengenalan
This manual provides comprehensive instructions for the setup, operation, and maintenance of your johgee Digital Water Timer. Please read this manual carefully before use to ensure proper function and longevity of the device.
The johgee Digital Water Timer is designed to automate your watering needs with its dual independent outlets, programmable schedules, rain delay function, and manual watering mode. Its IP54 waterproof rating ensures durability for outdoor use.
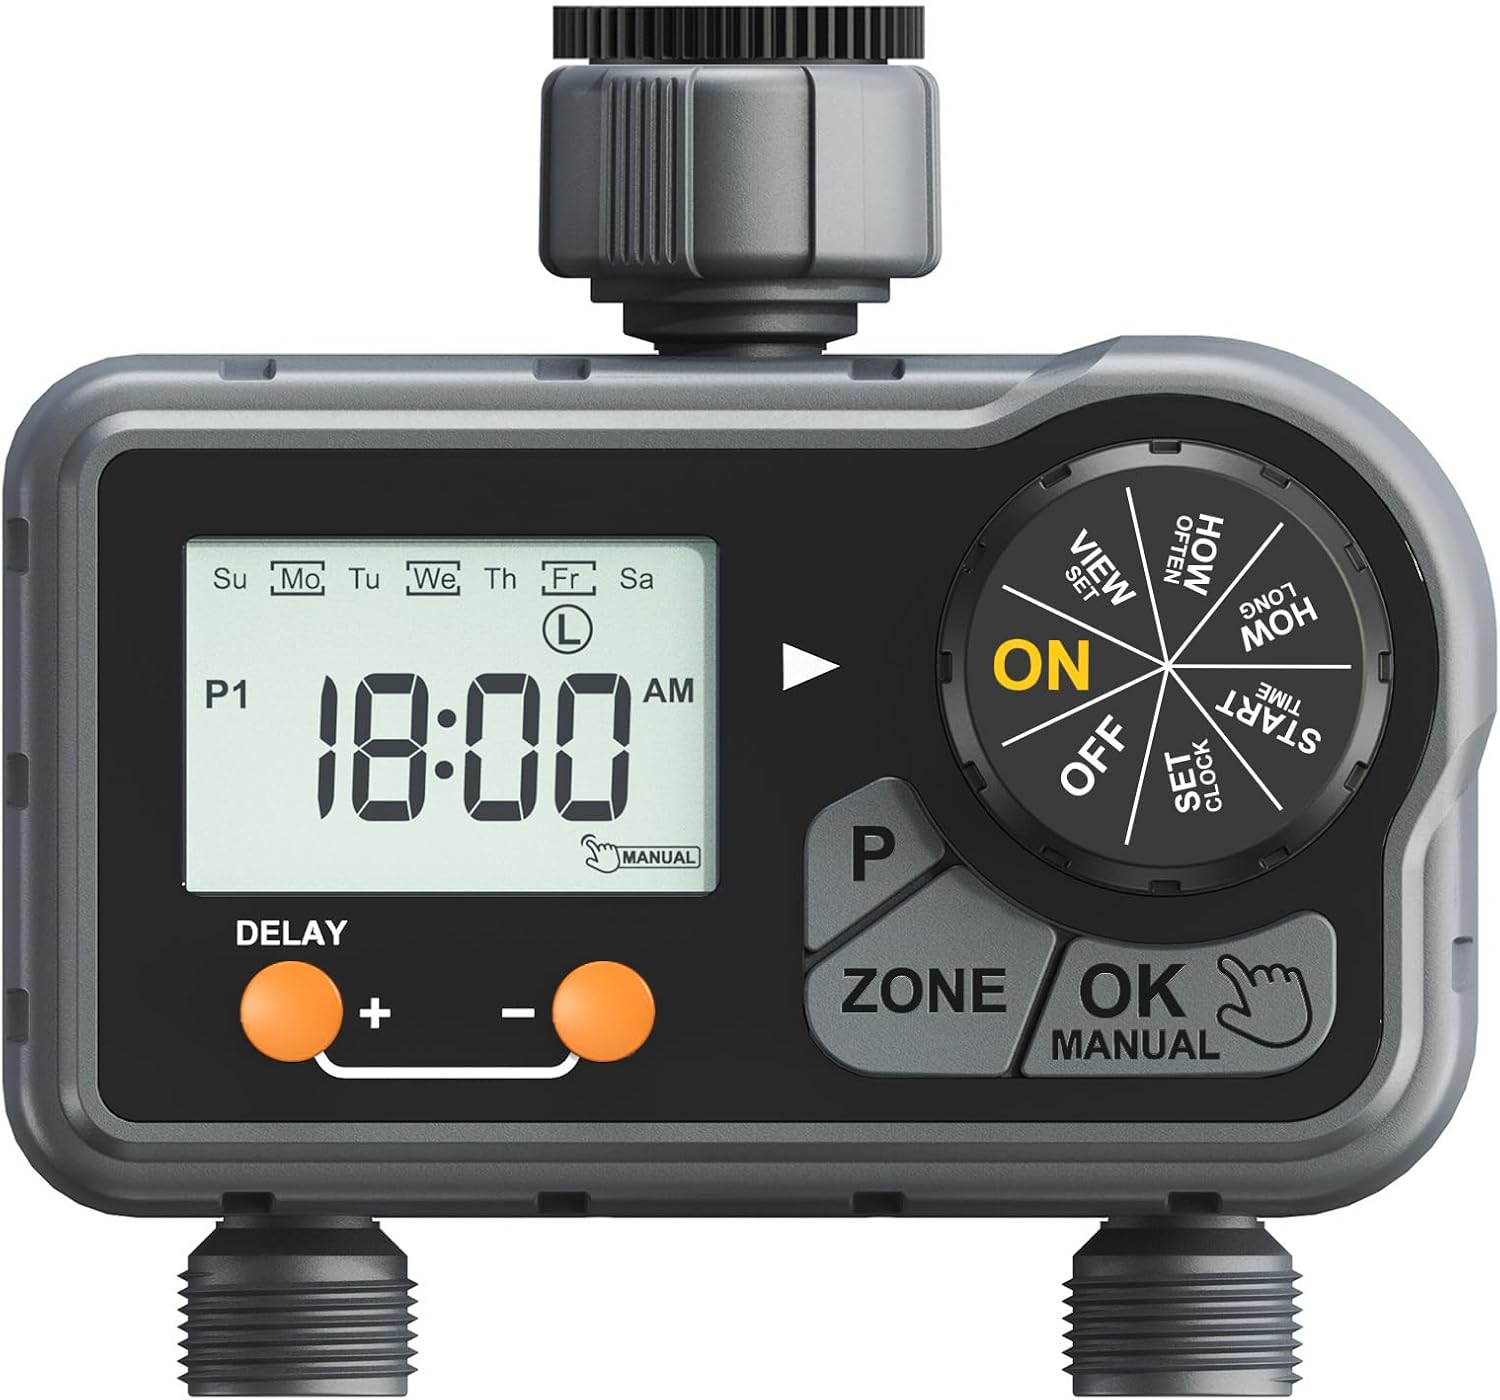
Imej: Depan view of the johgee Digital Water Timer, showcasing its large LCD display, control dial, and two independent outlets. The device is grey and black with orange buttons.
Komponen Produk

Image: Labeled diagram of the water timer, indicating the filter, hose tap connection, P button, dial, OK/Manual button, Zone button, Delay buttons, and the two Zone outlets.
Familiarize yourself with the main components of your water timer:
- Sambungan Ketuk Hos: Connects the timer to your outdoor faucet.
- Penapis: Prevents debris from entering the timer.
- Skrin LCD Besar: Displays time, program settings, and status.
- dail: Used to navigate through settings (VIEW, HOW OFTEN, HOW LONG, START TIME, SET CLOCK, ON, OFF).
- Butang P: Program button, likely for cycling through programs.
- Butang ZON: Selects between Zone 1 and Zone 2.
- Butang OK/MANUAL: Confirms selections and activates manual watering.
- Butang DELAY / +: Adjusts delay time or increases values.
- - Butang: Mengurangkan nilai.
- Zone 1 & Zone 2 Outlets: Independent outlets for connecting hoses.
Arahan Persediaan
- Pemasangan Bateri:
The timer requires 2 AAA alkaline batteries (not included). Locate the battery compartment on the back of the device. Open the compartment, insert the batteries, ensuring correct polarity (+/-), and close the compartment securely. The battery life is approximately half a year.
- Connecting to Faucet:
Screw the hose tap connection of the timer onto your outdoor faucet. Ensure the connection is tight to prevent leaks. The timer is designed for 3/4" or 1" BSP or NH thread taps.

Image: The water timer attached to an outdoor faucet, highlighting its IP54 waterproof design and the ability for 360-degree rotation adjustment for optimal positioning.
- Hos Penyambung:
Attach your garden hoses to the Zone 1 and Zone 2 outlets at the bottom of the timer. Ensure these connections are also secure.
Arahan Operasi
Menetapkan Jam
- Putar dail ke TETAPKAN JAM.
- Gunakan + dan - butang untuk menetapkan masa semasa.
- Tekan OK/MANUAL untuk mengesahkan.
Programming Watering Schedules (3 Programs per Outlet)
Each of the two independent outlets (Zone 1 and Zone 2) can be programmed with up to three distinct watering schedules.
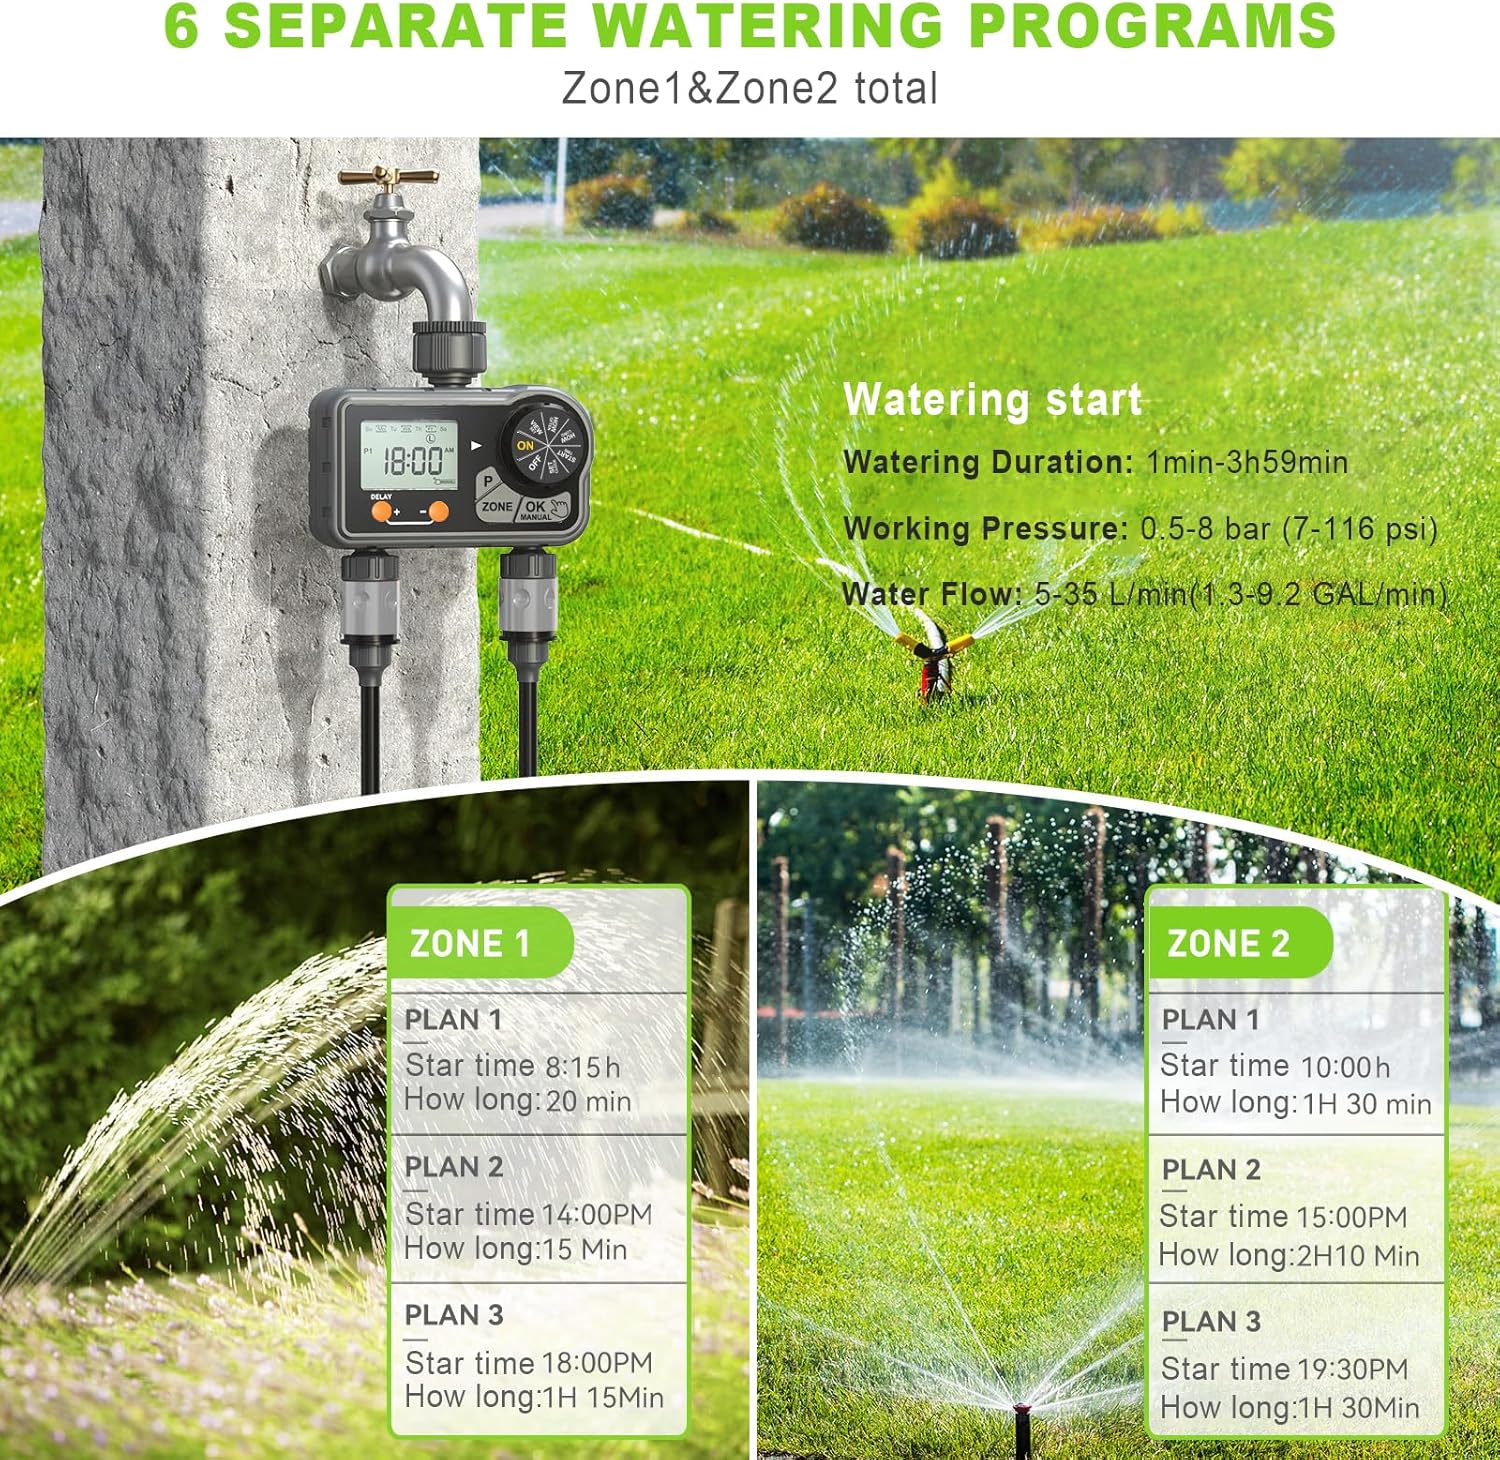
Image: An illustration demonstrating how Zone 1 and Zone 2 can each have three independent watering plans, totaling six programs. Each plan includes a start time and duration.
- Pilih Zon: Tekan ke ZON button to switch between Zone 1 and Zone 2. The selected zone will be indicated on the LCD.
- Tetapkan Masa Mula:
- Putar dail ke MASA MULA.
- guna + dan - to set the desired start time for the program.
- Tekan OK/MANUAL untuk mengesahkan.
- Tetapkan Tempoh Penyiraman:
- Putar dail ke BERAPA LAMA.
- guna + dan - to set the watering duration (1 minute to 3 hours 59 minutes).
- Tekan OK/MANUAL untuk mengesahkan.
- Tetapkan Kekerapan Penyiraman:
- Putar dail ke BERAPA KERAP.
- guna + dan - to select the frequency: every 2 days, every 6 days, or specific days of the week (Monday to Sunday).
- Tekan OK/MANUAL untuk mengesahkan.
- Set Additional Programs: To set the second or third program for the same zone, press the P button to cycle to the next program (P1, P2, P3) and repeat steps 2-4.

Image: An illustration demonstrating the independent operation of Zone 1 (left) and Zone 2 (right), showing that they can run simultaneously or separately without interference.
Fungsi Kelewatan Hujan
The rain delay function allows you to pause your watering schedule for a set period without losing your programmed settings. This is useful during periods of natural rainfall.
- Ensure the dial is in the ON kedudukan.
- Tekan ke KELEWATAN/+ butang.
- Gunakan + dan - buttons to select the delay duration: 24 hours, 48 hours, or 72 hours.
- Tekan OK/MANUAL to activate the rain delay. The timer will resume its schedule automatically after the delay period.

Image: A visual representation of the rain delay feature, showing the timer pausing watering for 24, 48, or 72 hours, with various garden scenes indicating its application.
Penyiraman Manual
You can initiate manual watering at any time without affecting your programmed schedules.
- Ensure the dial is in the ON kedudukan.
- Tekan ke OK/MANUAL butang.
- Gunakan + dan - buttons to set the desired manual watering duration (1 to 59 minutes).
- Tekan OK/MANUAL again to start manual watering. The timer will stop automatically after the set duration.
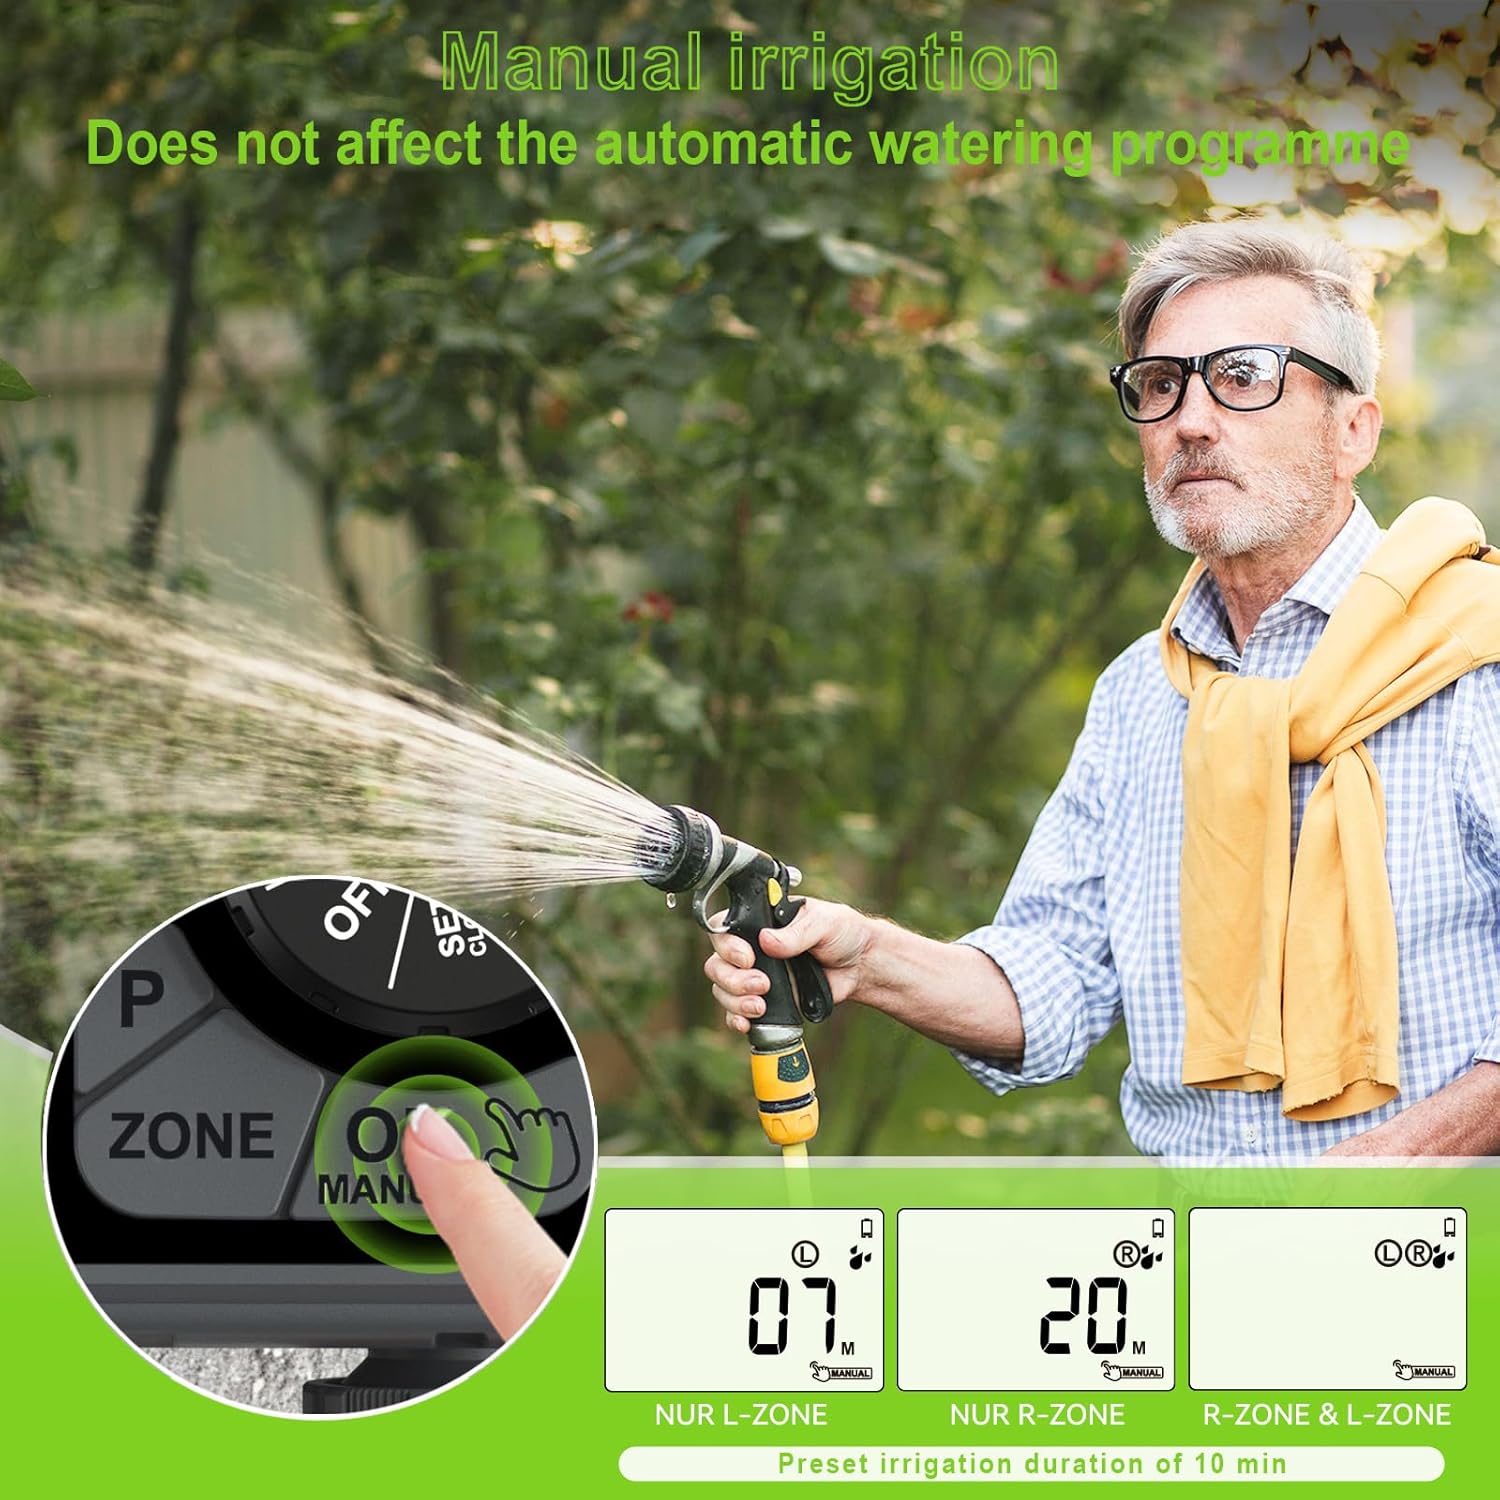
Image: A person demonstrating the manual irrigation feature, holding a hose nozzle while the timer's display shows the manual watering duration. This mode does not interfere with automatic programs.
Turning Off the Timer
To stop all watering, turn the dial to the DIMATIKAN kedudukan.
Penyelenggaraan
- Penggantian Bateri: Replace batteries when the low battery indicator appears on the LCD, or approximately every six months.
- Pembersihan Penapis: Periodically check and clean the filter located at the hose tap connection to prevent blockages and ensure optimal water flow.
- Musim sejuk: Before freezing temperatures, disconnect the timer from the faucet and hoses. Drain any remaining water and store the timer indoors in a dry, frost-free location.
- Pembersihan Am: Wipe the exterior of the timer with a damp kain. Jangan gunakan pembersih yang melelas atau tenggelamkan unit di dalam air.
Menyelesaikan masalah
| Masalah | Kemungkinan Punca | Penyelesaian |
|---|---|---|
| Pemasa tidak menyiram. |
|
|
| Air bocor dari sambungan. |
|
|
| Paparan LCD kosong atau malap. |
|
|
Spesifikasi
| Muncung Air | 2 independent outlets |
| Programmable Programs | 3 programs per spout (total 6) |
| Tekanan Air Kendalian | 0.5-8 bar (7-116 psi) |
| Tempoh Air | 1 min - 3 hours 59 min |
| Kekerapan Air | Every 2 days / Every 6 days / Any day from Monday to Sunday |
| Penilaian Kalis Air dan Habuk | IP54 |
| Kadar Aliran Maks | 35 L / Min |
| Jenis Benang | For tap 3/4" or 1" with BSP or NH thread |
| Suhu Bekerja | 3°C-50°C (37°F-122°F) |
| Sumber Kuasa | 2* AAA Alkaline Batteries (Excluded) |
| Hayat Bateri | Approximately half a year |
| bahan | plastik |
| Dimensi | 17D x 8.2W x 16.5H Sentimeter |
| Berat Barang | 0.53 Kilogram |
Waranti dan Sokongan
This product is covered by a standard manufacturer's warranty. For specific warranty details, please refer to the product packaging or contact the retailer where the product was purchased.
For technical support, troubleshooting assistance beyond this manual, or inquiries regarding parts, please contact johgee customer service through their official channels or the platform where you purchased the product.
Sila simpan manual ini untuk rujukan masa hadapan.
Ask a question about this manual
Ask about setup, troubleshooting, compatibility, parts, safety, or missing instructions. Manuals+ will review the question and use this page’s manual context to help answer it.