JideTech 64H2UA
Manual Pengguna Suis KVM HDMI 4-Port JideTech
Model: 64H2UA
Jenama: JideTech
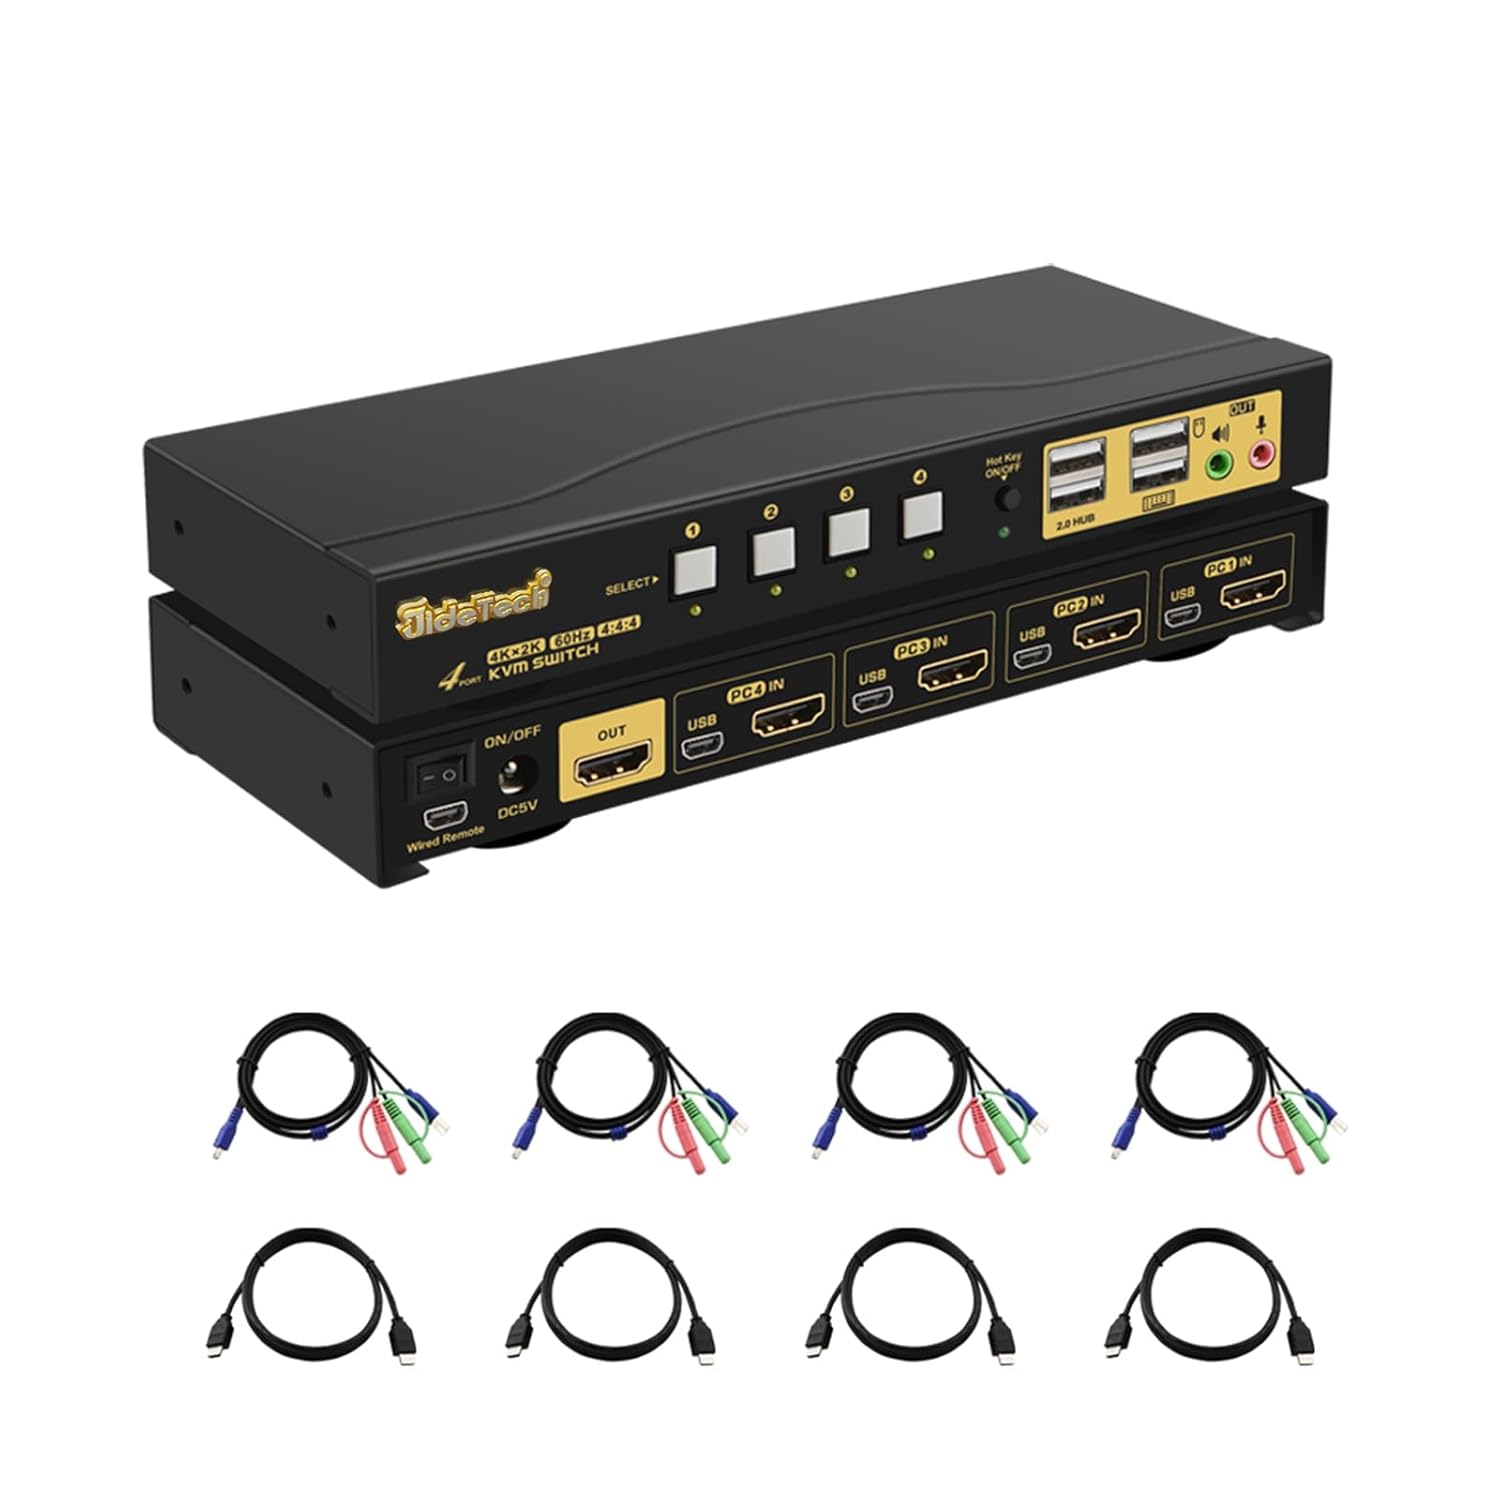
1. Produk Lebihview
The JideTech 4-Port HDMI KVM Switch allows you to control up to four HDMI-enabled computers or devices using a single set of USB keyboard, USB mouse, and HDMI monitor. It supports Ultra HD 4K@60Hz resolution, ensuring high-quality video output. This switch is designed to streamline your workspace by reducing cable clutter and simplifying multi-system management.
Ciri-ciri Utama:
- Supports 4 HDMI devices (PC, Servers, NVR, Game Consoles, AppleTV, etc.)
- Ultra HD 4K (4096x2160) @ 60Hz resolution support
- Compatible with HDMI 2.0, EDID, HDCP2.2, HDR10
- Integrated 2-port USB 2.0 hub for sharing peripherals (printers, scanners, USB drives)
- 3.5mm microphone and speaker ports for audio input/output
- Multiple switching methods: Front Panel Button, Wired Remote, Keyboard Hotkey, Mouse Switching
- Plug and Play functionality, driver-free for most operating systems
Kandungan Pakej:
- 1 x JideTech 4-Port HDMI KVM Switch
- 1 x Penyesuai Kuasa USB
- 4 x Kabel USB 3.0
- 4 x Kabel HDMI
- 1 x Alat Kawalan Jauh Berwayar
- 1 x Manual Pengguna (dokumen ini)
2. Persediaan dan Pemasangan
Ikuti langkah-langkah ini untuk menyediakan suis KVM anda dengan betul:
- Matikan Peranti: Pastikan semua komputer dan monitor dimatikan sebelum membuat sebarang sambungan.
- Sambung Monitor: Connect your HDMI monitor to the 'OUT' HDMI port on the KVM switch.
- Sambungkan Komputer (HDMI): Connect the HDMI output of each computer (PC1, PC2, PC3, PC4) to the corresponding 'PC IN' HDMI ports on the KVM switch.
- Sambungkan Komputer (USB): Connect the USB 3.0 cable from each computer's USB port to the corresponding 'USB IN' ports on the KVM switch. These cables transmit keyboard, mouse, and USB hub data.
- Sambungkan Papan Kekunci & Tetikus: Plug your USB keyboard and USB mouse into the dedicated keyboard and mouse USB ports on the front panel of the KVM switch.
- Sambungkan Peranti USB: If desired, connect additional USB devices (e.g., printer, USB drive) to the '2.0 HUB' ports on the front panel.
- Sambung Audio: Connect your speakers or headphones to the green audio output port and your microphone to the pink microphone input port on the front panel.
- Sambungkan Kuasa: Plug the provided USB power adapter into the 'DC5V' port on the KVM switch and then into a power outlet.
- Hidupkan kuasa: Power on the KVM switch using the 'ON/OFF' switch, then power on your monitor and computers.


3. Arahan Operasi
The JideTech KVM Switch offers multiple convenient ways to switch between connected computers:
3.1. Menukar Mod

- Front Panel Button Switching:
Press the 'SELECT' buttons (1, 2, 3, 4) on the front panel of the KVM switch to directly switch to the corresponding computer input.

Figure 6: The Hotkey On/Off switch on the KVM. - Wired Remote Control Switching:
Use the included wired remote control to switch between inputs. Press the numbered buttons (1, 2, 3, 4) to select the desired computer. The 'AUTO' button can initiate an auto-scan function.
- Keyboard Hotkey Switching:
Ensure the 'Hot Key On/Off' switch on the front panel is in the 'ON' (green light) position. Use the following hotkey commands:
- Switch to PC1: Press Kanan CTRL dua kali, kemudian 1, kemudian Masuk.
- Switch to PC2: Press Kanan CTRL dua kali, kemudian 2, kemudian Masuk.
- Switch to PC3: Press Kanan CTRL dua kali, kemudian 3, kemudian Masuk.
- Switch to PC4: Press Kanan CTRL dua kali, kemudian 4, kemudian Masuk.
- Disable Beep Sound: Press Kanan CTRL dua kali, kemudian B, kemudian Masuk.
- Enable Loudspeaker (Audio): Press Kanan CTRL dua kali, kemudian P, kemudian Masuk.
Note: Hotkey functionality may vary with certain specialized keyboards (e.g., gaming or mechanical keyboards). If issues arise, try connecting the keyboard to a USB hub connected to the KVM's USB 2.0 hub port.
- Penukaran tetikus:
Move the mouse cursor to the far right edge of the screen and quickly move it right again. This will switch to the next active input. Repeat to cycle through inputs.
3.2. Audio Capabilities
The KVM switch includes 3.5mm audio input and output ports, allowing you to share speakers and a microphone across all connected computers. Simply plug your audio devices into the corresponding ports on the front panel.

4. Penyelenggaraan
To ensure the longevity and optimal performance of your JideTech KVM Switch, follow these maintenance guidelines:
- Pembersihan: Use a soft, dry cloth to clean the exterior of the KVM switch. Avoid using liquid cleaners or aerosols, which may damage the device.
- Pengudaraan: Pastikan suis KVM diletakkan di kawasan yang mempunyai pengudaraan yang baik untuk mengelakkan terlalu panas. Jangan sekat sebarang bukaan pengudaraan.
- Pengurusan Kabel: Keep cables organized and untangled to prevent damage to ports and cables. Avoid excessive bending or pulling of cables.
- Bekalan Kuasa: Always use the original power adapter provided with the KVM switch.
- Storan: Jika menyimpan peranti untuk tempoh yang lama, putuskan sambungan semua kabel dan simpan di tempat yang sejuk dan kering.
5. Penyelesaian masalah
If you encounter issues with your KVM switch, please refer to the following common problems and solutions:
- Tiada Paparan atau Skrin Berkelip:
- Ensure all HDMI cables are securely connected to both the KVM switch and the computers/monitor.
- Verify that the KVM switch is powered on.
- Try using different HDMI cables, especially if they are not the ones provided.
- Check the display resolution settings on your computers. Ensure they are compatible with 4K@60Hz or a supported lower resolution.
- Power cycle the KVM switch and all connected devices.
- Keyboard or Mouse Unresponsive:
- Ensure the keyboard and mouse are plugged into the dedicated USB ports on the front panel.
- Try unplugging and replugging the keyboard/mouse.
- If using a specialized keyboard/mouse (e.g., gaming, mechanical, or wireless with a dongle), connect them to a powered USB 2.0 hub, then connect the hub to one of the KVM's '2.0 HUB' ports.
- Ensure the USB 3.0 cables from the computers to the KVM are securely connected.
- Disable hotkey switching if it interferes with your specific keyboard/mouse.
- No Audio or Distorted Audio:
- Check that speakers/headphones and microphone are correctly plugged into the 3.5mm audio ports.
- Sahkan tetapan output audio pada komputer anda.
- Ensure the 'Loudspeaker' hotkey (Right CTRL twice, then P, then Enter) is enabled if needed.
- Loud Beep Sound When Switching:
- The beep sound can be disabled using the hotkey command: Press Kanan CTRL dua kali, kemudian B, kemudian Masuk.
- Auto-Scan Not Working:
- Ensure all connected computers are powered on and sending a video signal.
- Check the wired remote control connection.
If the problem persists after trying these solutions, please contact JideTech customer support for further assistance.
6. Spesifikasi
| Ciri | Penerangan |
|---|---|
| Nombor Model | 64H2UA |
| Dimensi Produk | 2.95 x 0.97 x 8.07 inci |
| Berat badan | 2.93 paun |
| Resolusi Video | Sehingga 4096x2160@60Hz (4K@60Hz) |
| Piawaian HDMI | HDMI 2.0 |
| Sokongan HDCP | HDCP 2.2 |
| Sokongan HDR | HDR10 |
| Port USB | 2 x USB 2.0 Hub, Dedicated Keyboard/Mouse USB ports |
| Port Audio | 3.5mm Stereo Audio Out, 3.5mm Microphone In |
| Kaedah Penukaran | Front Panel Button, Wired Remote, Keyboard Hotkey, Mouse Switching |
| Vol Operasitage | 5 Volt |
| Sistem Operasi yang Serasi | Windows 10/7/2000/XP/Vista, Linux, Mac, Debian, Ubuntu, Fedora, Raspbian, etc. |


7. Waranti dan Sokongan
For warranty information and technical support, please refer to the official JideTech weblaman web atau hubungi khidmat pelanggan mereka secara langsung. Butiran mengenai pendaftaran produk, tuntutan jaminan dan bantuan teknikal biasanya boleh didapati di halaman sokongan pengilang.
Maklumat Hubungan: Sila layari Kedai JideTech di Amazon atau pegawai mereka weblaman web untuk mendapatkan butiran hubungan sokongan terkini.
Ask a question about this manual
Ask about setup, troubleshooting, compatibility, parts, safety, or missing instructions. Manuals+ will review the question and use this page’s manual context to help answer it.