
Cabletech URZ0336B
Cabletech URZ0336B DVB-T2 H.265 HEVC Digital Tuner
Manual Arahan Pengguna
1. Pengenalan
This manual provides comprehensive instructions for the installation, operation, and maintenance of your Cabletech URZ0336B DVB-T2 H.265 HEVC Digital Tuner. Please read this manual thoroughly before using the device to ensure proper functionality and to prevent damage.
2. Maklumat Keselamatan
Always observe the following safety precautions to avoid electric shock, fire, or damage to the device:
- Jangan dedahkan peranti kepada hujan atau lembapan.
- Jangan buka casing. Rujuk semua servis kepada kakitangan yang berkelayakan.
- Pastikan pengudaraan yang betul di sekitar peranti. Jangan halang bukaan pengudaraan.
- Gunakan hanya penyesuai kuasa yang dibekalkan bersama peranti.
- Jauhkan peranti daripada sumber haba dan cahaya matahari langsung.
- Disconnect the power plug from the wall outlet if the device will not be used for a long period.
3. Kandungan Pakej
Sila semak pakej untuk item berikut:
- Cabletech URZ0336B DVB-T2 H.265 HEVC Digital Tuner
- Alat Kawalan Jauh
- Bateri AAA (2x)
- Penyesuai Kuasa
- Manual Pengguna (dokumen ini)
4. Produk Lebihview
Familiarize yourself with the main components and connections of your Cabletech URZ0336B tuner.
4.1. Device and Remote Control
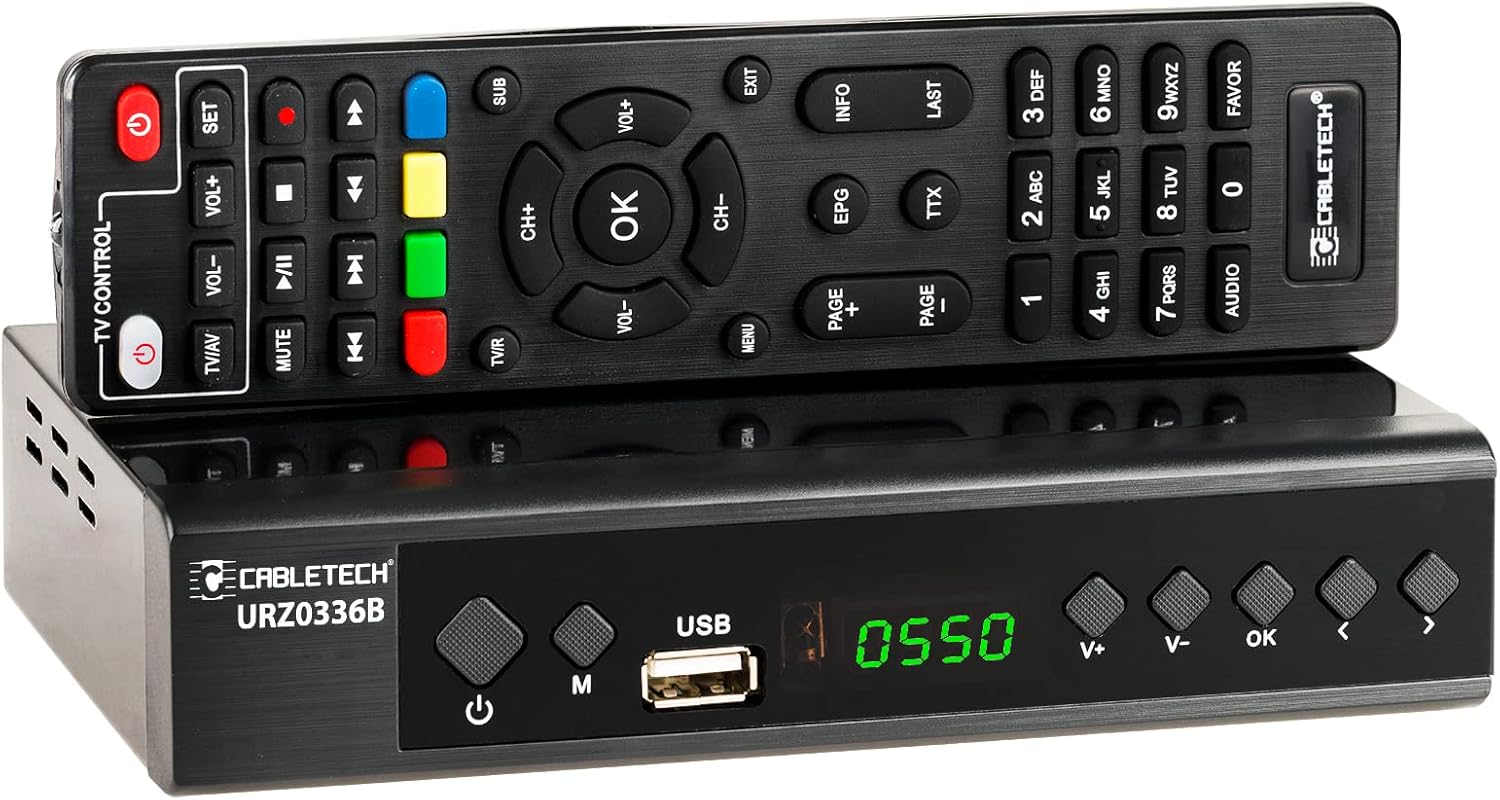
Image: The Cabletech URZ0336B DVB-T2 H.265 HEVC Digital Tuner shown with its accompanying remote control. The tuner is a compact black box, and the remote is also black with various control buttons.
4.2. Panel hadapan
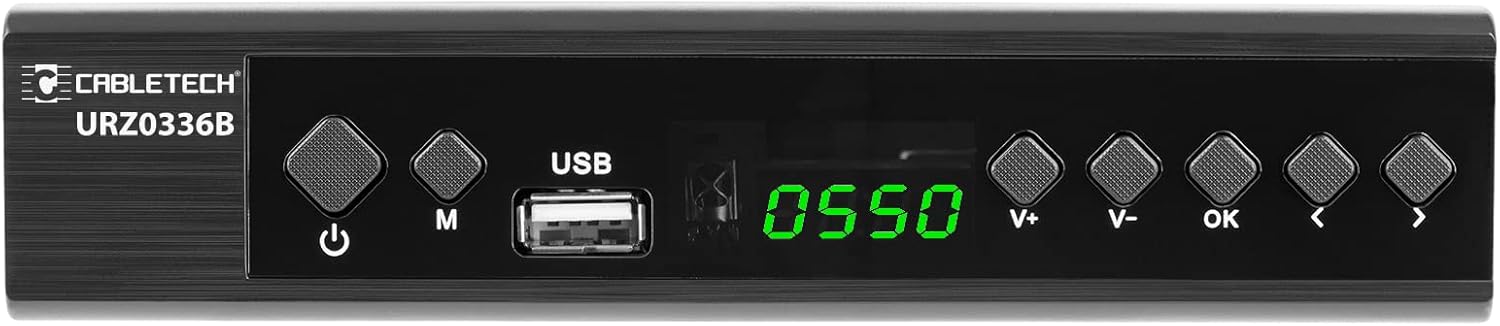
Image: Close-up of the Cabletech URZ0336B front panel, featuring a power button, menu button (M), USB 2.0 port, LED display showing "0550", and navigation/volume buttons (V+, V-, OK, <, >).
- Butang Kuasa: Turns the device on/off or to standby.
- M (Menu) Button: Mengakses menu utama.
- Port USB 2.0: For software updates, PVR recording, and media playback.
- Paparan led: Menunjukkan nombor atau masa saluran.
- V+/V- Buttons: Melaraskan kelantangan.
- Butang OK: Mengesahkan pilihan.
- </> Buttons: Navigates through menus or changes channels.
4.3. Sambungan Panel Belakang

Image: The rear panel of the Cabletech URZ0336B, showing various input and output ports: ANT IN (IEC socket), COAXIAL, USB, HD OUT (HDMI), SCART, and the power input (110-240V~ 50/60Hz).
- SEMUT DALAM: Connects to your DVB-T/T2 antenna.
- COAXIAL: Output audio digital.
- USB: Additional USB 2.0 port for external devices.
- HD KELUAR (HDMI): Connects to your TV for high-definition video and audio.
- SCART: Connects to older TVs or VCRs.
- Input Kuasa: Menyambung kepada penyesuai kuasa.
4.4. Susun Atur Alat Kawalan Jauh

Imej: Terperinci view of the Cabletech URZ0336B remote control, showing buttons for power, TV/AV, volume, channel, mute, playback controls, EPG, TTX, INFO, numeric keypad, and special function buttons.
The remote control provides full functionality for operating your tuner. Insert 2x AAA batteries into the battery compartment before first use.
5. Persediaan
5.1. Connecting the Tuner
- Sambungkan Antena: Connect your DVB-T/T2 antenna cable to the SEMUT DALAM port on the rear panel of the tuner.
- Sambung ke TV:
- For HD TVs: Connect an HDMI cable from the HD OUT (HDMI) port on the tuner to an HDMI input on your TV.
- For older TVs: Connect a SCART cable from the SCART port on the tuner to the SCART input on your TV.
- Sambungkan Kuasa: Connect the power adapter to the tuner's power input and then plug it into a wall outlet.
- Masukkan Bateri: Open the battery compartment on the remote control and insert 2x AAA batteries, observing polarity.
5.2. First-Time Installation and Channel Scan
- Turn on your TV and select the correct HDMI or SCART input source that the tuner is connected to.
- Power on the Cabletech URZ0336B tuner using the power button on the front panel or remote control.
- The first-time installation wizard should appear on your TV screen. Follow the on-screen prompts.
- Pilih bahasa dan negara pilihan anda.
- Initiate an Carian Automatik for channels. The tuner will scan for all available DVB-T/T2 channels in your area. This process may take several minutes.
- Once the scan is complete, the tuner will save the found channels and display the first channel.
Note: If you experience poor signal quality, adjust your antenna position or consider using a signal amplebih hidup.
6. Arahan Operasi
6.1. Fungsi Asas
- Hidupkan/Mati Kuasa: Tekan ke KUASA butang pada alat kawalan jauh.
- Perubahan Saluran: Gunakan CH + / CH- buttons or the numeric keypad to enter a channel number.
- Kawalan Kelantangan: Gunakan VOL + / VOL- butang.
- Redam: Tekan ke HILANGKAN butang untuk menyenyapkan audio buat sementara waktu.
- Menu: Tekan ke MENU butang untuk mengakses menu utama bagi tetapan dan ciri.
- OK: Confirms selections in menus or displays the channel list.
- KELUAR: Keluar dari menu atau skrin semasa.
6.2. Panduan Program Elektronik (EPG)
The 7-day EPG provides a schedule of current and upcoming programs.
- Tekan ke EPG butang pada alat kawalan jauh.
- Navigate through channels and program times using the arrow buttons.
- Tekan OK kepada view details about a selected program.
6.3. PVR (Program Recording) and Timeshift
Connect a USB storage device (e.g., USB flash drive or external hard drive) to one of the USB 2.0 ports to use PVR and Timeshift functions.
- Rakaman PVR:
- Tekan ke REC button (red circle) on the remote to start immediate recording of the current program. Press BERHENTI (square) to end recording.
- Schedule recordings via the EPG: Select a program in the EPG and press OK, then choose the record option.
- Peralihan masa:
- Semasa menonton rancangan, tekan butang JEDA button. The tuner will begin recording the live broadcast to the USB device.
- Anda boleh kemudian BERMAIN, CEPAT KE HADAPAN, atau REWIND within the buffered content.
- Tekan BERHENTI to exit Timeshift and return to live TV.
6.4. Main Semula Media
The tuner supports playback of various media files daripada peranti storan USB yang disambungkan.
- Connect your USB device to a USB port on the tuner.
- Go to the main menu and select "Media" or "USB".
- Navigasi ke yang dikehendaki file type (MP3, WMA, JPEG, BMP, AVI) and select the file untuk bermain.
6.5. Supported Applications
The tuner supports various online applications when connected to the internet via an external MT7601 Wi-Fi adapter (not included).
- Cuaca: View local weather forecasts.
- IPTV: Access Internet Protocol Television streams.
- YouTube: Tonton video dari YouTube.
- RSS: Read RSS news feeds.
Note: An external MT7601 Wi-Fi adapter is required for internet connectivity and access to these applications.
6.6. Kawalan Ibu Bapa
Set up parental control to restrict access to certain channels or programs based on age ratings.
- Access the "Parental Control" section in the main menu.
- Enter your PIN (default is usually 0000 or 1234, check your device for specifics).
- Configure age restrictions or lock specific channels.
6.7. Fungsi Pemasa
The timer function allows you to schedule the tuner to turn on/off at specific times or to switch to a particular channel.
- Navigate to the "Timer" section in the main menu.
- Set the event type (e.g., Power On, Power Off, Record), time, and duration.
7. Penyelenggaraan
7.1. Pembersihan
To clean the device, disconnect it from the power supply and wipe the exterior with a soft, dry cloth. Do not use liquid or aerosol cleaners.
7.2. Kemas kini Perisian
Software updates can improve performance and add new features. Updates are performed via the USB port.
- Muat turun perisian tegar terkini file from the official Cabletech support weblaman web (jika ada).
- Salin perisian tegar file to the root directory of a USB flash drive.
- Connect the USB flash drive to the tuner's USB port.
- Go to the "System" or "Tools" menu, then select "Software Update" or "Upgrade by USB".
- Follow the on-screen instructions to complete the update. Do not power off the device during the update process.
8. Penyelesaian masalah
If you encounter issues with your tuner, refer to the following common problems and solutions:
| Masalah | Kemungkinan Punca | Penyelesaian |
|---|---|---|
| Tiada gambar atau bunyi | Incorrect TV input selected; Loose cable connections; Tuner not powered on. | Select correct TV input (HDMI/SCART); Check all cable connections; Ensure tuner is powered on. |
| Mesej "Tiada Isyarat" | Antenna not connected; Poor antenna signal; No channels scanned. | Connect antenna properly; Adjust antenna position; Perform an automatic channel scan. |
| Alat kawalan jauh tidak berfungsi | Batteries are dead or inserted incorrectly; Obstruction between remote and tuner. | Replace batteries; Check battery polarity; Remove any obstructions; Point remote directly at the tuner. |
| Cannot record to USB | USB device not connected or formatted incorrectly; Insufficient storage space. | Ensure USB device is connected; Format USB device to FAT32 or NTFS; Free up space on USB device. |
| No internet access for apps | No MT7601 Wi-Fi adapter connected; Network configuration issues. | Connect a compatible MT7601 Wi-Fi adapter; Check network settings in the tuner's menu. |
9. Spesifikasi
| Ciri | Perincian |
|---|---|
| Nombor Model | URZ0336B |
| CPU | GX6702S5 |
| Memori Dalaman | 32 MB |
| RAM | 512 MB DDR2 |
| Penyambung ANT | soket IEC |
| Julat Kekerapan | VHF: 170–230 MHz, UHF: 470–862 MHz |
| Demodulasi | QPSK, 16QAM, 64QAM, 256QAM |
| Lebar jalur | 7 MHz, 8 MHz |
| Penyahkodan | MPEG-1, MPEG-2, MPEG-4, H.264, H.265, AAC, HE-AAC, AC-3, DD+ |
| Input/Output | 2x USB 2.0, HDMI, SCART, COAXIAL |
| Nisbah Aspek | Auto, 16:9 WS, 16:9 PB, 16:9 PS; 4:3 LB, 4:3 PS, 4:3 Full |
| Format yang Disokong | MP3, WMA, JPEG, BMP, AVI |
| Resolusi Skrin | 480i, 480p, 576i, 576p, 720p, 1080i, 1080p |
| Resolusi Video | 1920 x 1080 Piksel |
| Penyahkodan Audio | MPEG-1 LayerI/II, Dolby-Downmix 2-Channel (License), AAC LC, HE-AAC v1/V2, PCM-Downmix, IEC958 SPDIF |
| File Sistem | FAT32, NTFS |
| Keserasian | Fully compatible with DVB-T2/DVB-T |
| Alat Kawalan Jauh | Requires 2x AAA batteries |
| Penggunaan Kuasa | Max. 6 W (Operating), Max. 50/60 Hz (Standby) |
| Dimensi (W x H) | 168 mm x 36 mm |
| Sokongan Wi-Fi | Requires external MT7601 chip adapter |
| Tuner Bit Depth | 10 Bit |
10. Waranti dan Sokongan
This product comes with a standard manufacturer's warranty. For specific warranty terms and conditions, please refer to the documentation included with your purchase or contact Cabletech customer support.
For technical assistance, troubleshooting beyond this manual, or warranty claims, please contact your retailer or the official Cabletech support channels.
Ask a question about this manual
Ask about setup, troubleshooting, compatibility, parts, safety, or missing instructions. Manuals+ will review the question and use this page’s manual context to help answer it.