
1. Pengenalan
The AITRIP NodeMCU V3 Lua WiFi Module is a versatile development board that integrates the ESP8266 Wi-Fi System-on-Chip (SoC) with extra memory and a USB-Serial CH340G converter. This module combines the functionalities of a Wi-Fi access point, station, and a microcontroller, enabling easy development of IoT applications using the Lua scripting language or Arduino IDE.
It is designed for rapid prototyping and development, offering a rich set of I/O capabilities and network connectivity. The inclusion of 32M Flash memory provides ample space for complex projects and libraries.
2. Ciri-ciri Utama
- Integrated ESP8266 SoC: Powerful Wi-Fi enabled microcontroller for IoT applications.
- Memori Lanjutan: Features 32Mb (megabit) flash memory, allowing for larger projects and extensive libraries without memory constraints.
- USB-TTL Serial Converter: On-board CH340G chip with a Micro-USB socket for easy programming and serial communication.
- Arduino IDE Compatibility: Supports programming using the Arduino IDE, providing a familiar development environment.
- Flexible I/O: Includes 10 GPIOs (D0-D10) with PWM functionality, IIC, SPI communication, 1-Wire, and ADC (A0) capabilities.
- Rangkaian Wi-Fi: Can operate as both an access point and/or a station, enabling web server hosting and data exchange over the internet.
- Breadboard Friendly: Designed with 2.54mm (0.1") pin headers for easy integration into breadboard setups.
- Input Kuasa: Supports DC 4~9V power input via the VIN pin.
3. Kandungan Pakej
Setiap pakej mengandungi komponen berikut:
- NodeMCU V3 Lua WiFi Module (ESP8266 + 32M Flash, USB-serial CH340G)
- Pin headers (2.54mm, 0.1", 15 pins x 2 lines) - Note: Pin headers are not pre-soldered.

Imej 3.1: Selesaiview of the AITRIP NodeMCU V3 Lua WiFi Module and its accompanying pin headers.
4. Panduan Persediaan
4.1. Driver Installation (CH340G)
Before connecting the NodeMCU module to your computer, you may need to install the CH340G USB-to-Serial driver. This driver allows your computer to recognize the module as a serial port.
- Download the appropriate CH340G driver for your operating system (Windows, macOS, Linux) from a reliable source.
- Pasang pemacu dengan mengikuti arahan pada skrin. Anda mungkin perlu memulakan semula komputer anda selepas pemasangan.
- Verify the installation by connecting the NodeMCU module to your computer via a Micro-USB cable. Check your device manager (Windows) or
ls /dev/tty*(Linux/macOS) for a new serial port (e.g., COMx or /dev/tty.wchusbserial).
4.2. Pin Header Soldering (Optional but Recommended)
The included pin headers are not pre-soldered. For easy use with breadboards or custom PCBs, it is highly recommended to solder the pin headers to the module. Ensure proper alignment and good solder joints.
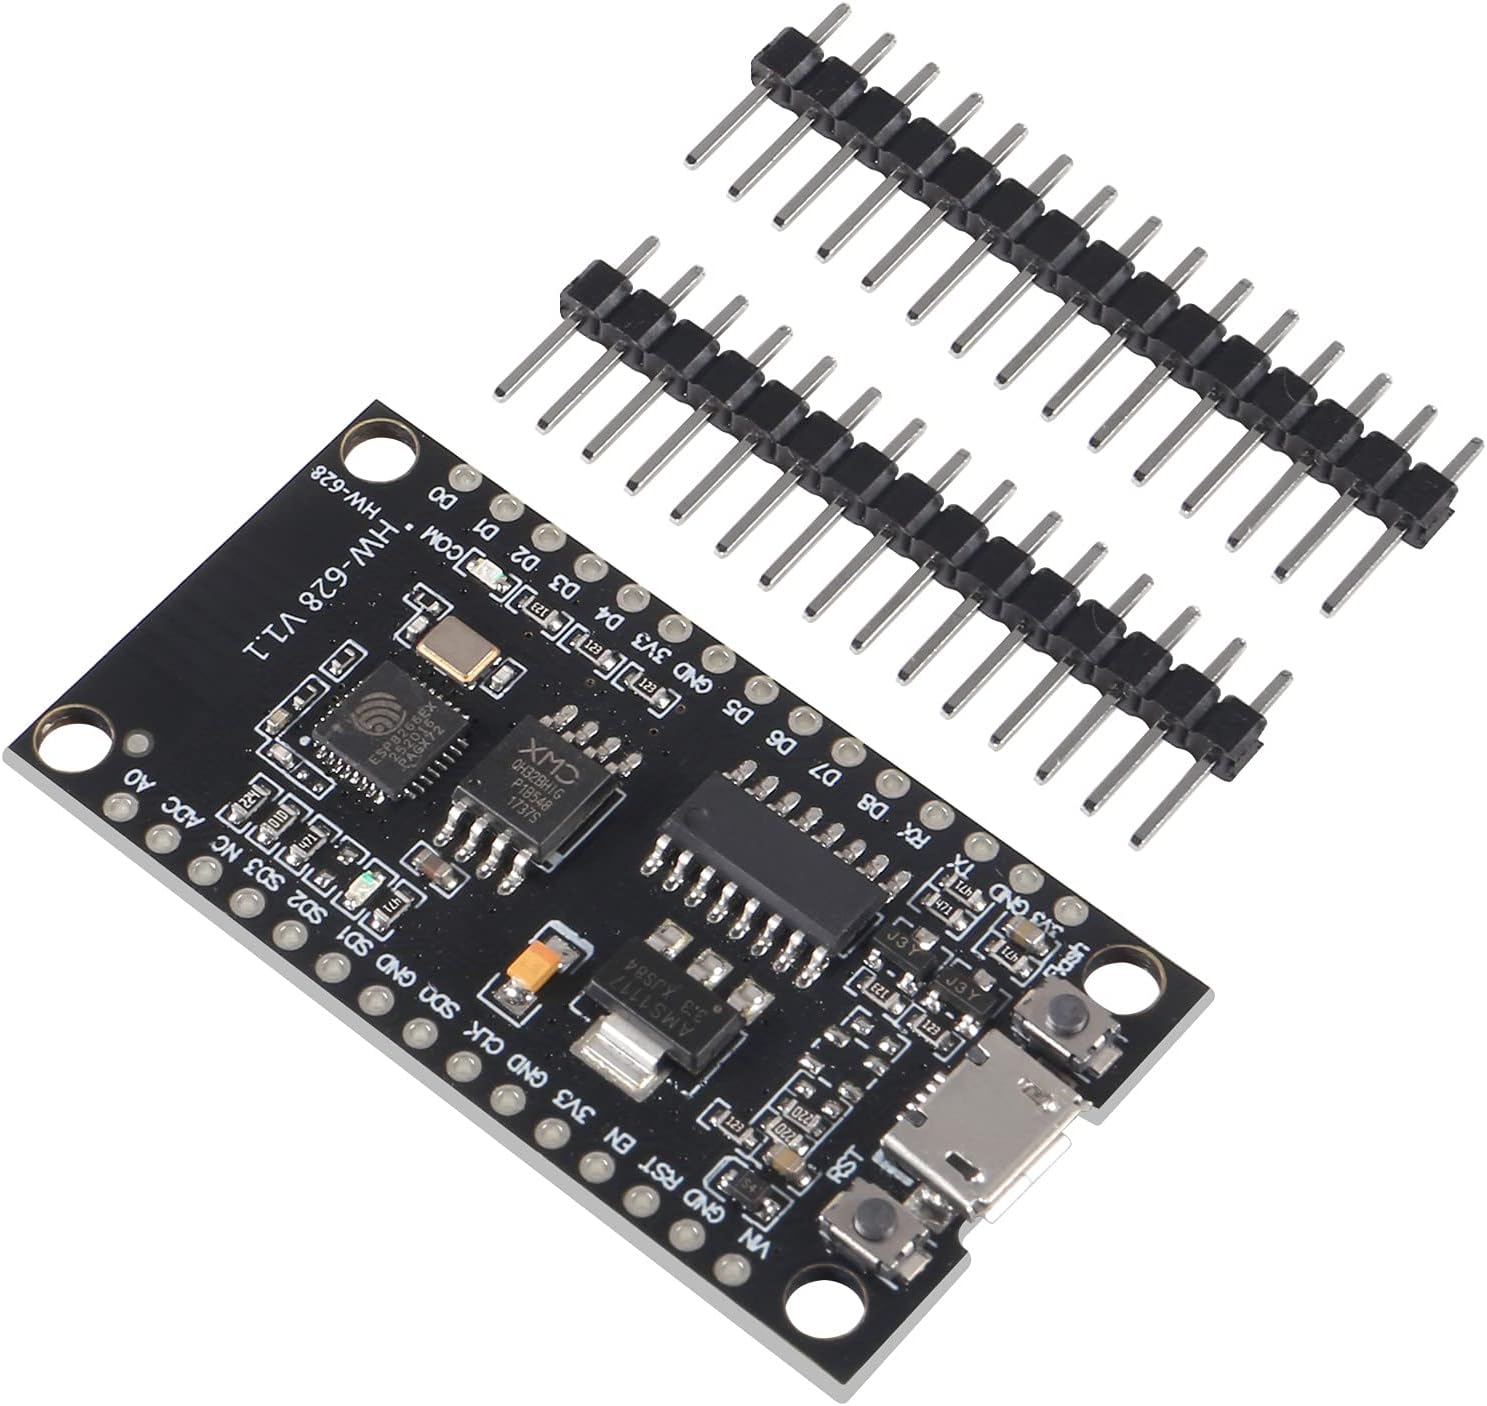
Image 4.1: NodeMCU module shown with separate pin headers, illustrating the need for soldering.
4.3. Memperkasakan Modul
The module can be powered in several ways:
- Port USB Mikro: Connect a standard Micro-USB cable to a 5V USB power source (e.g., computer USB port, USB wall adapter). This is the most common method for programming and initial testing.
- VIN Pin: Provide a DC voltage between 4V and 9V to the VIN pin. Ensure the ground (GND) pin is also connected.
Awas: Jangan gunakan voltage to other pins unless specifically required by your circuit design, and always verify pin voltage had.
5. Operation and Programming
5.1. Programming with Arduino IDE
The NodeMCU V3 module can be programmed using the Arduino IDE, making it accessible for users familiar with Arduino development.
- Install ESP8266 Board Package: Dalam Arduino IDE, pergi ke File > Keutamaan. In "Additional Boards Manager URLs", add:
http://arduino.esp8266.com/stable/package_esp8266com_index.json. Klik OK. - Pergi ke Alatan > Papan > Pengurus Papan... Cari untuk "ESP8266" and install the "esp8266 by ESP8266 Community" package.
- Select the Board: Go to Alatan > Papan and select "NodeMCU 1.0 (ESP-12E Module)".
- Select the Port: Go to Alatan > Pelabuhan and select the serial port corresponding to your NodeMCU module (e.g., COMx or /dev/tty.wchusbserial).
- Upload Code: Write your Arduino sketch and click the "Upload" button. The IDE will compile and upload the code to the module.
5.2. Programming with Lua (NodeMCU Firmware)
The module can also be programmed using Lua scripting, which is the native language for NodeMCU firmware.
- Flash NodeMCU Firmware: If not already present, you may need to flash the NodeMCU firmware onto the ESP8266. Tools like NodeMCU Flasher or esptool.py can be used for this.
- Use an IDE/Editor: Use a Lua-compatible IDE or text editor (e.g., ESPlorer, VS Code with Lua extensions) to write your Lua scripts.
- Upload Scripts: Use a serial communication tool (like ESPlorer) to upload your Lua scripts to the module's file sistem.
- Execute Scripts: Scripts can be set to run automatically on boot (e.g.,
init.lua) or executed manually via the serial console.

Imej 5.1: Terperinci view of the NodeMCU module, highlighting the various pins and components for programming and connectivity.
6. Spesifikasi
| Ciri | Perincian |
|---|---|
| Nama Model | NodeMCU V3 Lua |
| Pemproses | ESP8266 (Espressif) |
| Memori Kilat | 32 MB (Megabit) |
| Cip Siri USB | CH340G |
| Ketersambungan | Wi-Fi (802.11 b/g/n), Micro-USB |
| Pin GPIO | 10 (D0-D10), with PWM, IIC, SPI, 1-Wire, ADC (A0) |
| Input Voltage (VIN) | DC 4V ~ 9V |
| Keserasian Sistem Pengendalian | Linux (and other OS with CH340G driver) |
| Berat Barang | 1.44 auns (lebih kurang 40.8 gram) |
| Dimensi Pakej | 4.02 x 3.03 x 0.79 inci |

Image 6.1: The compact size of the NodeMCU module, suitable for various embedded projects.
7. Penyelesaian masalah
- Module Not Recognized by Computer:
- Ensure the CH340G driver is correctly installed.
- Try a different Micro-USB cable; some cables are for charging only and do not support data transfer.
- Uji dengan port USB yang berbeza pada komputer anda.
- Upload Errors (Arduino IDE/Lua):
- Verify that the correct board ("NodeMCU 1.0 (ESP-12E Module)") and serial port are selected in the IDE.
- Ensure no other program is using the serial port.
- Semak kod anda untuk ralat sintaks.
- Sometimes pressing the "Flash" or "RST" button on the module during upload can help initiate programming mode.
- Isu Sambungan Wi-Fi:
- Double-check Wi-Fi SSID and password in your code.
- Ensure the module is within range of the Wi-Fi network.
- Verify that your router settings are not blocking new devices.
- Insufficient Memory:
- Although the module has 32M Flash, complex projects can still consume significant memory. Optimize your code and libraries.
- Consider using a more memory-efficient programming approach if possible.
8. Penyelenggaraan
To ensure the longevity and proper functioning of your NodeMCU module, follow these maintenance guidelines:
- Tangani dengan Berhati-hati: Electronic components are sensitive. Avoid dropping the module or subjecting it to physical shock.
- Keringkan: Protect the module from moisture and liquids, which can cause short circuits and damage.
- Elektrik Statik: Discharge any static electricity from your body before handling the module to prevent damage to sensitive components.
- Kebersihan: Keep the module free from dust and debris. Use a soft, dry brush or compressed air for cleaning if necessary.
- Storan yang Betul: When not in use, store the module in an anti-static bag or a protective container to prevent damage.
9. Waranti dan Sokongan
For warranty information and technical support regarding your AITRIP NodeMCU V3 Lua WiFi Module, please refer to the seller's policies or contact AITRIP customer service directly. Specific warranty terms may vary based on your region and point of purchase.
For community support and extensive documentation on ESP8266 and NodeMCU development, consider exploring online forums, official ESP8266 documentation, and the NodeMCU project GitHub page.