
1. Pengenalan
Thank you for choosing the XUNATA WiFi RGB LED Neon Strip Light. This product is designed to provide vibrant, customizable lighting for both indoor and outdoor environments, featuring WiFi connectivity for smart control and music synchronization. Please read this manual carefully before installation and operation to ensure proper use and longevity of your product.
2. Ciri-ciri Produk
- Kawalan WiFi & Apl: Seamlessly control your lighting via a smart application on your mobile device.
- Penyegerakan Muzik: Built-in microphone allows the lights to change color and pulsate in real-time with music rhythms.
- LED Berkualiti Tinggi: Utilizes SMD 3535 LEDs (96 LEDs/M) for enhanced brightness and energy efficiency.
- Reka Bentuk Fleksibel & Boleh Dipotong: The neon strip is flexible for various installations and can be cut every 30mm at designated marks.
- IP67 Kalis Air: Suitable for both indoor and outdoor applications, offering protection against dust and water immersion.
- Warna RGB Cergas: Offers a wide spectrum of Red, Green, and Blue colors, allowing for diverse lighting effects.
- Jangka hayat yang panjang: Designed for durability with a lifespan exceeding 50,000 hours.
3. Kandungan Pakej
Sila semak pakej untuk memastikan semua item ada dan dalam keadaan baik:
- XUNATA WiFi RGB LED Neon Strip Light (29.5ft/9M)
- 12V 8A Power Adapter (CE Certified)
- Kawalan Jauh 24-Kekunci
- Mini Controller Box
- 10 x 6mm Plastic Mounting Clips
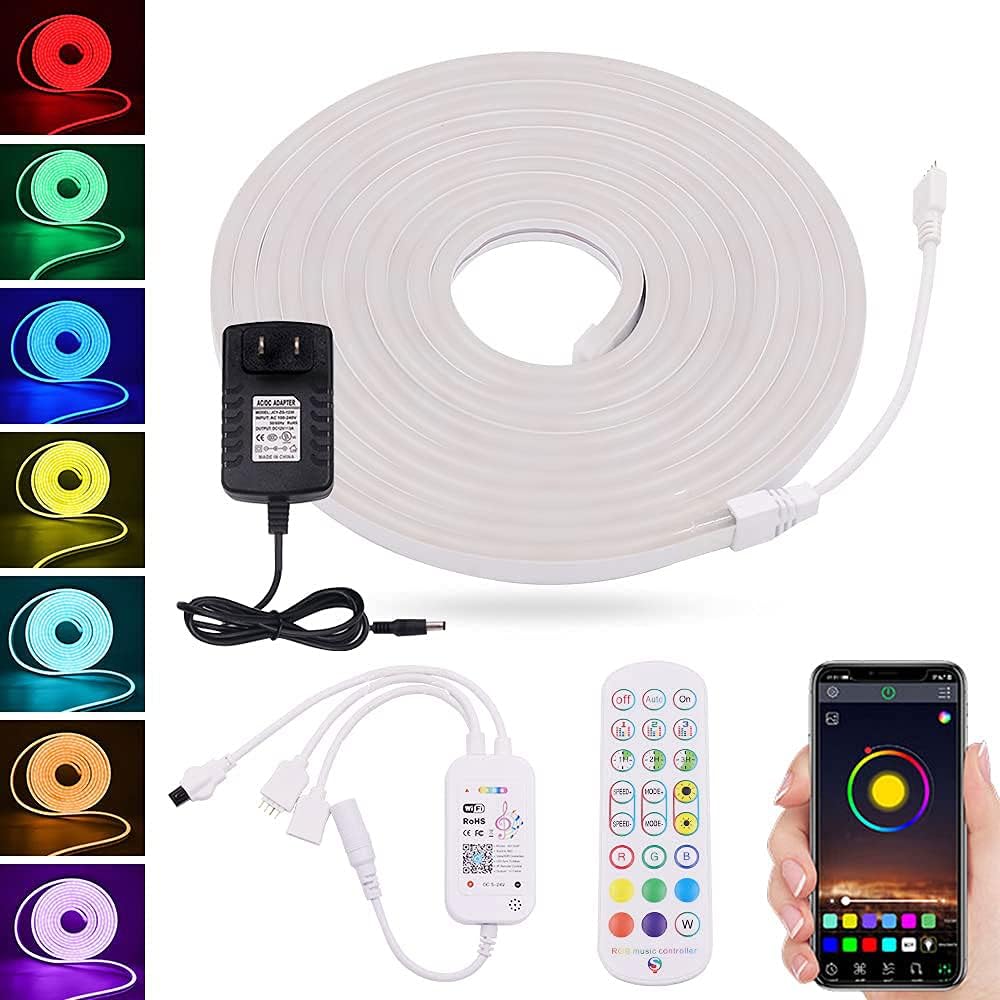
Imej 1: Selesaiview of the XUNATA WiFi RGB LED Neon Strip Light package contents, including the coiled light strip, power adapter, mini controller, 24-key remote control, and a smartphone displaying the control app interface.
4. Spesifikasi
| Atribut | Nilai |
|---|---|
| Jenama | XUNATA |
| Nombor Model | dcf9e6fd-df89-4722-bc02-f9f36c9355af (WX300P) |
| warna | RGB (Merah, Hijau, Biru) |
| Panjang | 29.5 kaki / 9 Juta |
| Jenis LED | SMD 3535 |
| Ketumpatan LED | 96 LED/M |
| Voltage | 12 Volt (DC) |
| Wattage | 72 watt |
| Tahan Air | IP67 Kalis Air |
| Kaedah Kawalan | App (Wi-Fi), 24-Key Remote Control |
| Ketersambungan | Wi-Fi, Inframerah |
| bahan | plastik |
| Jangka hayat | > 50,000 jam |
5. Arahan Persediaan
5.1 Merancang Pemasangan Anda
Before installation, plan the layout of your LED strip. Consider the desired length and path. Ensure the surface is clean, dry, and smooth for optimal adhesion (if using adhesive backing, though clips are provided).
5.2 Cutting the Strip (Optional)
If a shorter length is required, the LED strip can be cut. Locate the designated cutting marks, typically indicated by a scissor icon or copper pads, every 30mm along the strip. Use sharp scissors to cut precisely at these marks. Do not cut anywhere else, as this may damage the strip.

Imej 2: Gambar jarak dekat view of the XUNATA LED neon strip showing the 30mm spacing and a pair of scissors indicating the precise cutting point. This illustrates where the strip can be safely trimmed.
5.3 Mounting the Strip
Use the provided plastic mounting clips to secure the LED strip in place. Space the clips evenly along the length of the strip to ensure a firm and straight installation. For outdoor use, ensure clips are securely fastened to withstand environmental conditions.
5.4 Sambungan Kuasa
- Connect the end of the LED neon strip to the Mini Controller Box. Ensure the connectors are aligned correctly and securely fastened.
- Connect the Mini Controller Box to the 12V 8A Power Adapter.
- Plug the power adapter into a standard electrical outlet. The lights should illuminate.
5.5 Pemasangan Aplikasi dan Sambungan WiFi
- Scan the QR code on the Mini Controller Box or refer to the packaging for the recommended smart app (e.g., Smart Life, Tuya Smart). Download and install the app on your smartphone.
- Daftar atau log masuk ke akaun anda dalam apl.
- Ensure your phone is connected to a 2.4GHz WiFi network. (5GHz networks are not supported for initial pairing).
- In the app, select 'Add Device' or the '+' icon. Choose 'Lighting' or 'Strip Light' from the device list.
- Follow the on-screen instructions to put the device into pairing mode (usually by cycling power 3 times or holding a button on the controller). The light strip will typically flash rapidly when in pairing mode.
- Confirm the flashing indicator in the app and enter your WiFi network password.
- Wait for the device to connect. Once connected, you can rename the device and begin controlling it via the app.
6. Arahan Operasi
6.1 Using the 24-Key Remote Control
The included 24-key remote control provides basic functions for quick adjustments:
- Hidup/Mati: Hidupkan atau matikan lampu.
- Pilihan Warna: Direct buttons for Red, Green, Blue, White, and various mixed colors.
- Pelarasan Kecerahan: Meningkatkan atau mengurangkan keamatan cahaya.
- Pemilihan Mod: Cycle through pre-programmed dynamic modes (e.g., flash, fade, jump).
- DIY Buttons: Some remotes allow saving custom color settings.
6.2 Using the Smart App
The smart app offers advanced control and customization options:
- Roda Warna: Select any color from a full spectrum.
- Kecerahan & Ketepuan: Fine-tune light intensity and color vibrancy.
- Mod Pemandangan: Choose from various pre-set scenes (e.g., reading, party, relaxation) or create custom scenes.
- Fungsi Pemasa: Jadualkan lampu untuk hidup/mati pada waktu tertentu.
- Mod Muzik: Activate the music synchronization feature. The built-in microphone in the controller will pick up ambient sound, and the lights will react to the rhythm.
- Penyesuaian DIY: Create and save your own dynamic lighting effects.
- Kawalan Kumpulan: Control multiple XUNATA smart lights simultaneously (if applicable).
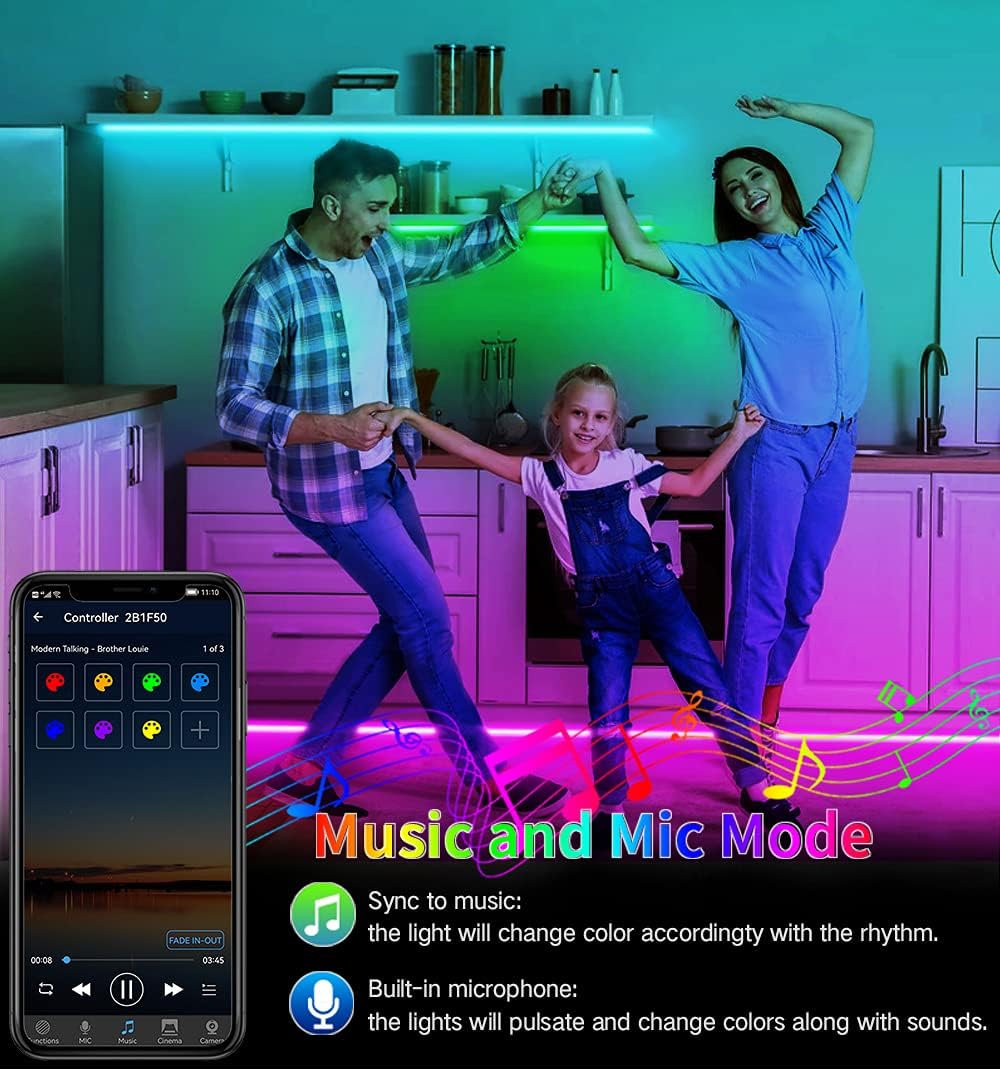
Image 3: A family enjoying the XUNATA LED neon strip light in 'Music and Mic Mode'. The lights, installed along the kitchen cabinets, are dynamically changing colors in sync with music, demonstrating the built-in microphone's functionality.
7. Penyelenggaraan
- Pembersihan: Gently wipe the LED strip with a soft, dry cloth to remove dust. For stubborn dirt, a slightly damp cloth can be used, ensuring the strip is unplugged and completely dry before re-powering.
- Storan: If storing the strip for an extended period, coil it loosely and keep it in a cool, dry place away from direct sunlight and extreme temperatures.
- Pemeriksaan: Periodically check the connections and the strip for any signs of damage, especially if used outdoors.
8. Penyelesaian masalah
| Masalah | Kemungkinan Punca | Penyelesaian |
|---|---|---|
| Lampu tidak menyala. | Tiada kuasa, sambungan longgar, penyesuai rosak. | Periksa soket kuasa, pastikan semua sambungan selamat. Uji dengan soket lain. |
| Alat kawalan jauh tidak berfungsi. | Battery depleted, remote not pointed at receiver, obstruction. | Replace remote battery. Ensure clear line of sight to the Mini Controller Box. |
| Tidak dapat menyambung ke WiFi/Apl. | Incorrect WiFi password, 5GHz network, device not in pairing mode, too far from router. | Verify WiFi password. Ensure connection to 2.4GHz network. Re-enter pairing mode. Move closer to router. |
| Lampu malap atau berkelip-kelip. | Insufficient power, damaged section of strip. | Ensure power adapter is correctly rated. Inspect strip for physical damage. |
| Music Sync not working. | Microphone obstructed, volume too low, mode not activated. | Ensure controller's microphone is clear. Increase music volume. Activate music mode in the app. |
9. Waranti dan Sokongan
XUNATA products are manufactured with quality and performance in mind. For warranty information, technical support, or any inquiries regarding your product, please refer to the purchase platform or contact XUNATA customer service directly. Keep your purchase receipt as proof of purchase for warranty claims.
For further assistance, please visit the official XUNATA store or contact their support channels as provided at the time of purchase.