
Rigol DG1062Z
Manual Pengguna Penjana Bentuk Gelombang Fungsi/Sewenang-wenangnya Rigol DG1062Z
Model: DG1062Z | Brand: Rigol
1. Pengenalan
This user manual provides comprehensive instructions for the safe and effective operation of the Rigol DG1062Z Function/Arbitrary Waveform Generator. The DG1062Z is a high-performance, multi-functional signal source capable of generating various waveforms, including sine, square, ramp, pulse, noise, and arbitrary waveforms, with a maximum frequency of 60MHz across two independent channels. It features a 14-bit vertical resolution and 8Mpts arbitrary wave length, making it suitable for a wide range of applications in electronics testing, education, and research.
Please read this manual thoroughly before operating the device to ensure proper usage and to prevent damage to the instrument or injury to personnel. Keep this manual for future reference.
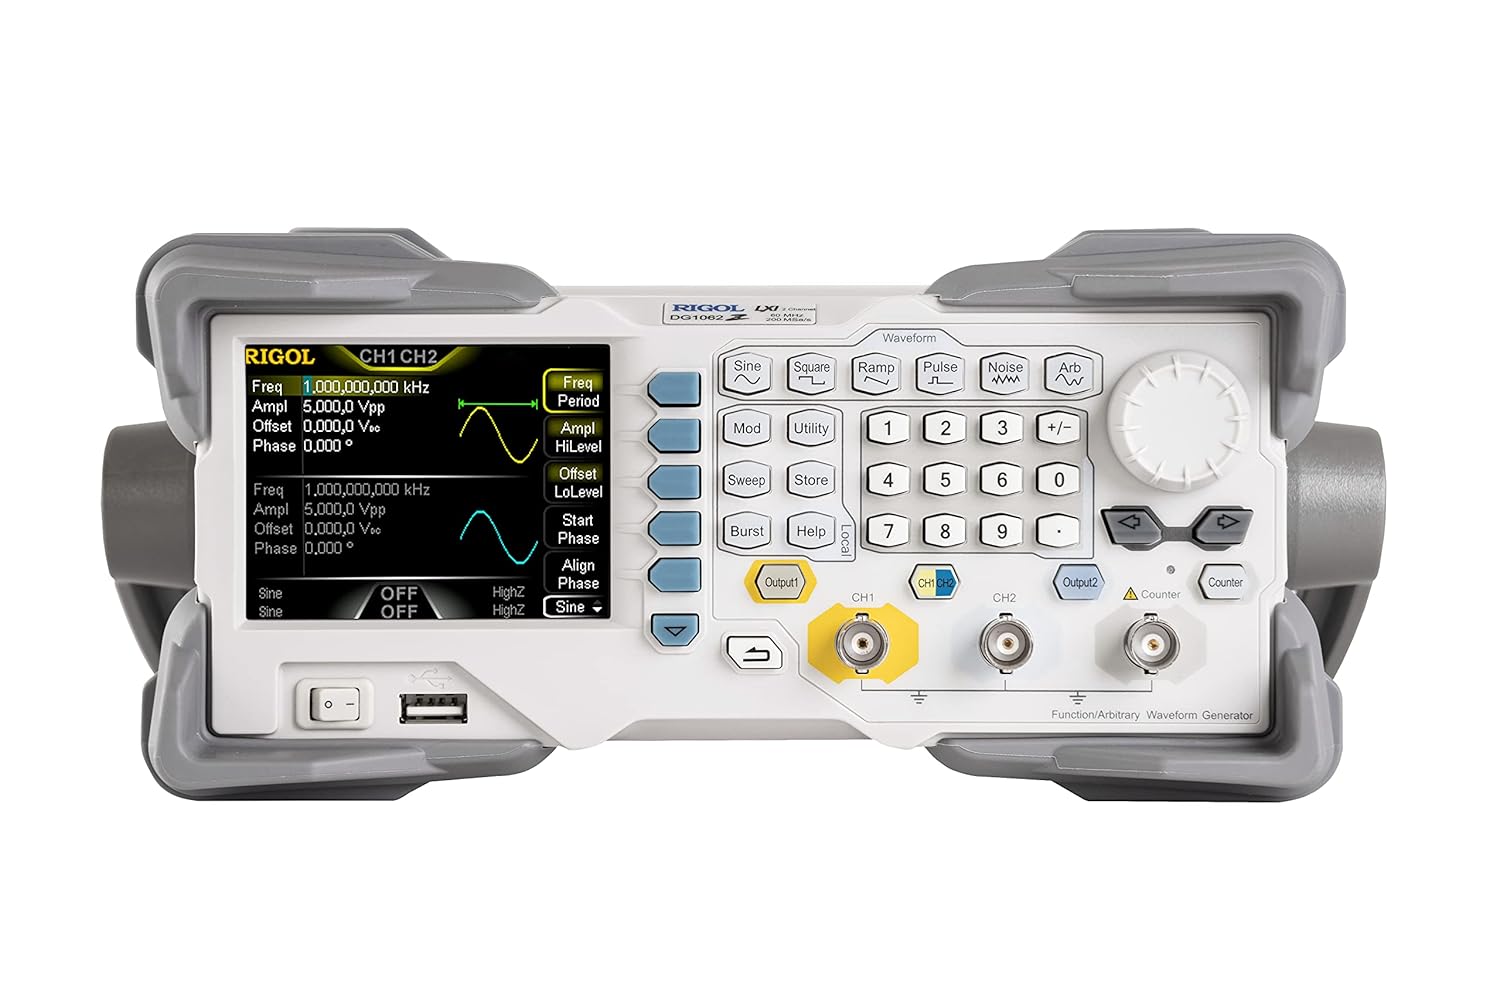
Rajah 1.1: Depan view of the Rigol DG1062Z Function/Arbitrary Waveform Generator, showing the display, control buttons, and output connectors.
2. Persediaan dan Pemasangan
2.1 Membongkar dan Pemeriksaan Awal
Carefully remove the DG1062Z from its packaging. Inspect the instrument for any signs of damage that may have occurred during transit. If any damage is found, contact your Rigol distributor immediately.

Figure 2.1: The Rigol DG1062Z Function/Arbitrary Waveform Generator along with its standard accessories, including power cords and BNC cables.
2.2 Sambungan Kuasa
- Ensure the power switch on the front panel is in the DIMATIKAN kedudukan.
- Connect the supplied AC power cord to the power input connector on the rear panel of the instrument.
- Plug the other end of the power cord into a grounded AC power outlet. The DG1062Z supports AC 100-240V, 45-440Hz.
2.3 Menyambung ke Peranti Lain
The DG1062Z offers various connectivity options for integration into your test setup.
- Output Channels (CH1, CH2): Use BNC cables to connect the CH1 and CH2 output connectors on the front panel to your device under test or an oscilloscope.
- USB Host/Device: The front panel USB host port allows for connecting USB storage devices. The rear panel USB device port can be used for PC communication.
- LAN (LXI): The Ethernet port on the rear panel enables network connectivity for remote control and data transfer.
- External Reference Input/Output (10MHz In/Out): For synchronization with external reference clocks.
- External Modulation/Trigger Inputs: For external control of modulation and burst functions.

Figure 2.2: Rear panel of the Rigol DG1062Z, highlighting the power input, LAN, USB device, and external reference/trigger ports.
2.4 Hidupkan Kuasa Awal
After connecting the power cord, press the power switch on the front panel to turn on the instrument. The display will illuminate, and the system will perform a self-test. Once the boot sequence is complete, the main interface will appear, ready for operation.
3. Arahan Operasi
3.1 Panel Hadapan Atasview
The front panel of the DG1062Z is designed for intuitive operation. It includes a color LCD display, waveform selection buttons, numeric keypad, navigation keys, and output connectors.

Rajah 3.1: Bersudut view of the DG1062Z, providing a clear perspective of the display and the arrangement of control buttons.
3.2 Generating Standard Waveforms
To generate a standard waveform:
- Press one of the waveform buttons (e.g., Sinus, Segi empat, Ramp, nadi, bising, Arb) to select the desired waveform type.
- Use the numeric keypad and navigation keys to set parameters such as Kekerapan, Amplilitan (Vpp), Offset, dan fasa.
- Tekan ke Keluaran button for the desired channel (CH1 or CH2) to enable the waveform output. The button will illuminate when the output is active.
3.3 Fungsi Modulasi
The DG1062Z supports various modulation types. Press the Mod button to access modulation settings.
- pagi (AmpModulasi litud): Adjust carrier frequency, modulation depth, and modulating waveform.
- FM (Frequency Modulation): Set carrier frequency, frequency deviation, and modulating waveform.
- PM (Phase Modulation): Configure carrier frequency, phase deviation, and modulating waveform.
- TANYA (Amplitude Shift Keying): Define carrier frequency and keying rate.
- FSK (Frequency Shift Keying): Specify carrier frequency and keying rate.
3.4 Sweep and Burst Modes
The instrument can generate swept and burst waveforms.
- sapu: Tekan sapu to configure start/stop frequency, sweep time, and sweep type (linear/log).
- pecah: Tekan pecah to set the number of cycles, burst period, and trigger source (internal/external/manual).
3.5 Using the Counter Function
The DG1062Z includes a built-in frequency counter. Press the Kaunter button to activate and configure the counter. It can measure frequency, period, and duty cycle of external signals.
3.6 Saving and Recalling Settings
To save current instrument settings, press the Kedai button. To recall previously saved settings, press the Ingat kembali button (often accessed via Utility menu or dedicated button).
4. Penyelenggaraan
4.1 Membersihkan Instrumen
To maintain the appearance and prolong the life of the instrument, clean the exterior surfaces regularly. Use a soft cloth dampened with a mild detergent or water. Do not use abrasive cleaners or solvents that may damage the plastic parts.
4.2 Penentukuran
The DG1062Z is factory calibrated. For optimal performance, periodic calibration by qualified service personnel is recommended. Refer to Rigol's official support channels for calibration services.
4.3 Penyimpanan
When not in use for extended periods, store the instrument in a clean, dry environment, away from direct sunlight and extreme temperatures. Ensure all cables are disconnected and the power is off.
5. Penyelesaian masalah
| Masalah | Kemungkinan Punca | Penyelesaian |
|---|---|---|
| Instrumen tidak boleh dihidupkan. | Power cord not connected properly; Power outlet faulty; Internal fuse blown. | Check power cord connection; Test power outlet; Contact service for fuse replacement. |
| No waveform output. | Output channel not enabled; Amplitude set to zero; Cable connection faulty. | Tekan ke Keluaran button for the channel; Increase amplitude setting; Check BNC cable connections. |
| Incorrect waveform displayed on oscilloscope. | Incorrect settings on DG1062Z; Oscilloscope settings incorrect (e.g., vertical scale, time base). | Verify waveform parameters on DG1062Z; Adjust oscilloscope settings to match expected signal. |
| Alat kawalan jauh tidak berfungsi. | Incorrect LAN/USB settings; Driver issues; Network connectivity problems. | Check network cable and IP settings; Install correct USB drivers; Verify network connection. |
6. Spesifikasi
The following table lists the key specifications for the Rigol DG1062Z Function/Arbitrary Waveform Generator.
| Parameter | Nilai |
|---|---|
| Dimensi Produk | 10.3 x 12.54 x 4.41 inci; 7.05 paun |
| Nombor Model Item | DG1062Z |
| Pengeluar | RIGOL |
| Jenis Pemasangan | Lekapan Permukaan |
| Bilangan Saluran | 2 |
| Kekerapan Maks | 60MHz |
| Resolusi menegak | 14 bit |
| Arbitrary Wave Length | 8Mpts |
7. Waranti dan Sokongan
7.1 Maklumat Waranti
Rigol products are typically covered by a manufacturer's warranty against defects in materials and workmanship. For specific warranty terms and duration, please refer to the warranty card included with your product or visit the official Rigol webtapak. Simpan resit pembelian anda sebagai bukti pembelian untuk tuntutan waranti.
7.2 Sokongan Teknikal
For technical assistance, troubleshooting, or service inquiries, please contact Rigol customer support. You can find contact information, FAQs, and additional resources on the official Rigol webtapak:
When contacting support, please have your instrument's model number (DG1062Z) and serial number ready.
Ask a question about this manual
Ask about setup, troubleshooting, compatibility, parts, safety, or missing instructions. Manuals+ will review the question and use this page’s manual context to help answer it.