1. Arahan Keselamatan Penting
Baca semua arahan dengan teliti sebelum menggunakan perkakas. Simpan manual ini untuk rujukan masa hadapan.
- Keselamatan Elektrik: Pastikan voltage indicated on the appliance matches your local power supply before connecting. Do not operate with a damaged cord or plug.
- penempatan: Place the dehumidifier on a stable, level surface. Maintain adequate clearance around the unit for proper airflow (at least 20 cm from walls or furniture). Do not block air inlets or outlets.
- Pengendalian Air: Always empty the water tank before moving the unit. Do not drink the collected water.
- Refrigerant Gas (R290): This appliance contains R290 refrigerant gas. R290 is a flammable gas. Handle with care and ensure the appliance is not damaged during transport or installation. Do not attempt to service the unit yourself if you suspect a refrigerant leak.
- Kanak-kanak dan Haiwan Kesayangan: Keep the appliance out of reach of children and pets. Supervise children to ensure they do not play with the appliance.
- Pembersihan: Putuskan sambungan bekalan kuasa sebelum membersihkan atau melakukan sebarang penyelenggaraan.
2. Produk Lebihview
2.1 Komponen
- Panel Kawalan
- Air Inlet (rear)
- Air Outlet (top/front)
- Water Collection Tank (front/bottom)
- Removable Air Filter (side/rear)
- Casters for easy movement
2.2 Panel Kawalan

Imej: Atas view daripada panel kawalan.
The control panel features a digital display and touch-sensitive buttons for various functions:
- Butang Kuasa: Menghidupkan atau mematikan unit.
- Paparan Kelembapan: Shows the current ambient humidity level and the set target humidity.
- Butang Tetapan Kelembapan: Adjust the desired humidity level.
- Butang Kelajuan Kipas: Selects fan speed (if available).
- Butang Pemasa: Sets the 24-hour timer for automatic operation.
- Penunjuk Penuh Air: Bercahaya apabila tangki air penuh, mencetuskan penutupan automatik.
3. Persediaan
3.1 Membongkar
Carefully remove the dehumidifier from its packaging. Retain the packaging materials for future storage or transport. Check for any signs of damage. If the unit appears damaged, do not operate it and contact customer support.
3.2 Penempatan
For optimal performance, place the dehumidifier in a central location within the room. Ensure the room size does not exceed 25 square meters for effective dehumidification.
- Place the unit on a firm, level surface to prevent vibrations and ensure proper water collection.
- Allow at least 20 cm of space around the air inlet and outlet to ensure unrestricted airflow.
- Elakkan meletakkan unit berhampiran sumber haba atau di bawah cahaya matahari langsung.
3.3 Sambungan Kuasa
Plug the power cord into a grounded electrical outlet. Ensure the outlet meets the power requirements of the dehumidifier (210W, 240V).
4. Arahan Operasi
4.1 Hidupkan/Mati Kuasa
Press the Power button on the control panel to turn the dehumidifier on or off. The unit will start operating in its default mode or resume previous settings.
4.2 Menetapkan Tahap Kelembapan yang Diingini
The dehumidifier features a humidity sensor that detects the ambient humidity. Use the humidity setting buttons to adjust your desired humidity level. The unit will operate until this level is reached, then cycle on and off to maintain it. Recommended humidity levels are typically between 40% and 60%.
4.3 Menggunakan Fungsi Pemasa
Press the Timer button to set the 24-hour timer. This allows you to program the unit to turn on or off automatically after a set number of hours, providing flexible operation.
4.4 Pengurusan Tangki Air
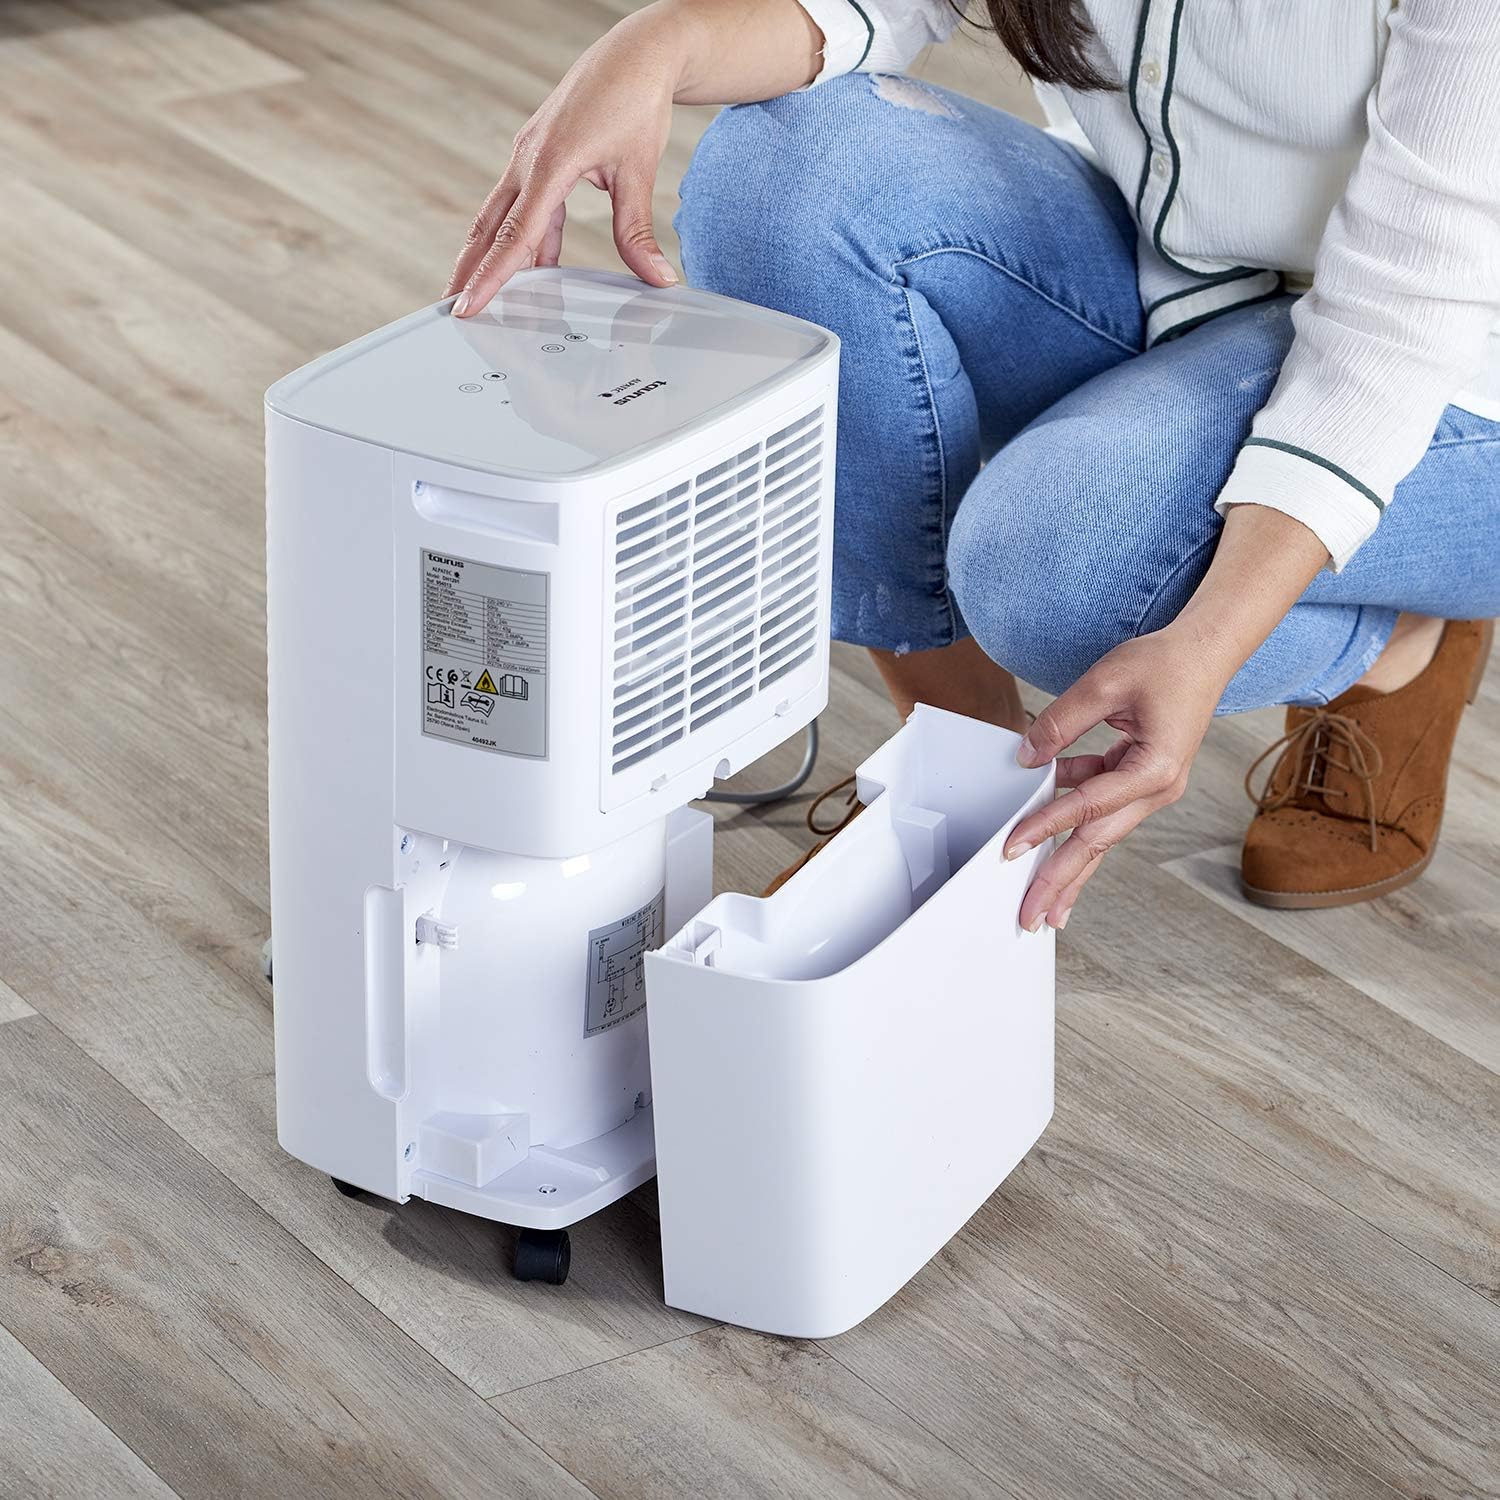
Image: Removing the water collection tank.
- Penunjuk Penuh Air: The dehumidifier has a 2.5-liter water tank. When the tank is full, the Water Full Indicator light will illuminate, and the unit will automatically shut off to prevent overflow.
- Mengosongkan Tangki: Carefully pull out the water tank from the front of the unit. Dispose of the collected water. Reinsert the empty tank firmly until it clicks into place. The unit will resume operation.
- Saliran Berterusan: For continuous operation without needing to empty the tank, connect a drainage hose (not included) to the continuous drainage outlet (usually located at the back or side of the unit). Ensure the hose is sloped downwards to allow gravity drainage into a suitable receptacle.
5. Penyelenggaraan
5.1 Membersihkan Penapis Udara

Image: Removing the air filter for cleaning.
Regular cleaning of the air filter is essential for efficient operation.
- Matikan penyahlembap dan cabut plagnya dari salur keluar kuasa.
- Locate the air filter cover (typically on the side or rear of the unit) and remove it.
- Carefully pull out the air filter.
- Wash the filter with warm, soapy water or vacuum it to remove dust and debris.
- Bilas dengan teliti dan biarkan penuras kering sepenuhnya sebelum dimasukkan semula.
- Place the dry filter back into its slot and secure the cover.
5.2 Membersihkan Bahagian Luar Unit
Lap bahagian luar dehumidifier dengan lembut, damp kain. Jangan gunakan pembersih yang kasar, pelarut atau bahan kimia yang keras, kerana ini boleh merosakkan permukaan.
5.3 Automatic Defrost Control
The dehumidifier is equipped with an automatic defrost function. If frost builds up on the evaporator coils, the unit will temporarily stop dehumidifying and run the fan to melt the frost. This is a normal operation and ensures efficient performance in cooler environments.
6. Penyelesaian masalah
Sebelum menghubungi perkhidmatan pelanggan, semulaview isu dan penyelesaian biasa berikut:
| Masalah | Kemungkinan Punca | Penyelesaian |
|---|---|---|
| Unit tidak dihidupkan | No power supply; Power cord not plugged in; Water tank full or not correctly inserted. | Periksa sambungan kuasa; Kosongkan dan masukkan semula tangki air dengan betul. |
| No dehumidification or low efficiency | Air filter clogged; Room temperature too low; Air inlet/outlet blocked; Desired humidity level already reached. | Clean the air filter; Ensure room temperature is above 5°C; Clear obstructions; Lower the desired humidity setting. |
| Water Full Indicator is on, but tank is not full | Water tank not correctly positioned; Float switch malfunction. | Remove and reinsert the water tank firmly; If problem persists, contact support. |
| Bunyi luar biasa semasa operasi | Unit bukan pada permukaan yang rata; Isu komponen dalaman. | Ensure unit is on a flat, stable surface; If noise is excessive or persistent, discontinue use and contact support. |
7. Spesifikasi
7.1 Data Teknikal
| Ciri | Perincian |
|---|---|
| Jenama | Taurus |
| Nombor Model | 954513000 (PLEASANT) |
| warna | putih |
| Dimensi (L x W x H) | 34.5 x 20 x 10 cm |
| Berat badan | 9.5 Kilogram |
| Kapasiti Tangki Air | 2.5 Liter |
| Kapasiti Dehumidifikasi | Sehingga 12 liter/24 jam |
| kuasa | 210 Watt |
| Voltage | 240V |
| bahan | plastik |
| Kelas Tenaga | A hingga G |
| Kawasan Lantai yang Disyorkan | Sehingga 25 meter persegi |
| Ciri Khas | Humidity level detector, 24h timer, R290 refrigerant gas, Easy maintenance, Washable filters, Automatic defrost |
8. Waranti dan Sokongan
This product is covered by a manufacturer's warranty. Please refer to the warranty card included with your purchase or contact your retailer for specific warranty terms and conditions. For technical support, spare parts, or service inquiries, please contact the Taurus customer service department or your local distributor. Information regarding spare parts availability is not provided in this manual.