Claymore V600+
Claymore V600+ Portable Fan Instruction Manual
Model: V600+
1. Pengenalan
Thank you for choosing the Claymore V600+ Rechargeable Portable Fan. This manual provides essential information for the safe and efficient operation, maintenance, and troubleshooting of your fan. Please read it thoroughly before first use and keep it for future reference.

Image: The Claymore V600+ Portable Fan in Warm Gray, showcasing reka bentuknya yang padat.
2. Ciri-ciri Produk
- Bateri Tahan Lama: Equipped with a 7,800 mAh Li-ion battery, providing up to 32 hours of wireless operation on the ultra-low setting.
- Powerful & Quiet Airflow: Features a BLDC motor with 4 wind speed levels, delivering a maximum airflow of 5.8 m/s while maintaining an ultra-quiet operation (as low as 15 decibels).
- Pengecasan USB-C: Conveniently recharges via USB Type-C. Full charge takes approximately 6.5 hours.
- Reka bentuk boleh laras: The fan head can be adjusted vertically up to 45 degrees to direct airflow.
- Pemasangan Serbaguna: Includes a tripod stand and a built-in 1/4-inch tripod socket for flexible positioning on various surfaces or hanging.
- Penyelenggaraan mudah: The front safety cage is removable for quick and safe cleaning of the fan blades.
- Pemasa Bersepadu: Features a 1-4 hour timer setting for automated shut-off.
3. Kandungan Pakej
Pastikan semua item ada semasa menyahkotak:
- Claymore V600+ Portable Fan
- Tripod Berdiri
- Kabel Pengecasan USB Jenis-C
- Sarung Bawa

Image: The Claymore V600+ fan, tripod, and charging cable neatly stored within its included carry case.
4. Persediaan
4.1 Attaching the Tripod Stand
- Locate the 1/4-inch tripod socket at the bottom of the fan unit.
- Unfold the legs of the tripod stand.
- Screw the tripod stand clockwise into the socket until it is securely fastened.

Image: A user demonstrating how to attach the tripod stand to the base of the fan.
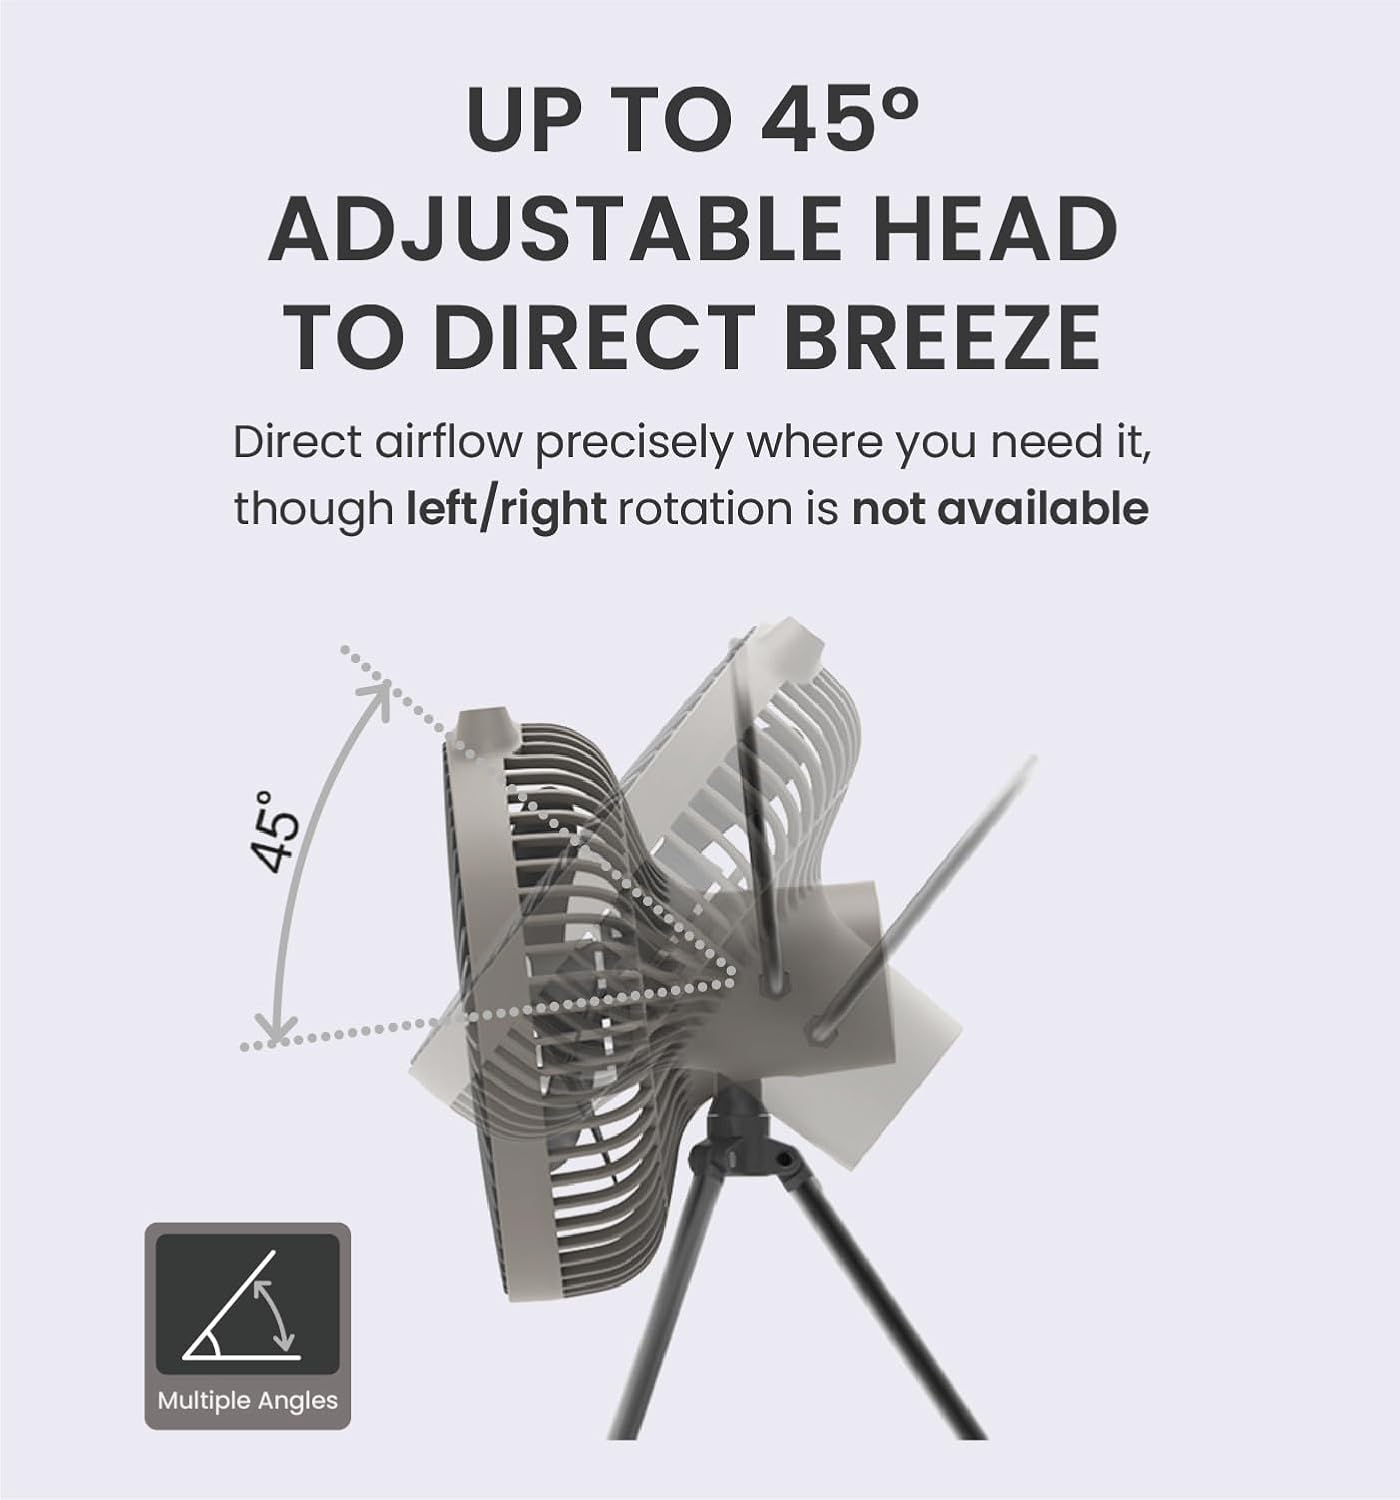
4.2 Adjusting Fan Angle
The fan head can be manually tilted up to 45 degrees vertically. Gently adjust the fan head to your desired angle. Do not force rotation beyond the specified range, as this may cause damage.
Image: A visual representation of the fan head's 45-degree vertical adjustment capability.
4.3 Caj Permulaan
For optimal performance, fully charge the fan before its first use. Refer to the "Charging" section for detailed instructions.
5. Operasi
5.1 Kawalan Hidup/Mati dan Kelajuan
The fan features a control panel with buttons for power and speed adjustment. There are 4 fan speed levels: Ultra-Low, Low, Medium, and High.
- Press the power button (usually marked with a fan icon) once to turn the fan on to the Ultra-Low speed.
- Press the power button repeatedly to cycle through the speed settings: Low, Medium, High.
- After the High setting, pressing the button again will turn the fan off.
Video: Demonstrates how to cycle through the four fan modes (Ultra-Low, Low, Medium, High) and turn the fan off using the control button.
5.2 Menetapkan Pemasa
The fan includes a timer function for automatic shut-off.
- With the fan powered on, press the timer button (usually marked with a clock icon).
- Each press will cycle through the available timer settings: 1 hour, 2 hours, 3 hours, 4 hours.
- The corresponding indicator lights will illuminate to show the selected timer duration.
- Pressing the timer button after the 4-hour setting will deactivate the timer.
Video: Illustrates the process of setting the sleep timer on the fan, showing the indicator lights for each duration.
6. Mengecas
The Claymore V600+ fan is equipped with a 7,800mAh rechargeable battery.
- Locate the USB-C charging port on the back of the fan, covered by a protective flap.
- Open the flap and insert the provided USB Type-C cable into the port.
- Connect the other end of the USB cable to a compatible USB power adapter (not included) or a power source.
- A small blue indicator light next to the charging port will illuminate, indicating that the fan is charging.
- Charging takes approximately 6.5 hours for a full charge. The indicator light will turn off once charging is complete.
- The fan can be operated while it is charging.
Imej: A terperinci view of the USB-C charging port on the back of the fan, with the protective flap open.
Video: Shows the charging process, including plugging in the USB-C cable and the charging indicator light.
7. Penyelenggaraan
7.1 Cleaning the Fan Blades
Pembersihan berkala memastikan prestasi optimum dan memanjangkan jangka hayat kipas anda.
- Ensure the fan is turned off and unplugged from any power source before cleaning.
- To remove the front safety cage, gently twist it counter-clockwise until it unlocks and detaches.
- Wipe the fan blades with a dry or slightly damp cloth. The blades are not removable.
- The detached front grill can be washed under running water. Ensure it is completely dry before reattaching.
- To reattach the front grill, align the arrows and grooves, then twist clockwise until it clicks into place.

Image: A user removing the front grill of the fan to access the blades for cleaning.
8. Spesifikasi
| Ciri | Perincian |
|---|---|
| Jenama | Claymore |
| Nama Model | V600+ |
| warna | Kelabu Hangat |
| Sumber Kuasa | Battery Powered (7,800mAh Li-ion) |
| Jenis Pengecasan | USB Jenis-C |
| Masa Mengecas | lebih kurang 6.5 jam |
| Masa Larian (Maks) | Up to 32 hours (Ultra-Low speed) |
| Kelajuan Kipas | 4 peringkat |
| Aliran Udara Maks | 5.8 m/s |
| Tahap Kebisingan | Down to 15 Decibels |
| Sudut Boleh Laras | Senget Menegak 45° |
| Dimensions (with tripod) | 5.47"D x 7.08"W x 13.78"H |
| Berat Barang | 1.3 paun |
| Jenis Pemasangan | Pemasangan Tripod |
| Pengeluar | Prism Co., Ltd |
9. Penyelesaian masalah
| Masalah | Kemungkinan Punca | Penyelesaian |
|---|---|---|
| Kipas tidak dihidupkan. | Bateri habis. | Cas kipas menggunakan kabel USB-C yang disediakan. |
| Kipas tidak dicas. | Charging cable or adapter is faulty; port is obstructed. | Ensure the USB-C cable is securely connected. Try a different USB power adapter. Check the charging port for any debris. |
| Reduced airflow or unusual noise. | Fan blades or grill are dirty. | Refer to the "Maintenance" section to clean the fan blades and grill. |
10. Maklumat Keselamatan
- Do not immerse the fan in water or expose it to heavy rain.
- Jauhkan kipas daripada kanak-kanak dan haiwan peliharaan.
- Do not insert fingers or any objects into the fan grill while it is operating.
- Gunakan hanya kabel USB-C yang disediakan untuk mengecas.
- Do not attempt to disassemble or repair the fan yourself. Contact customer support for assistance.
- Avoid placing the fan near heat sources or in direct sunlight for extended periods.
11. Waranti dan Sokongan
For warranty information, product support, or service inquiries, please contact Claymore customer service or visit the official Claymore webtapak. Simpan resit pembelian anda sebagai bukti pembelian untuk tuntutan waranti.
Manufacturer: Prism Co., Ltd