
1. Pengenalan
Thank you for choosing the CREATE SILKAIR CONNECT 3-in-1 Mobile Air Conditioner. This versatile appliance is designed to provide cooling, dehumidification, and fan functions for your living space. With its Wi-Fi connectivity, you can conveniently control the unit via a mobile application. Please read this manual thoroughly before operation to ensure safe and efficient use.
model: 64274_145198
Jenama: CIPTA
2. Maklumat Keselamatan
Sentiasa ikuti langkah berjaga-jaga keselamatan asas apabila menggunakan peralatan elektrik untuk mengurangkan risiko kebakaran, renjatan elektrik dan kecederaan.
- Pastikan bekalan kuasa sepadan dengan voltage dinyatakan pada label penilaian.
- Jangan kendalikan unit dengan kord atau palam yang rosak.
- Jauhkan unit dari sumber haba dan cahaya matahari langsung.
- Jangan sekat saluran masuk atau alur keluar udara.
- Sentiasa cabut plag unit sebelum membersihkan atau menyelenggara.
- This appliance uses R290 refrigerant. Do not puncture the refrigerant circuit.
- Awasi kanak-kanak dan pastikan mereka tidak bermain dengan perkakas ini.
3. Kandungan Pakej
Carefully unpack your air conditioner and check that all items are present and in good condition.
- CREATE SILKAIR CONNECT Mobile Air Conditioner Unit
- Hos Ekzos
- Window Sealing Kit (Adjustable window slider, hose adapter)
- Alat Kawalan Jauh
- Manual Pengguna

Figure 1: The CREATE SILKAIR CONNECT Mobile Air Conditioner unit shown alongside a smartphone displaying its control application interface.
4. Produk Lebihview
4.1 Panel Kawalan

Figure 2: Close-up of the top-mounted control panel, featuring an LED display and touch-sensitive buttons for various functions such as power, mode selection, fan speed, and timer.
4.2 Komponen dan Dimensi
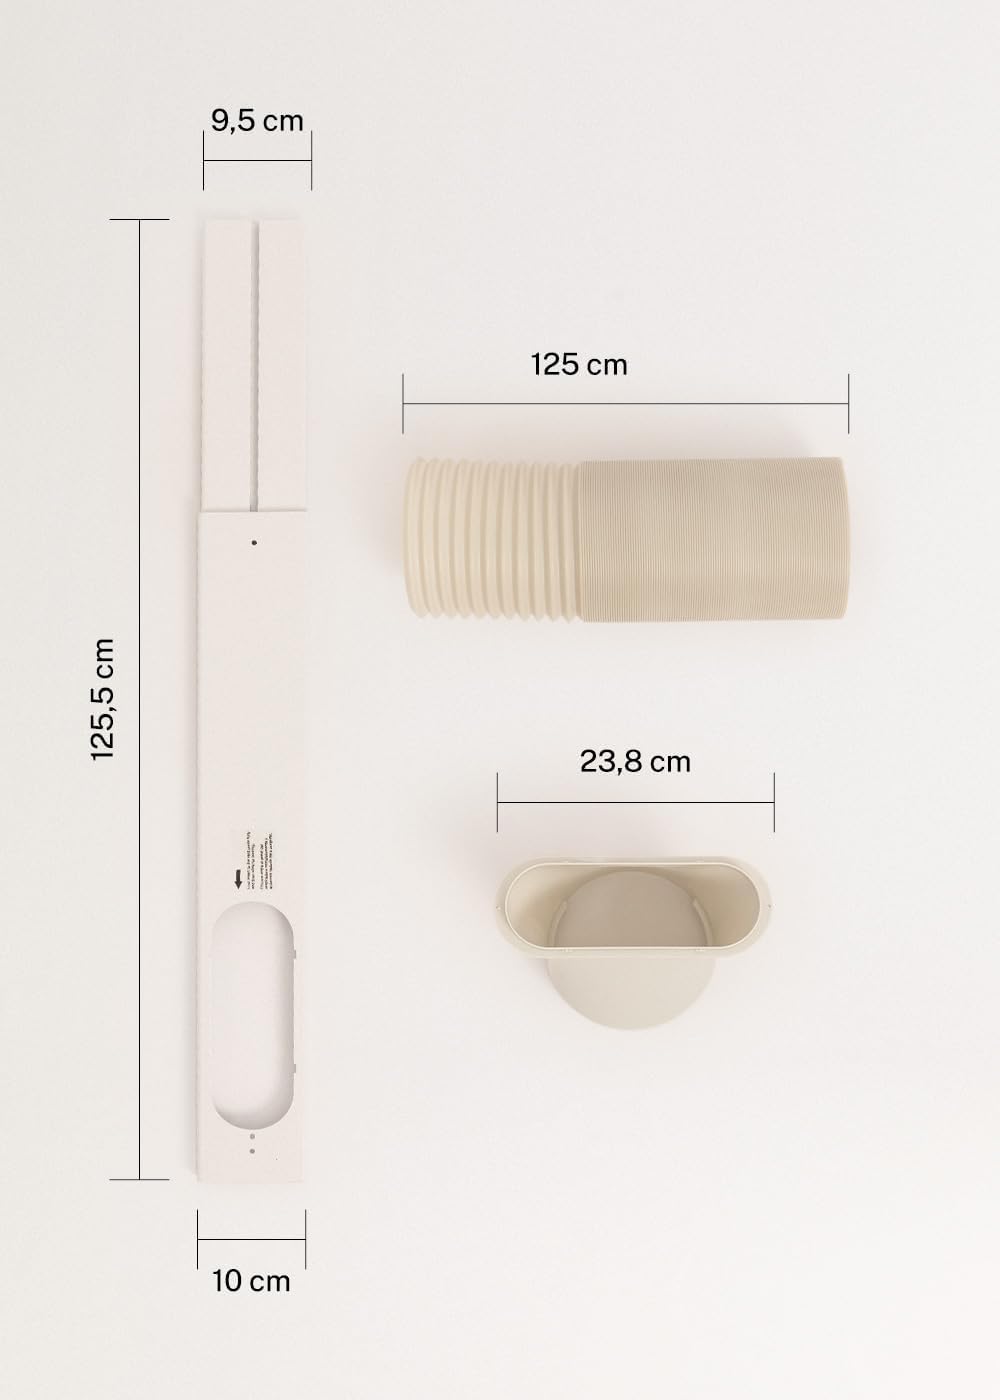
Figure 3: Detailed diagram illustrating the dimensions of the window sealing plate (125.5 cm length, 10 cm width, 9.5 cm adjustable width) and the exhaust hose (125 cm length) with its adapter (23.8 cm diameter).
5. Persediaan dan Pemasangan
Proper installation is crucial for the efficient operation of your mobile air conditioner.
5.1 Kedudukan Unit
- Letakkan unit di permukaan yang rata dan stabil.
- Ensure there is at least 30 cm of space around the unit for proper airflow.
- Letakkan unit berhampiran tingkap atau bukaan untuk hos ekzos.
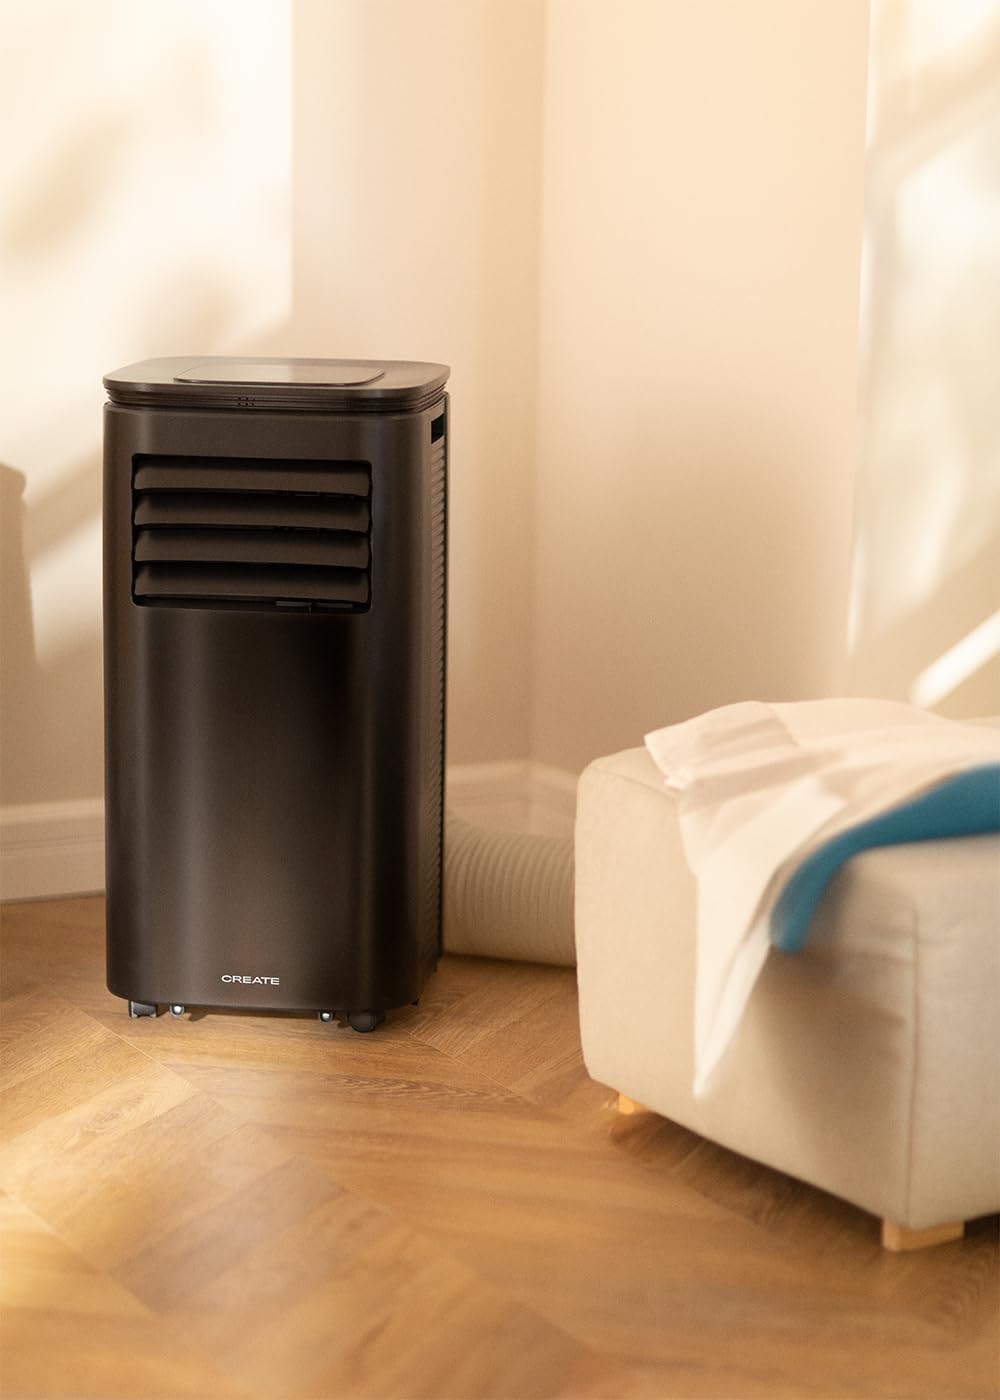
Figure 4: The air conditioner unit positioned in a room, demonstrating the typical setup with the exhaust hose directed towards a window for heat expulsion.
5.2 Installing the Exhaust Hose and Window Kit
- Attach the hose adapter to one end of the exhaust hose.
- Sambungkan hujung hos ekzos yang satu lagi ke saluran keluar udara di bahagian belakang unit.
- Install the adjustable window sealing kit in your window opening. Extend it to fit the window frame.
- Insert the hose adapter into the opening of the window sealing kit.

Figure 5: Illustrates the secure connection of the flexible exhaust hose to the designated port at the rear of the air conditioning unit.
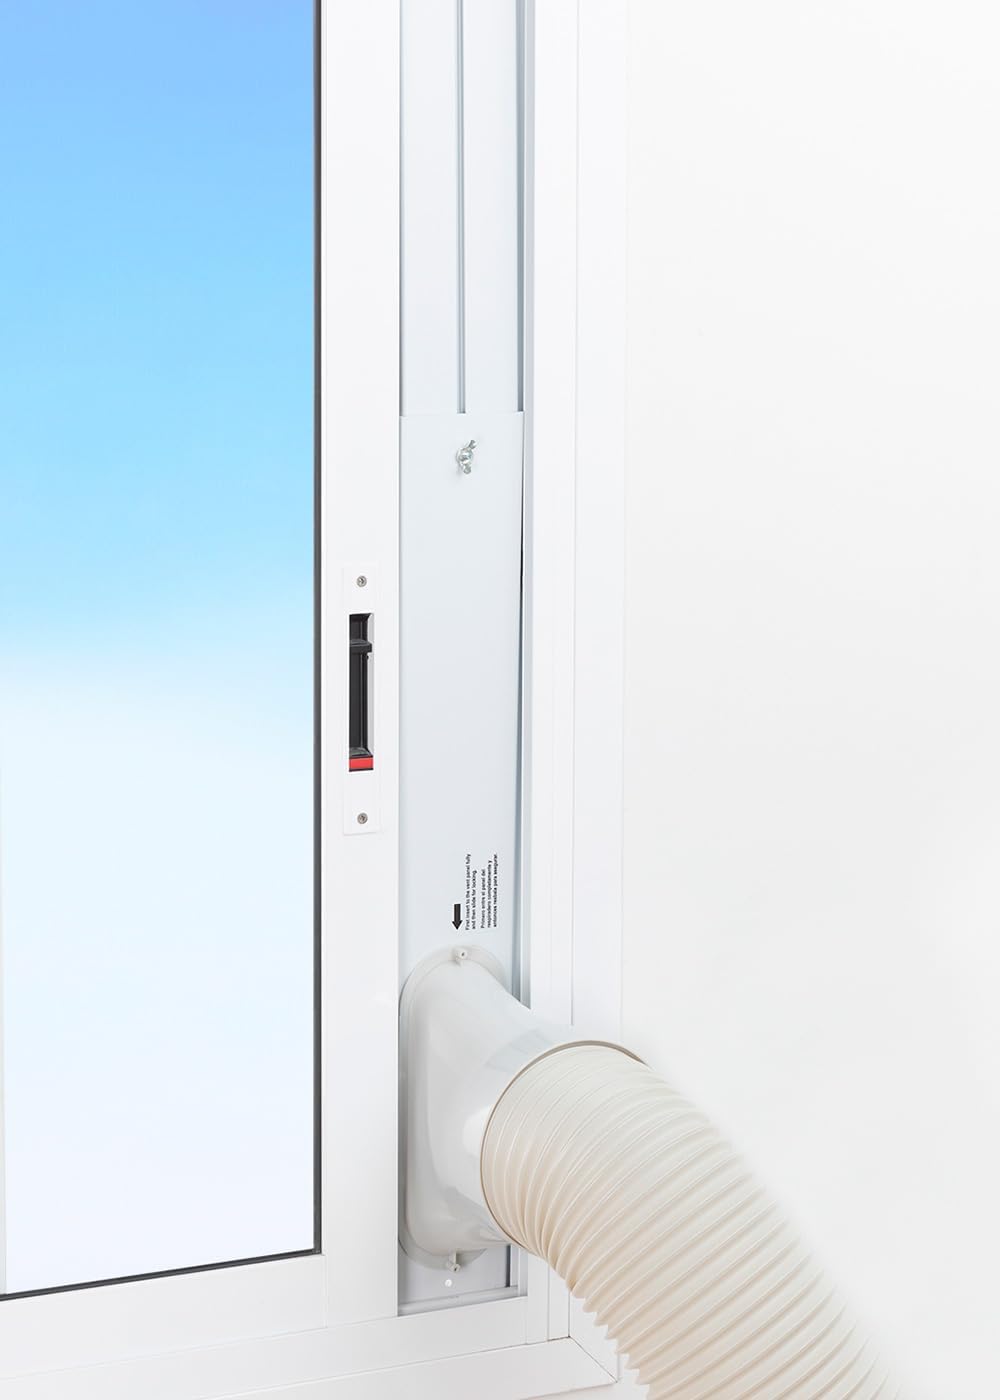
Figure 6: The window sealing kit is shown properly installed in a window frame, with the exhaust hose securely fitted into the kit's opening to vent hot air outside.
6. Arahan Operasi
6.1 Menggunakan Panel Kawalan
The control panel on top of the unit allows direct operation.
- Butang Kuasa: Tekan untuk menghidupkan atau MATI unit.
- Butang Mod: Cycle through Cooling, Fan, and Dehumidifier modes.
- Butang Kelajuan Kipas: Adjust fan speed (Low, High).
- Butang Suhu (+/-): Adjust desired temperature in Cooling mode.
- Butang Pemasa: Set the auto-on or auto-off timer (up to 24 hours).
- Butang Mod Tidur: Activates a quieter operation mode for nighttime use.
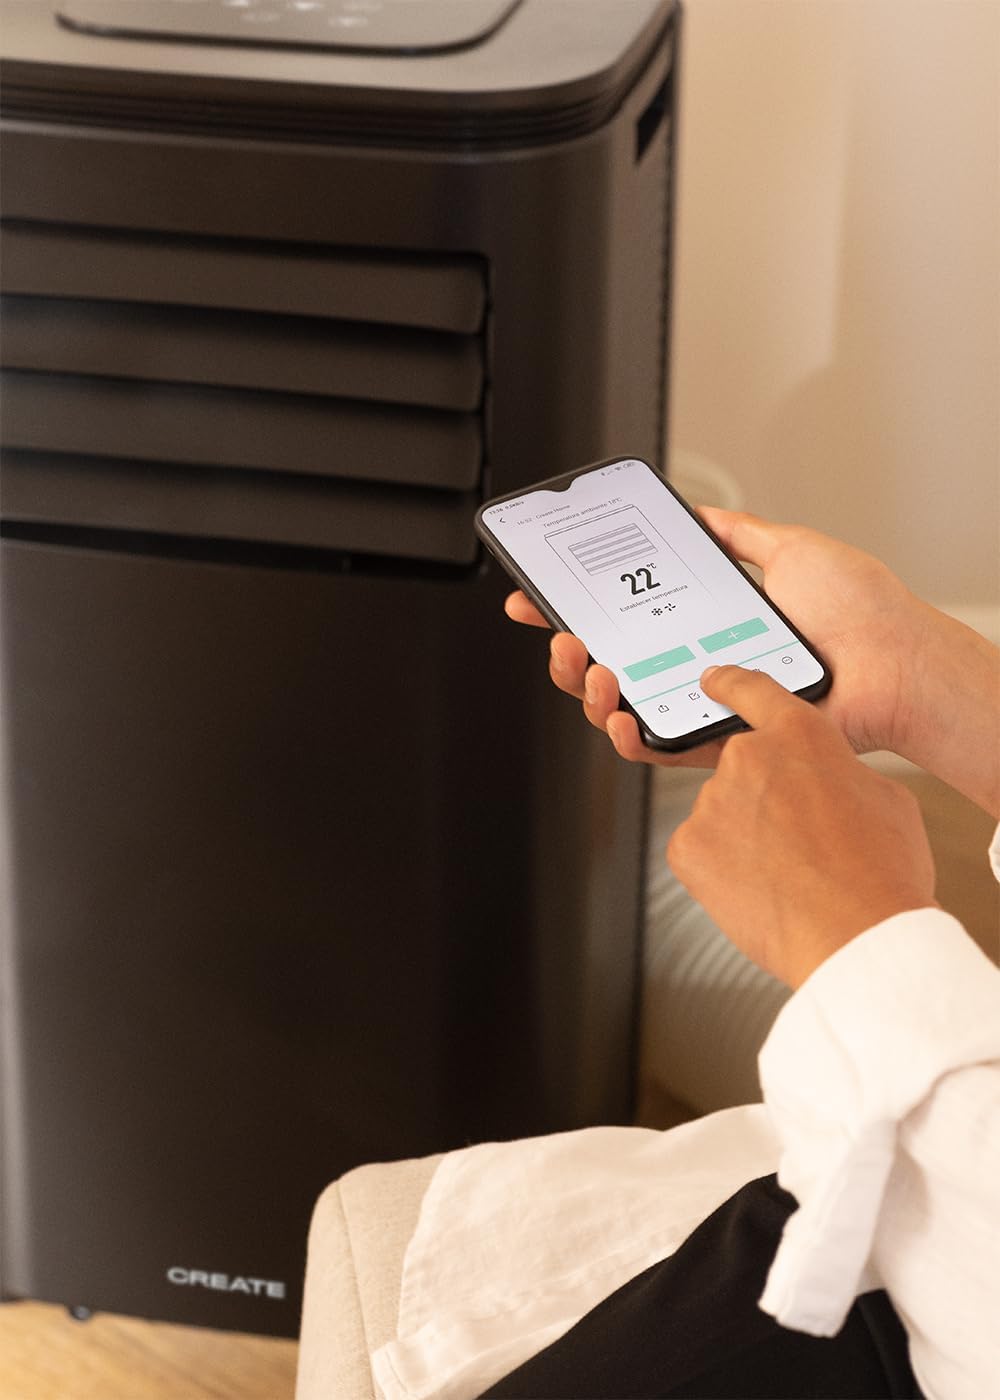
Figure 7: A user's hand interacting with the touch-sensitive control panel located on the top surface of the air conditioner, demonstrating direct manual operation.
6.2 Menggunakan Alat Kawalan Jauh
The remote control provides convenient operation from a distance.

Figure 8: A hand holding the dedicated remote control for the air conditioner, illustrating its use for convenient operation from a distance.
6.3 Kawalan Wi-Fi dan Aplikasi
Download the CREATE Home app from your smartphone's app store. Follow the in-app instructions to connect your air conditioner to your home Wi-Fi network. Once connected, you can control all functions of the unit from your smartphone, including mode selection, temperature adjustment, fan speed, and timer settings.
Figure 9: A user interacting with the mobile application on a smartphone to remotely control the air conditioner, showcasing the Wi-Fi connectivity feature.
7. Penyelenggaraan
Penyelenggaraan tetap memastikan prestasi optimum dan memanjangkan jangka hayat unit anda.
7.1 Membersihkan Penapis Udara
Penapis udara hendaklah dibersihkan setiap dua minggu atau lebih kerap bergantung pada penggunaan dan kualiti udara.
- Matikan unit dan cabut palamnya daripada salur keluar kuasa.
- Locate the air filter panel on the back of the unit.
- Keluarkan penapis perlahan-lahan.
- Clean the filter with warm, soapy water or a vacuum cleaner. Rinse thoroughly and allow it to air dry completely before reinserting.

Figure 10: Demonstrates the process of removing the air filter from the rear of the air conditioner unit for cleaning or replacement.
7.2 Menyalirkan Air
In Dehumidifier mode or high humidity conditions, the internal water tank may fill up. The unit will stop operating when the tank is full. Drain the water from the drainage port at the bottom rear of the unit.
8. Penyelesaian masalah
| Masalah | Kemungkinan Punca | Penyelesaian |
|---|---|---|
| Unit tidak dihidupkan | No power; Power cord not plugged in; Water tank full. | Periksa soket kuasa; Pasangkan kord kuasa; Toskan tangki air. |
| Unit tidak menyejukkan dengan berkesan | Air filter dirty; Exhaust hose not properly installed; Room too large; Doors/windows open. | Clean air filter; Ensure hose is sealed; Use in recommended room size (14-25 m²); Close doors/windows. |
| Bunyi bising | Unit bukan pada permukaan rata; Halangan dalam kipas. | Place on flat surface; Check for obstructions. |
| Isu sambungan Wi-Fi | Kata laluan Wi-Fi salah; Penghala terlalu jauh; Isu aplikasi. | Sahkan kata laluan; Alihkan unit lebih dekat ke penghala; Mulakan semula aplikasi/unit. |
9. Spesifikasi
| Ciri | Spesifikasi |
|---|---|
| Nombor Model | 64274_145198 |
| Kapasiti Penyejukan | 9000 BTU / 2270 Watt |
| Kapasiti Dehumidifikasi | 24 Liter/Hari |
| Aliran udara | Sehingga 350 m³/j |
| Saiz Bilik yang Disyorkan | 14-25 m² |
| Tahap Kebisingan | 65 dB |
| Bahan penyejuk | R290 (ECO-friendly) |
| Voltage | 240 Volt |
| Wattage | 2600 Watt |
| Dimensi (L x W x H) | 35.5 x 36.5 x 71.3 cm |
| bahan | ABS |
| Kelas Kecekapan Tenaga | A |

Figure 11: The energy efficiency label for the CREATE SILKAIR CONNECT, indicating an A-class energy rating, 2.6 kW cooling capacity, and a noise level of 65 dB. More details can be found at eprel.ec.europa.eu/qr/1580267.
10. Waranti dan Sokongan
For warranty information and technical support, please refer to the warranty card included with your product or visit the official CREATE webtapak. Simpan resit pembelian anda sebagai bukti pembelian.
Pengeluar: CIPTA
Hubungi: Refer to CREATE's official support channels.