1. Pengenalan
Haloview RD7 Wireless Long Range Backup Camera System is designed to provide a clear 720P HD image of the area behind your vehicle, enhancing safety during driving and parking. This system is suitable for a wide range of long-length vehicles, including RVs, Fifth Wheels, Travel Trailers, Motorhomes, Campers, and Buses. It features a 7-inch LCD digital monitor with a built-in recorder for real-time recording and video playback. The system utilizes integrated Frequency Hopping Technology to prevent interference, ensuring a stable signal without dropping or freezing at speeds up to 70mph. It supports 10-32V wide voltage input and up to 4 wireless camera inputs with a 130° wide viewing angle. An external range extender is included to boost signal range up to 1200 feet, overcoming obstacles for enhanced connectivity.
2. Apa yang ada di dalam Kotak
Haloview RD7 system comes with all necessary components for installation and operation:
- 7" LCD Digital Monitor
- Wireless Camera (130° wide viewing angle, IP69K waterproof)
- TX-BOX (Wireless Transmitter/Range Extender)
- Kabel 12M
- Penyesuai Daya Rokok Ringan
- Pendakap Lekap Tengah
- Adjustable Wiring Fixture
- BMW Connector Adapter
- Kabel 0.3M
- Power cables and various adapters for different power connections.

3. Persediaan dan Pemasangan
Haloview RD7 system offers flexible installation options, including hardwiring or using a portable battery pack. The camera and TX-BOX can be powered via DC10-32V. For long vehicles, the TX-BOX acts as a repeater to ensure strong signal strength.
3.1 Powering the System
The camera and TX-BOX can be powered in two main configurations:
- Power supplied next to TX-BOX: The power source connects directly to the TX-BOX, which then powers the camera via a cable.
- Power supplied next to camera: The power source connects directly to the camera, and a cable runs from the camera to the TX-BOX.

3.2 Camera and TX-BOX Placement
For optimal long-range performance, position the camera at the rear of your vehicle and the TX-BOX closer to the front, typically above the front cap of a motorhome or near the towing vehicle.

3.3 Pemasangan Monitor
The 7-inch monitor can be mounted on the dashboard using the provided mounting bracket. The bracket includes a flat, two-sided tape option for secure attachment without drilling. The monitor's mount is adjustable, allowing you to set the desired viewsudut ing.
4. Arahan Operasi
Haloview RD7 monitor features an intuitive menu system for easy operation:
- Kelantangan: Adjust the audio from the camera's built-in microphone.
- gambar: Adjust brightness, contrast, and color settings.
- Cermin: Balikkan kamera view horizontally to match your preference (e.g., for rearview mirror functionality).
- Mod Q: Split the screen to view multiple cameras simultaneously (supports up to 4 cameras).
- tetapan: Access time, date, camera selection, video format (PAL/NTSC), and auto-dimming options.
- Autoscan: Scan for available cameras.
- Park-Line: Turn parking lines on/off or adjust their position.
- Rekod: Rakam footage to an SD card (not included).
- Main: Main semula video yang dirakam.
- Berpasangan: Initiate the pairing process between the monitor and camera/TX-BOX.
5. Spesifikasi
| Ciri | Spesifikasi |
|---|---|
| Jenama | Haloview |
| Saiz Skrin | 7 Inci |
| Peranti Serasi | Pantau |
| Jenis Pemasangan | Pemasangan Papan Pemuka, Pemasangan Permukaan |
| Voltage | 10-32 Volt |
| Teknologi Penderia Optik | CMOS |
| Jenis Kanta | lebar Viewsudut |
| Sudut Sebenar daripada View | 130 Darjah |
| Jenis Penyambung | Tanpa wayar |
| Teknologi Paparan | LCD |
| Resolusi Tangkapan Video | 720p |
| Penilaian Kalis Air | IP69K |
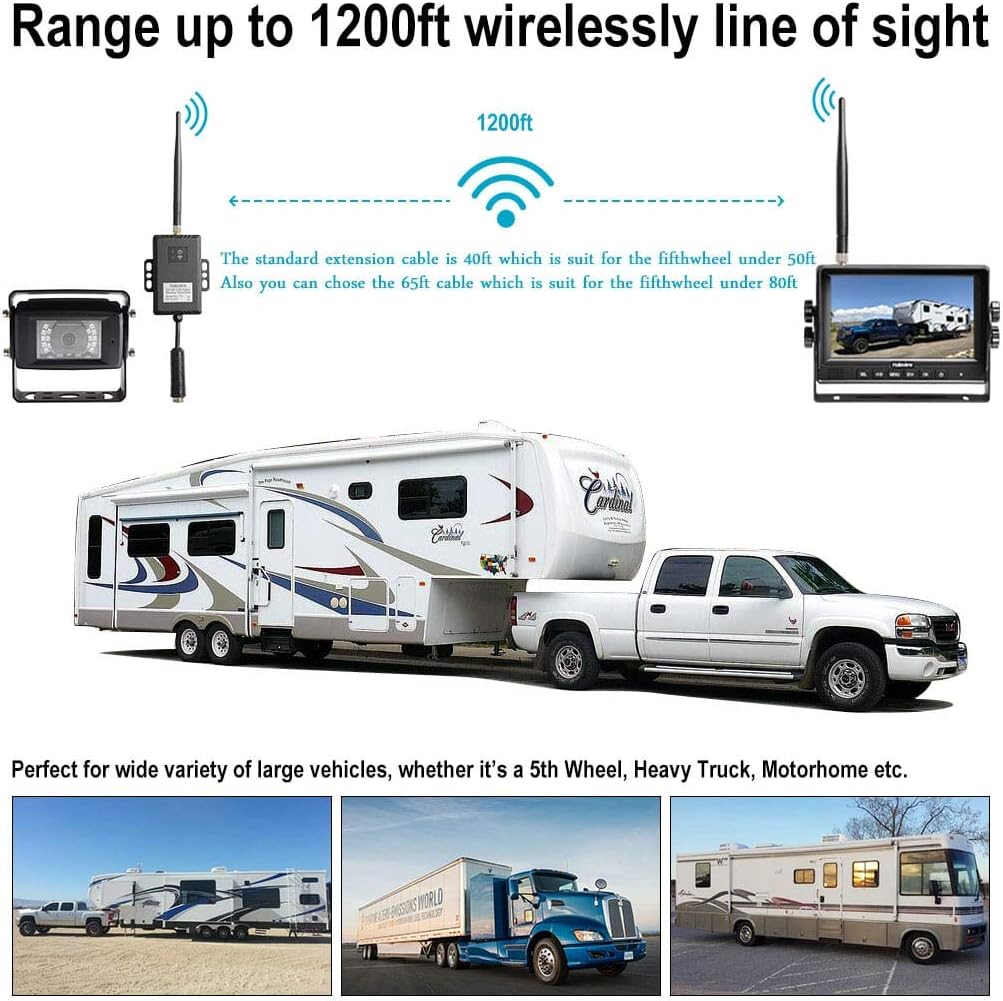
| Wireless Range (Line of Sight) | Sehingga 1200 kaki |
6. Penyelesaian masalah
- No Signal/Intermittent Signal: Ensure the camera and TX-BOX are properly powered and paired. Check for obstructions between the camera, TX-BOX, and monitor. The external range extender (TX-BOX) is designed to improve signal over long distances.
- Penglihatan Malam yang lemah: Verify that the camera's night vision feature is active. External light sources (like headlights from other vehicles) can sometimes interfere with night vision clarity.
- Isu Kuasa: Confirm that the power source (DC10-32V) is providing adequate and consistent voltage. For newer trucks with LED lights, an adapter might be necessary if the 12V signal is not constant.
- Camera Failure: If the camera fails, check all connections and power supply. Contact customer support if the issue persists.
7. Waranti dan Sokongan
Haloview RD7 Wireless Long Range Backup Camera System is covered by the manufacturer's warranty. For specific warranty details, product support, or technical assistance, please refer to the official Haloview webtapak atau hubungi perkhidmatan pelanggan mereka secara langsung. Simpan resit pembelian anda untuk tuntutan waranti.