
pengenalan
This manual provides detailed instructions for the installation, operation, and maintenance of your Lanzar VIBE432.5 4-Channel Car Amppenghawa dingin. Sila baca manual ini dengan teliti sebelum cuba memasang atau mengendalikannya bagi memastikan penggunaan yang betul dan untuk mengelakkan kerosakan pada unit atau sistem audio kenderaan anda.
The Lanzar VIBE Series MOSFET amplifiers are designed to deliver high-quality audio performance. These amplifiers provide the necessary power and clarity for an enhanced car audio experience, focusing on rich bass production and overall sound quality.
Ciri-ciri Produk
- Teknologi Lanjutan: Incorporates DC to DC switching power supplies for dynamic range and peak performance.
- Reka Bentuk Pintar: Features Power and Protection LED indicators, soft turn-on/off circuitry, and advanced protection mechanisms.
- Sound Specialization: Equipped with silver RCA connectors and speaker screw-down terminals for secure, distortion-free audio connections.
- RCA Line-Out Jacks: Allows for building multi-amplifier systems by distributing the signal without external splitter cords.
- Audio Evolution: Regulated MOSFET Pulse Width Modulated (PWM) power supply maintains rated power across varying battery voltages, ensuring excellent frequency response.
- Bahan: Constructed with durable Aluminum.
Apa yang ada dalam Kotak
Selepas membongkar, sila sahkan bahawa semua item yang disenaraikan di bawah ada dan dalam keadaan baik.

Image: Contents of the Lanzar VIBE432.5 package, including the amplifier, remote subwoofer level control, and connection cable.
- Lanzar VIBE432.5 4-Channel Car Amplebih hidup
- Kawalan Tahap Subwoofer Jauh
- Connection Cable for Remote Control
- Memasang Perkakasan (skru, dsb.)
Persediaan dan Pemasangan
Proper installation is critical for optimal performance and safety. If you are unsure about any part of the installation process, it is recommended to seek professional assistance.
1. Lokasi Pemasangan
Choose a mounting location that is dry, well-ventilated, and away from direct sunlight or heat sources. Ensure sufficient space around the amplifier for proper air circulation. Avoid mounting on carpet or other materials that could obstruct airflow.
2. Sambungan Kuasa
Sebelum membuat sebarang sambungan, putuskan sambungan terminal negatif bateri kenderaan untuk mengelakkan pintasan elektrik.
- +12V (Kuasa): Connect a heavy-gauge wire (e.g., 8-gauge or larger, depending on power requirements) directly from the positive terminal of the car battery to the +12V terminal on the amplifier. Install an in-line fuse holder with an appropriate fuse (e.g., 30A x 2, as indicated by the amplifier's fuses) within 18 inches of the battery.
- GND (Tanah): Connect a heavy-gauge wire from the GND terminal on the amppenyala pada permukaan logam yang bersih dan tidak dicat pada casis kenderaan. Pastikan sambungan yang kukuh dan berrintangan rendah.
- REM (Penghidupan Jauh): Connect a smaller gauge wire from the REM terminal on the amplifier to the remote turn-on output of your car stereo or head unit. This wire signals the amplifier to turn on when the stereo is activated.
3. Sambungan Input Audio
Connect the RCA output cables from your car stereo system to the "Line Input" RCA jacks on the amplifier. The VIBE432.5 is a 4-channel amplifier, allowing for front and rear speaker inputs.

Image: Diagram showing RCA Line Input and Line Out connections, Level controls, Bass Boost, Mode switches, and Remote Subwoofer Control port on the amppanel hadapan lifier.
4. Sambungan Output Pembesar Suara
Sambungkan pembesar suara anda ke amplifier's speaker terminals. Observe correct polarity (+ to + and - to -) for each speaker. The VIBE432.5 supports 4-channel operation or can be bridged for 2-channel operation (e.g., for subwoofers).

Image: Diagram illustrating the speaker output terminals (CH1, CH2, CH3, CH4), bridged mode connections, and power/ground/remote terminals on the amppanel belakang liifier.
- Mod 4 Saluran: Connect one speaker to each channel (CH1, CH2, CH3, CH4).
- Mod Jambatan: For higher power output to fewer speakers (e.g., subwoofers), connect speakers across designated bridged terminals (e.g., CH1+CH2 for one speaker, CH3+CH4 for another). Refer to the diagram for specific bridged connections.
5. Remote Subwoofer Bass Control
Connect the provided remote subwoofer level control to the "Remote" port on the amplifier using the supplied cable. Mount the control in an accessible location for easy adjustment of subwoofer bass levels.

Imej: Jarak dekat view of the remote subwoofer level control unit, showing the level knob and the RJ-style connector port.
6. Pemeriksaan Akhir
Once all connections are made, double-check all wiring for correct polarity, secure connections, and proper insulation to prevent shorts. Reconnect the vehicle's negative battery terminal.
Arahan Operasi
After successful installation, follow these steps to operate your amplebih hidup:
- Hidupkan kuasa: Turn on your car stereo. The amplifier's "PWR" (Power) LED indicator should illuminate, indicating it is receiving power and is operational. If the "PROT" (Protection) LED illuminates, refer to the Troubleshooting section.
- Level Control (Gain): Adjust the "Level" (gain) control for each channel (CH1/CH2 and CH3/CH4) to match the output voltage of your car stereo. Start with the level at minimum and slowly increase it until you achieve a clear, undistorted sound at your desired maximum volume from the stereo. Avoid setting the gain too high, as this can introduce distortion.
- Mode Switch (Crossover):
- penuh: Full range audio output.
- Lulus Tinggi: Allows frequencies above the set crossover point (40Hz-3kHz) to pass, typically used for full-range speakers or tweeters.
- PAS Rendah: Allows frequencies below the set crossover point (40Hz-3kHz) to pass, typically used for subwoofers.
- Peningkatan Bass: Use the "Bass Boost" switch to apply a low-frequency boost if desired. Use this feature sparingly to avoid distortion or damage to speakers.
- Remote Subwoofer Bass Control: If connected, use the remote control knob to adjust the subwoofer's bass level conveniently from the driver's seat.
Penyelenggaraan
To ensure the longevity and optimal performance of your Lanzar VIBE432.5 amplifier, ikuti garis panduan penyelenggaraan mudah ini:
- Pembersihan: Lap secara berkala ampLap bahagian luar penapis dengan kain yang lembut dan kering. Jangan gunakan bahan kimia yang keras atau pembersih yang kasar.
- Pengudaraan: Memastikan bahawa ampSirip penyejuk pemanas bebas daripada habuk dan serpihan. Aliran udara yang baik adalah penting untuk mengelakkan terlalu panas.
- Sambungan: Occasionally check all power, ground, remote, RCA, and speaker connections to ensure they are secure and free from corrosion. Loose connections can lead to poor performance or damage.
- Sekering: The amplifier is equipped with replaceable fuses (30A x 2). If a fuse blows, replace it only with a fuse of the same type and rating. Never use a higher-rated fuse, as this can cause severe damage to the ampkuasa atau sistem elektrik kenderaan.
Menyelesaikan masalah
Jika anda mengalami masalah dengan anda amplifier, rujuk panduan penyelesaian masalah berikut sebelum menghubungi sokongan.
Tiada Kuasa / LED Kuasa Mati
- Check the +12V power wire connection at the battery and amplebih hidup.
- Sahkan fius sebaris berhampiran bateri dan fius pada amplifier. Replace if blown.
- Ensure the ground wire connection is secure and making good contact with the chassis.
- Check the remote turn-on (REM) wire connection at both the stereo and amplifier. Ensure the stereo is turned on.
Protection LED On (PROT)
- Terlalu panas: The amplifier may be overheating. Ensure adequate ventilation around the amplifier. Allow it to cool down.
- Speaker Short Circuit: Check speaker wiring for any shorts (e.g., bare wires touching each other or the vehicle chassis). Ensure speaker impedance matches the ampspesifikasi liifier.
- Vol. Rendahtage: Periksa volum bateri kenderaantage.
Tiada Keluaran Bunyi
- Sahkan amppenghidup dihidupkan (LED Kuasa menyala).
- Check RCA input cables from the stereo to the amplebih hidup.
- Sahkan sambungan wayar pembesar suara pada kedua-dua amppembesar dan pembesar suara.
- Ensure the stereo's volume is up and not muted.
- Laraskan amplifier's "Level" (gain) controls.
Bunyi Herot
- Kurangkan amplifier's "Level" (gain) control.
- Check for proper crossover settings (High Pass/Low Pass).
- Ensure speaker impedance is compatible.
- Check for damaged speakers or wiring.
Spesifikasi
The following are the technical specifications for the Lanzar VIBE432.5 4-Channel Car Amplebih hidup:
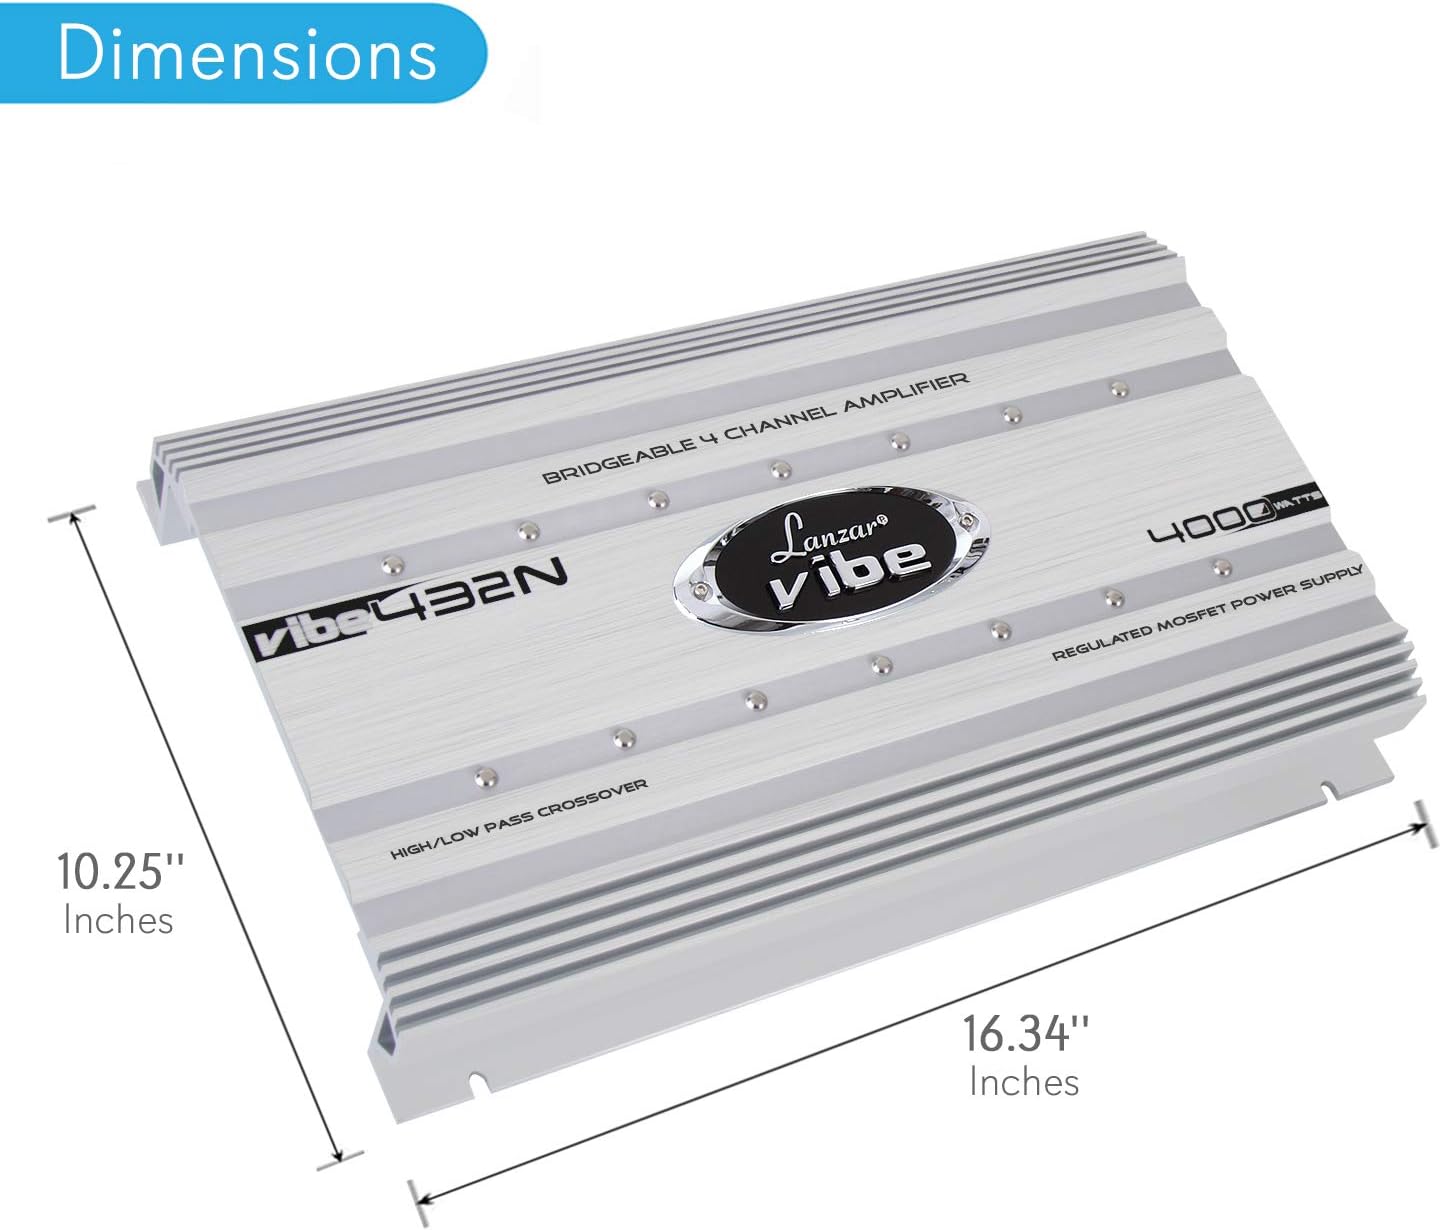
Image: Dimensions of the Lanzar VIBE432.5 amplifier, showing a length of 16.34 inches and a width of 10.25 inches.
| Ciri | Spesifikasi |
|---|---|
| Model | VIBE432.5 |
| Bilangan Saluran | 4 |
| Kuasa Keluaran | 500 Watt (Note: Product title mentions 4000-Watt, but specifications list 500 Watts. Refer to product packaging for exact RMS/Peak power ratings.) |
| Voltage | 16 Volt (Voltage Julat) |
| Jenis Bahan | aluminium |
| Jenis Pemasangan | Lekapan Permukaan |
| Spesifikasi Met | Less Than 1% THD, 95 dB S/N Ratio, >75 dB Crosstalk |
| Frequency Response (Remote Bass Control) | 10 Hz - 40 KHz |
| Dimensi (Anggaran) | 16.34 inci (Panjang) x 10.25 inci (Lebar) |
Note: Specifications are subject to change without notice. Please refer to the product packaging for the most accurate and up-to-date information.
Waranti dan Sokongan
Lanzar products are designed for reliability and performance. For warranty information, technical support, or service inquiries, please refer to the warranty card included with your product or visit the official Lanzar webtapak. Simpan resit pembelian anda sebagai bukti pembelian untuk tuntutan waranti.
For further assistance, please contact Lanzar customer support.