Produk Selesaiview
The TOPVISION TOP402 security camera system is a comprehensive surveillance solution designed for both indoor and outdoor monitoring. This kit includes a 4-channel Digital Video Recorder (DVR) and two 1080p lite bullet cameras, providing clear video capture and reliable performance.
Ciri-ciri Utama:
- Two 1080p 2MP Cameras: Plastic bullet cameras with 2.8mm lenses, suitable for indoor/outdoor use, equipped with infrared LEDs for night vision.
- 4-Channel 1080p Lite DVR: One digital video recorder supporting 4 video channels plus 1 IP channel.
- Storan Boleh Dikembangkan: DVR supports up to an 8TB hard drive (HDD not included). A WD Purple hard drive is recommended for recording.
- Plug-and-Play Cables: Two 18-meter pre-terminated cables with BNC connectors for easy installation.
- Aksesori Lengkap: Includes power adapters, power splitters, and a USB mouse.
- Versatile Video Output: Supports simultaneous HDMI and VGA video output (cables not included).

Image: The TOPVISION TOP402 kit, showing the 4-channel DVR unit and two 1080p bullet-style security cameras.
Kandungan Pakej
Sila sahkan bahawa semua item yang disenaraikan di bawah disertakan dalam pakej anda. Jika ada item yang hilang atau rosak, hubungi sokongan pelanggan.
- 1 x TOPVISION 4-Channel 1080p Lite DVR (Model: XDVR-1004)
- 2 x TOPVISION 1080p 2MP Bullet Cameras
- 2 x 18-meter BNC Video/Power Cables
- 1 x Power Adapter for DVR
- 1 x Power Adapter for Cameras
- 1 x 1-to-2 Power Splitter Cable for Cameras
- 1 x Tetikus USB
- 1 x Manual Pengguna (dokumen ini)

Image: All components of the TOPVISION TOP402 security system, including the DVR, two cameras, cables, power supplies, and a mouse.
Maklumat Keselamatan
Please read and follow these safety guidelines to prevent damage to the product and ensure user safety.
- Use only the power adapters provided with the system.
- Ensure proper ventilation for the DVR to prevent overheating.
- Do not expose the DVR or cameras to extreme temperatures, humidity, or direct water.
- Avoid placing the DVR near strong magnetic fields or sources of electrical interference.
- Installation should be performed by qualified personnel if you are unsure about any steps.
- Putuskan sambungan kuasa sebelum melakukan sebarang prosedur penyelenggaraan atau pemasangan.
Panduan Persediaan
1. Membongkar dan Penyediaan
- Keluarkan semua komponen dari pembungkusan dengan berhati-hati.
- Inspect all items for any signs of damage.
- Choose a suitable location for the DVR, ensuring it is dry, well-ventilated, and away from direct sunlight.
- Plan the camera placement to cover desired areas, considering cable length and power access.
2. Sambungan DVR
Connect the necessary peripherals to the DVR before powering it on.
- Sambungan Monitor: Connect a monitor to the DVR's HDMI or VGA port using a compatible cable (not included).
- Mouse Connection: Palamkan tetikus USB yang disertakan ke dalam salah satu port USB pada DVR.
- Sambungan Rangkaian (Pilihan): Untuk jarak jauh viewUntuk menggunakannya, sambungkan kabel Ethernet daripada port LAN DVR ke penghala anda.
- Pemasangan Pemacu Keras (Pilihan): If you plan to record video, install a compatible 3.5-inch SATA hard drive (up to 8TB, WD Purple recommended) inside the DVR. Refer to the separate HDD installation guide if provided, or consult online resources.

Image: The DVR unit, showing the front panel and the rear panel with various ports including BNC video inputs, audio inputs/outputs, HDMI, VGA, LAN, and USB ports.
3. Pemasangan Kamera
Mount the cameras in desired locations and connect them to the DVR.
- Pemasangan: Use screws and anchors (not included) to securely mount the cameras to a wall or ceiling. Adjust the camera angle as needed.
- Sambungan Kabel: Connect one end of the 18-meter BNC cable to the camera's video and power ports.
- DVR Connection: Connect the other end of the BNC cable's video connector to an available BNC input port on the DVR (e.g., Video In 1, Video In 2).
- Sambungan Kuasa: Connect the power end of the BNC cable to the 1-to-2 power splitter, then connect the splitter to the camera power adapter.

Image: Two TOPVISION 1080p bullet cameras, highlighting their night vision capability and compatibility with mobile viewaplikasi.
4. Kuasa Awal Hidup
- Once all connections are secure, plug the DVR power adapter into an electrical outlet.
- Plug the camera power adapter into an electrical outlet.
- The DVR will power on automatically. Follow the on-screen instructions for initial setup, which may include setting the language, date/time, and creating a password.
Arahan Operasi
1. Basic DVR Operation
- Langsung View: After booting, the DVR will display the live feed from all connected cameras on the monitor.
- Navigasi Menu: Use the USB mouse to navigate the DVR's on-screen menu. Right-click to access the main menu.
- Tetapan Sistem: Access the 'System' or 'Configuration' menu to adjust video settings, network settings, user accounts, and other system parameters.
2. Jauh Viewdalam Persediaan
Kepada view your cameras remotely on a smartphone or tablet, follow these general steps:
- Connect DVR to Network: Ensure the DVR is connected to your router via an Ethernet cable.
- Muat turun Aplikasi: Cari untuk the official TOPVISION security app (often named 'XMeye' or similar for generic DVRs) on your smartphone's app store (iOS or Android).
- Daftar Akaun: Buat akaun dalam apl.
- Tambah Peranti: Use the app to scan the QR code displayed on the DVR's monitor (usually found in the 'Network' or 'P2P' settings) or manually enter the DVR's serial number to add it to your account.
- Langsung View: Setelah ditambah, anda sepatutnya boleh view your camera feeds remotely.
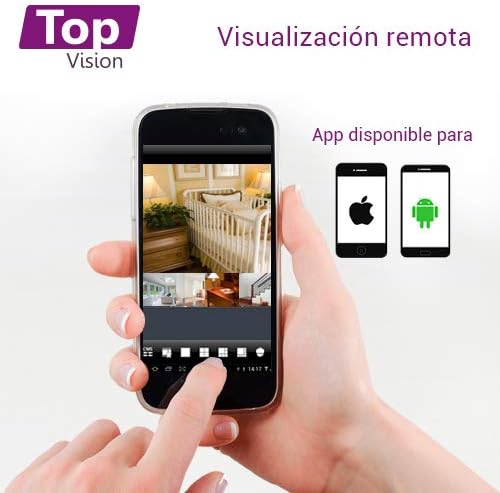
Image: A smartphone screen showing multiple live camera feeds, demonstrating the remote viewing capability of the security system.
3. Rakaman dan Main semula
- Tetapan Rakaman: Access the 'Record' menu on the DVR to configure recording schedules, motion detection recording, and continuous recording options.
- Main balik: Daripada menu utama, pilih 'Main Semula' untukview dirakam footage. You can search by date, time, and event type.
- sandaran: Connect a USB flash drive to the DVR's USB port to back up recorded video files.
Penyelenggaraan
Penyelenggaraan tetap memastikan prestasi optimum dan jangka hayat sistem keselamatan anda.
- Pembersihan: Periodically clean the camera lenses with a soft, dry cloth to remove dust and smudges. Clean the DVR exterior with a soft, damp kain. Jangan gunakan bahan kimia yang keras.
- Kemas kini Firmware: Semak pengeluar website for available firmware updates for your DVR. Firmware updates can improve performance, add features, and fix bugs. Follow update instructions carefully.
- Kesihatan Cakera Keras: If a hard drive is installed, regularly check its health status through the DVR's system settings. Back up important footage secara berkala.
- Pemeriksaan Kabel: Periodically inspect all cables for wear, damage, or loose connections.
Menyelesaikan masalah
This section addresses common issues you might encounter with your TOPVISION TOP402 system.
| Masalah | Kemungkinan Punca | Penyelesaian |
|---|---|---|
| Tiada paparan video pada monitor | Kabel video longgar, input yang dipilih pada monitor salah, DVR tidak dihidupkan. | Check HDMI/VGA cable connections. Ensure monitor is on correct input. Verify DVR power. |
| Kamera tidak memaparkan video | Loose BNC cable, camera not receiving power, faulty camera/cable. | Check BNC video and power connections for the specific camera. Ensure power adapter and splitter are working. Test with a different cable or camera if possible. |
| Tiada alat kawalan jauh viewing | DVR not connected to network, incorrect network settings, app not configured correctly. | Verify Ethernet cable connection to router. Check DVR network settings (DHCP enabled). Ensure correct device ID/QR code is added to the mobile app. |
| Tiada rakaman | No hard drive installed, hard drive full, recording schedule not set. | Install a compatible hard drive. Check HDD status in DVR settings. Configure recording schedules. |
| Penglihatan malam tidak berfungsi | IR LEDs blocked, insufficient power to camera. | Ensure nothing is obstructing the camera's IR LEDs. Verify camera power supply. |
Spesifikasi
| Ciri | Spesifikasi |
|---|---|
| Nombor Model | TOP402 |
| Jenama | TOPVISION |
| DVR Channels | 4 Video Channels + 1 IP Channel |
| Resolusi Tangkapan Video | 1080p Lite |
| Resolusi Kamera | 2 Megapiksel (1080p) |
| Lensa Kamera | 2.8mm |
| Ciri Khas | Night Vision (Infrared LEDs) |
| Teknologi Ketersambungan | berwayar |
| Sokongan Pemacu Keras | Up to 8TB (3.5-inch SATA, HDD not included) |
| Output Video | HDMI, VGA (serentak) |
| Product Dimensions (DVR) | Kira-kira 30 x 25 x 7 cm |
| Berat Produk | Approximately 3.6 kg (total kit) |
Waranti dan Sokongan
TOPVISION products are designed for reliability and performance. For specific warranty details, please refer to the warranty card included with your product or visit the official TOPVISION webtapak.
If you encounter any issues or require technical assistance, please contact TOPVISION customer support through the contact information provided on the official website or your purchase platform. When contacting support, please have your product model number (TOP402) and purchase details ready.
For the latest drivers, software, and FAQs, please visit the TOPVISION support page online.