
1. Pengenalan
The j5create JCD384 USB-C 10-in-1 Multi-Port Docking Station is designed to expand the connectivity of your USB-C enabled laptop, PC, or tablet. This docking station provides a comprehensive solution for connecting multiple displays, USB peripherals, Ethernet, and memory cards, enhancing your productivity and simplifying your workspace. It supports 4K HDMI and VGA outputs for versatile display options, along with USB 3.0 ports for high-speed data transfer and Power Delivery for charging your host device.
2. Ciri-ciri Utama
- Multi-Display Connectivity: Connect your laptop to an additional monitor via HDMI (4K) or VGA (1080p).
- Pengembangan USB: Features two USB 3.1 Gen 1 Type-A ports for peripherals and one USB Type-A port with BC 1.2 for fast-charging mobile devices.
- Pemindahan Data Berkelajuan Tinggi: USB 3.1 Gen 1 ports offer up to 5 Gbps transfer speed, significantly faster than USB 2.0.
- Memory Card Reader: Direct access to SD and MicroSD memory cards for convenient data storage and transfer.
- Pelabuhan Ethernet: Provides a stable and reliable wired network connection.
- Penghantaran Kuasa: USB-C 3.1 port with Power Delivery allows charging of your host device while using the hub.
3. Panduan Persediaan
Follow these steps to set up your j5create JCD384 docking station:
- Sambung ke Peranti Hos: Plug the integrated USB-C cable from the docking station into an available USB-C port on your laptop, PC, or tablet. Ensure your host device's USB-C port supports DisplayPort Alternate Mode and Power Delivery for full functionality.
- Sambungkan Penyesuai Kuasa (Pilihan tetapi Disyorkan): If your host device requires charging or if you are connecting power-intensive peripherals, connect your original USB-C power adapter to the USB-C Power Delivery port on the docking station. This will charge your host device and provide power to connected peripherals.
- Sambungkan Paparan Luaran:
- For HDMI display: Connect an HDMI cable from your monitor to the HDMI port on the docking station.
- For VGA display: Connect a VGA cable from your monitor to the VGA port on the docking station.
Note: The docking station supports either HDMI or VGA output at one time, not simultaneously for extended desktop. For mirrored display, both can be used.
- Sambungkan Peranti USB: Plug your USB devices (e.g., keyboard, mouse, external hard drive) into the available USB 3.0 Type-A ports. The orange USB Type-A port supports BC 1.2 for faster charging of mobile devices.
- Sambungkan Kabel Ethernet: For a wired network connection, plug an Ethernet cable into the RJ-45 Gigabit Ethernet port on the docking station.
- Masukkan Kad Memori: Insert your SD or MicroSD cards into the corresponding slots for data access.

Gambar 1: Lebihview of the j5create JCD384 docking station with connected peripherals.
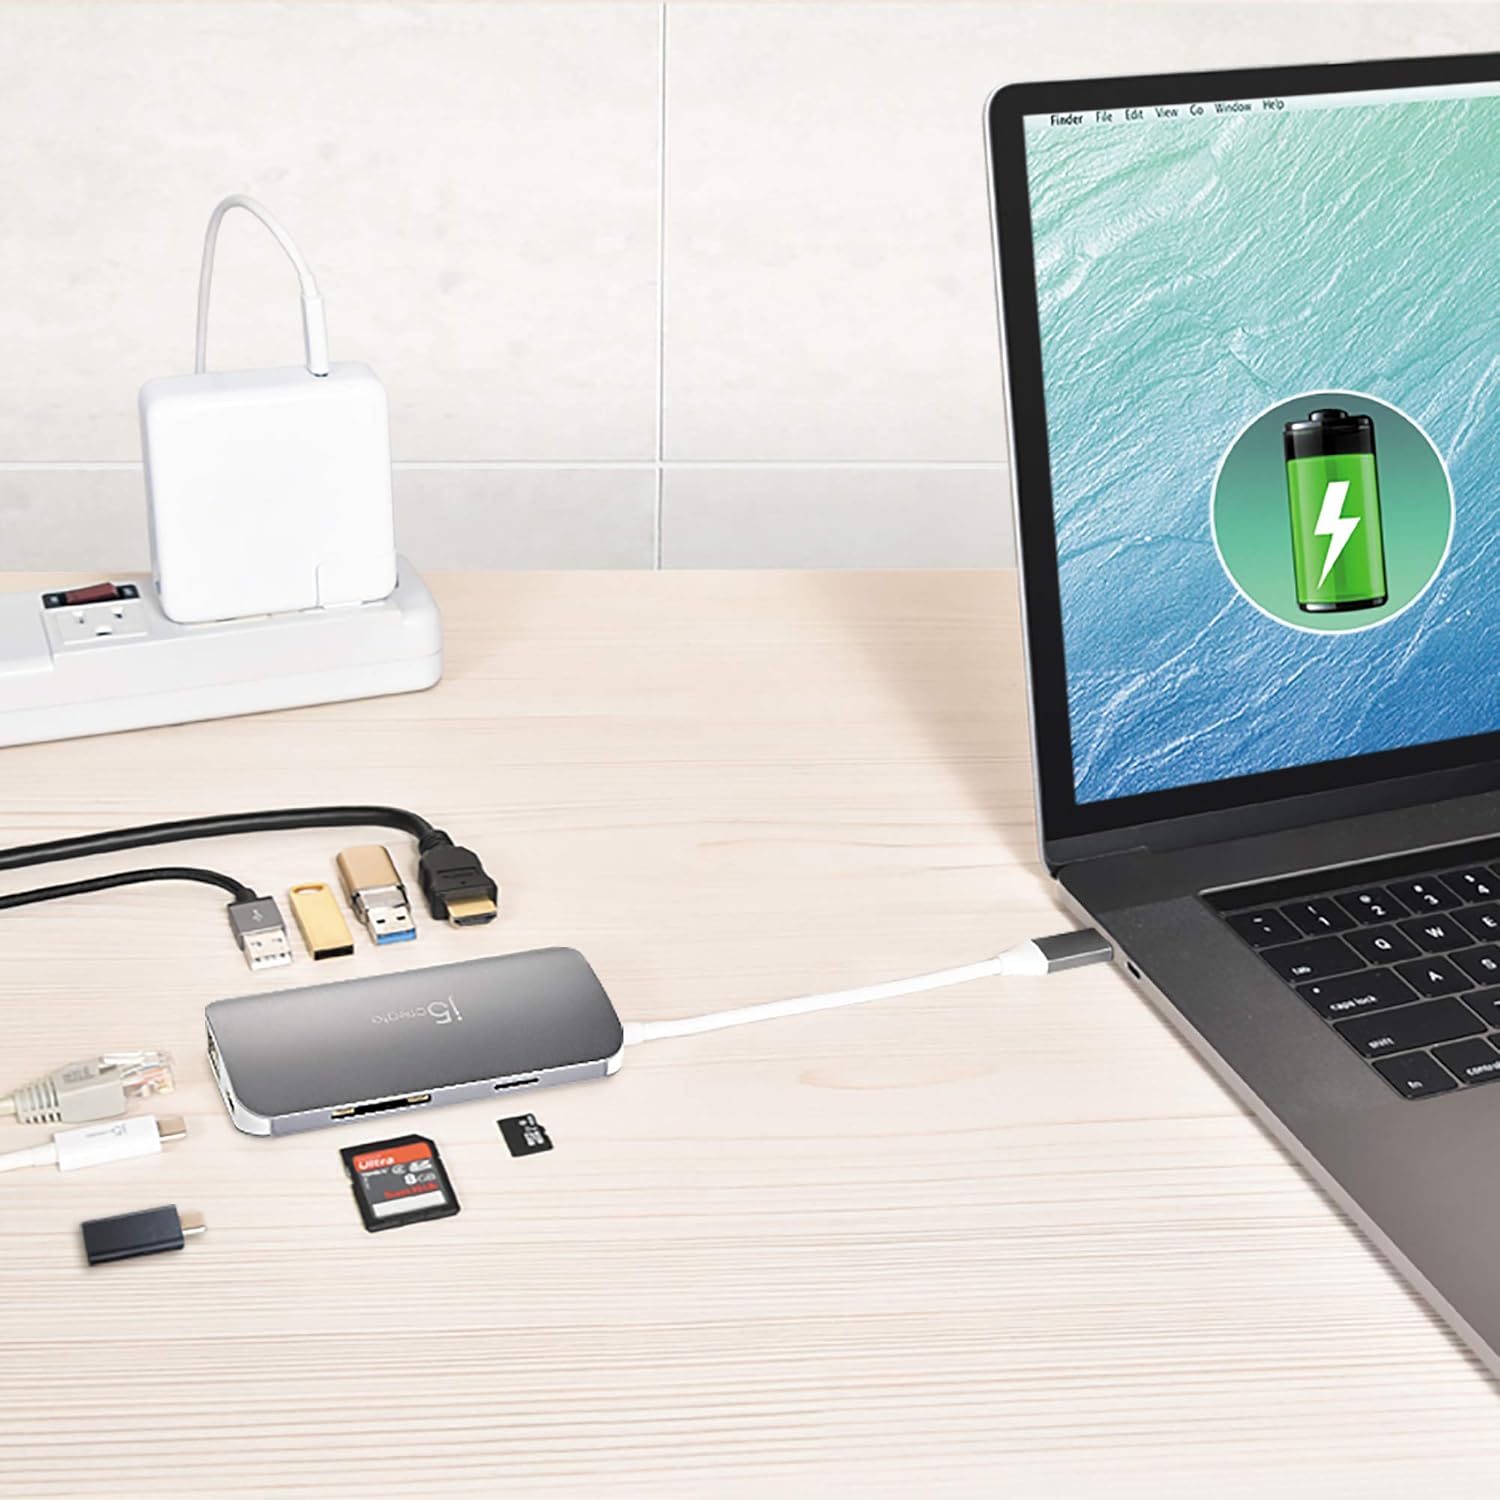
Figure 2: The docking station connected to a laptop, demonstrating power delivery and peripheral connections.
4. Arahan Operasi
Once the docking station is set up, it operates largely plug-and-play. Your operating system should automatically detect and configure most connected devices.
4.1 Tatarajah Paparan
After connecting your monitor(s), you may need to adjust display settings in your operating system:
- Windows: Right-click on the desktop, select "Display settings," and configure your displays (extend, duplicate, or second screen only).
- macOS: Go to "System Preferences" > "Displays" to arrange or mirror your displays.

Rajah 3: Komputer riba yang disambungkan ke monitor luaran, menunjukkanasing multi-display functionality.

Figure 4: A tablet and projector connected to a 4K UHD monitor, illustrating diverse display connections.
4.2 USB Device Usage
Simply plug your USB devices into the available USB 3.0 ports. For charging mobile devices, use the orange USB Type-A port which supports BC 1.2 for faster charging.
4.3 Memory Card Access
Insert your SD or MicroSD card into the appropriate slot. The card will appear as a removable drive in your file explorer, allowing you to transfer files.
4.4 Sambungan Ethernet
Once connected, your host device should automatically detect the wired network. If not, check your network settings.
5. Spesifikasi
| Ciri | Perincian |
|---|---|
| Nombor Model | JCD384 |
| Jenama | j5create |
| warna | Kelabu |
| bahan | aluminium |
| Antara Muka Perkakasan | MicroSD, Secure Digital Card, USB 3.0, HDMI, VGA, Ethernet, USB-C |
| Peranti Serasi | PC, Laptops, Tablets, Smartphones (with USB-C DisplayPort Alt Mode) |
| Jumlah Port USB | 3 (2x USB 3.0 Type-A, 1x USB Type-A with BC 1.2) |
| Kadar Pemindahan Data | 5 Gigabit Sesaat (USB 3.0) |
| Bilangan Pelabuhan | 9 (HDMI, VGA, Ethernet, 3x USB 3.0, SD, MicroSD, USB-C PD) |
| Sokongan Sistem Pengendalian | Sistem pengendalian berbilang |
| Berat Barang | 88 Gram |
| UPC | 847626002458 |

Rajah 5: Atas dan bawah views of the docking station, showing various ports.

Rajah 6: Sisi view highlighting the VGA port and integrated USB-C cable.

Rajah 7: Sisi view displaying the Ethernet and USB-C Power Delivery ports.
6. Penyelesaian masalah
Jika anda menghadapi masalah dengan stesen dok anda, rujuk penyelesaian biasa berikut:
- Tiada Output Paparan:
- Pastikan port USB-C peranti hos anda menyokong Mod Ganti DisplayPort.
- Check all cable connections (USB-C to host, HDMI/VGA to monitor).
- Sahkan sumber input monitor dipilih dengan betul.
- Try connecting only one display at a time to isolate the issue.
- Update your graphics drivers on your host device.
- Peranti USB Tidak Dikenali:
- Pastikan stesen dok disambungkan dengan selamat ke peranti hos anda.
- Cuba sambungkan peranti USB terus ke peranti hos anda untuk mengesahkan ia berfungsi.
- If using a high-power USB device, ensure the docking station is connected to an external power source via its USB-C PD port.
- Some wireless peripherals (e.g., Logitech adapters) may have compatibility issues with certain hubs.
- Slow Ethernet Connection:
- Check your Ethernet cable for damage and ensure it's securely connected.
- Verify your network drivers are up to date.
- Test with a different Ethernet cable or port on your router/modem.
- Peranti Hos Tidak Mengecas:
- Ensure your original USB-C power adapter is connected to the docking station's USB-C PD port.
- Verify your host device's USB-C port supports Power Delivery.
- Periksa penyesuai kuasa dan kabel untuk sebarang kerosakan.
7. Penyelenggaraan
To ensure the longevity and optimal performance of your j5create JCD384 docking station, follow these maintenance guidelines:
- Pembersihan: Gunakan kain lembut dan kering untuk membersihkan bahagian luar stesen dok. Elakkan menggunakan pembersih cecair atau aerosol, kerana ia boleh merosakkan peranti.
- Storan: Simpan stesen dok di tempat yang sejuk dan kering, jauh daripada cahaya matahari langsung dan suhu yang melampau.
- Pengendalian: Handle the device with care. Avoid dropping it or subjecting it to strong impacts. Do not pull on the integrated USB-C cable forcefully.
- Pengudaraan: Pastikan stesen dok mempunyai pengudaraan yang mencukupi untuk mengelakkan kepanasan melampau, terutamanya semasa penggunaan berpanjangan dengan berbilang peranti yang disambungkan.
8. Waranti & Sokongan
The j5create JCD384 USB-C 10-in-1 Multi-Port Docking Station comes with a manufacturer's warranty. Please refer to the warranty card included in your product packaging for specific terms and conditions, including warranty duration and coverage details.
For technical support, product registration, or further assistance, please visit the official j5create website or contact their customer service department. Contact information can typically be found on the j5create webtapak atau dalam dokumentasi produk anda.