1. Pengenalan
Terima kasih kerana membeliasing the DBPOWER RD810 Portable Mini Projector. This manual provides essential information for the safe and optimal use of your projector. Please read it thoroughly before operating the device and retain it for future reference.
This projector is designed for home entertainment, offering a portable solution for displaying videos, photos, and presentations. Ensure all safety guidelines are followed to prevent damage to the device or personal injury.
2. Kandungan Pakej
Please verify that all components are present in your package. If any items are missing or damaged, contact DBPOWER customer support.
- DBPOWER RD810 Portable Mini Projector
- Alat Kawalan Jauh
- Kabel Kuasa
- Kabel HDMI
- AV kabel
- Manual Pengguna
3. Produk Lebihview
Familiarize yourself with the various parts of your DBPOWER RD810 projector.

Rajah 3.1: Depan view of the DBPOWER RD810 Projector, showing the lens and ventilation.
Rajah 3.2: Sisi view of the projector, illustrating input ports such as HDMI, USB, and VGA.
Komponen Utama:
- Kanta: Menayangkan imej ke skrin.
- Cincin Fokus: Melaraskan kejelasan imej.
- Keystone Correction Knob: Membetulkan herotan imej trapezoid.
- Panel Kawalan: On-device buttons for basic navigation and settings.
- Pelabuhan Input: HDMI, USB, VGA for connecting various devices.
- Pelabuhan Kuasa: Untuk menyambungkan kabel kuasa.
- Gril Pengudaraan: Essential for heat dissipation. Do not block.
4. Persediaan
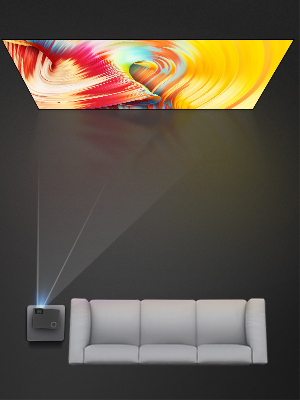
4.1 Penempatan
- Place the projector on a stable, flat surface (Tabletop Mount).
- Ensure there is adequate space around the projector for proper ventilation.
- Position the projector perpendicular to the projection surface for the best image quality.
4.2 Sambungan Kuasa
- Sambungkan kabel kuasa ke port kuasa projektor.
- Palamkan hujung kabel kuasa yang lain ke dalam salur keluar kuasa.
- Lampu penunjuk kuasa pada projektor harus menyala.
4.3 Menyambungkan Peranti Input
The projector supports HDMI, USB, and VGA connectivity.
- HDMI: Connect an HDMI cable from your source device (e.g., laptop, DVD player, game console) to the HDMI port on the projector.
- USB: Masukkan pemacu USB ke dalam port USB untuk memainkan media files directly. Note: The USB port is primarily for media playback and charging, not for direct computer connection for display.
- VGA: Sambungkan kabel VGA dari komputer anda ke port VGA pada projektor.
- Output Audio: If desired, connect external speakers to the projector's audio output port for enhanced sound.
5. Arahan Operasi
5.1 Menghidupkan/Mematikan
- Hidupkan kuasa: Press the power button on the projector or the remote control. The projector lamp akan dihidupkan.
- Matikan: Press the power button again. The projector will initiate a shutdown sequence. Do not unplug the power cable until the fan has stopped and the projector has fully cooled down.
5.2 Pelarasan Fokus dan Keystone
- Fokus: Rotate the focus ring located around the lens until the projected image appears sharp and clear.
- Pembetulan Keystone: If the image appears trapezoidal (wider at the top or bottom), adjust the keystone correction knob until the image is rectangular.
5.3 Memilih Sumber Input
After connecting your input device, you need to select the correct source:
- Press the 'Source' button on the remote control or the projector's control panel.
- Use the arrow keys to navigate through the input options (HDMI, USB, VGA).
- Press 'OK' or 'Enter' to confirm your selection.
5.4 Menu Navigasi
Use the 'Menu' button on the remote or projector to access settings. Navigate with arrow keys and confirm with 'OK' or 'Enter'. Common settings include Picture Mode, Aspect Ratio, Sound Settings, and Time Settings.
6. Penyelenggaraan
6.1 Pembersihan Kanta
Use a soft, lint-free cloth or lens cleaning paper to gently wipe the lens. Avoid using abrasive cleaners or excessive force, which can scratch the lens surface.
6.2 Pembersihan Pengudaraan
Regularly check and clean the ventilation grilles to prevent dust buildup, which can lead to overheating. Use a soft brush or a vacuum cleaner with a brush attachment to remove dust from the vents.
6.3 Penyimpanan
When not in use for extended periods, store the projector in a cool, dry, and dust-free environment. Use the original packaging or a protective case to prevent damage.
7. Penyelesaian masalah
| Masalah | Kemungkinan Punca | Penyelesaian |
|---|---|---|
| Tiada Kuasa | Power cable not connected; Power outlet faulty; Projector overheated. | Ensure power cable is securely connected; Test power outlet; Allow projector to cool down. |
| Tiada Imej | Incorrect input source selected; Input cable loose or faulty; Source device not outputting signal. | Select correct input source; Check cable connections; Ensure source device is on and configured to output. |
| Imej Kabur | Focus not adjusted; Keystone not adjusted; Projector too far/close to screen. | Adjust focus ring; Adjust keystone correction knob; Reposition projector. |
| Tiada Bunyi | Volume too low; Mute enabled; External speakers not connected/configured; Source device audio settings. | Increase volume; Disable mute; Connect external speakers if desired; Check audio settings on source device. |
| Alat Kawalan Jauh Tidak Berfungsi | Bateri berkurangan; Halangan antara alat kawalan jauh dan projektor; Sensor alat kawalan jauh tersekat. | Replace batteries; Remove obstructions; Ensure remote sensor on projector is clear. |
8. Spesifikasi
| Ciri | Spesifikasi |
|---|---|
| Jenama | DBPOWER |
| Nama Model | RD810 |
| Nombor Model | 810X |
| Teknologi Ketersambungan | HDMI, USB, VGA |
| Resolusi Paparan Asli | 800 x 480 |
| Resolusi Paparan Maksimum | 1920 x 1080 |
| Jenis Paparan | LCD |
| Nisbah Kontras | 1000:1 |
| Hayat Operasi Sumber Cahaya | 30,000 Jam |
| Wattage | 24 watt |
| Kaedah Kawalan | Alat Kawalan Jauh, Butang |
| Jenis Pemasangan | Pemasangan Atas Meja |
| Faktor Bentuk | Mudah alih |
9. Waranti dan Sokongan
DBPOWER products are designed and manufactured to the highest quality standards. For information regarding warranty coverage, technical support, or service inquiries, please refer to the warranty card included with your product or visit the official DBPOWER website. Please have your model number (RD810 / 810X) and purchase details ready when contacting support.