
1. Pengenalan
This instruction manual provides essential information for the installation, operation, and maintenance of the Hikvision DS-7604NI-K1/4P 4-Channel 4K PoE Network Video Recorder (NVR). Please read this manual thoroughly before using the product to ensure correct and safe operation. Keep this manual for future reference.
2. Maklumat Keselamatan
Patuhi langkah berjaga-jaga keselamatan berikut untuk mengelakkan kecederaan atau kerosakan pada peranti:
- Bekalan Kuasa: Gunakan hanya penyesuai kuasa yang dinyatakan untuk peranti ini. Pastikan volum kuasatage is stable and meets the device's requirements.
- Pengudaraan: Jangan halang bukaan pengudaraan. Pastikan aliran udara yang betul untuk mengelakkan terlalu panas.
- Persekitaran: Avoid exposing the device to extreme temperatures, humidity, dust, or corrosive environments. Do not place heavy objects on the device.
- Pemasangan: Install the device on a stable surface. Avoid strong vibrations or impacts.
- Servis: Jangan cuba membuka atau mengubah suai peranti. Rujuk semua servis kepada kakitangan yang berkelayakan.
3. Produk Lebihview
The Hikvision DS-7604NI-K1/4P is a 4-channel Network Video Recorder designed for surveillance systems. It supports up to 4K resolution for live view, recording, and playback, and features Power-over-Ethernet (PoE) interfaces for direct connection and power supply to compatible IP cameras.
3.1 Kandungan Pakej
- Unit NVR Hikvision DS-7604NI-K1/4P
- Penyesuai Kuasa
- Tetikus USB
- Skru untuk Pemasangan HDD
- Panduan Mula Pantas
3.2 Panel Depan
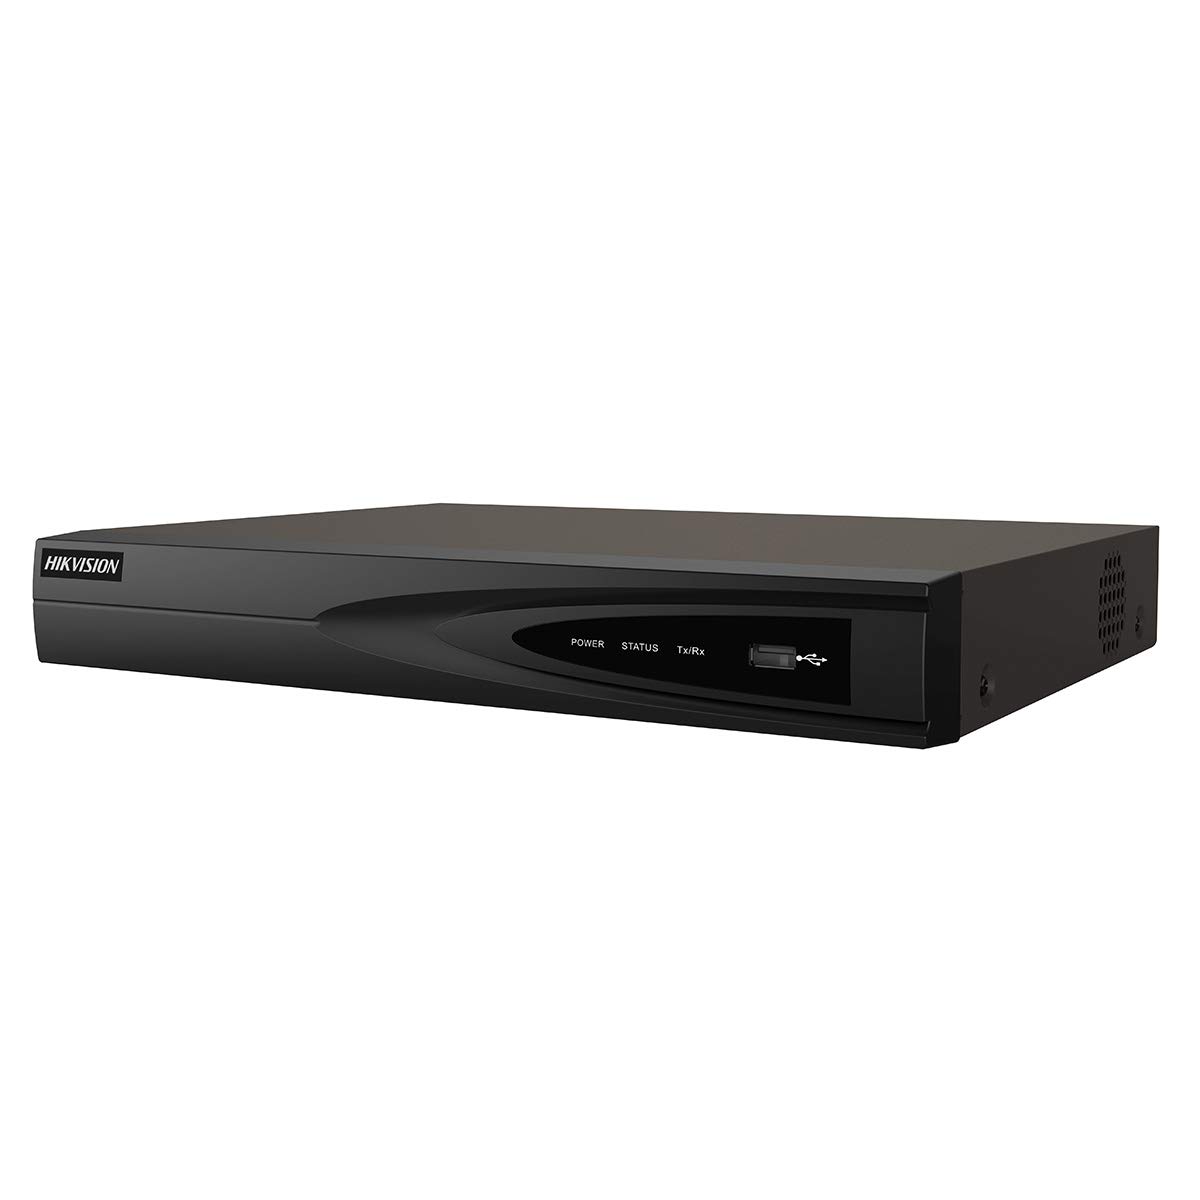
Imej 1: Depan view of the Hikvision DS-7604NI-K1/4P NVR. This image displays the front panel of the NVR, typically featuring status indicator lights and a USB port for peripheral connections.
3.3 Panel Belakang
Panel belakang termasuk pelbagai port untuk sambungan:
- PoE Ports (x4): For connecting IP cameras and providing power.
- Port LAN: For network connection to a router or switch.
- Output HDMI: For connecting to a monitor or TV for high-definition video output.
- Output VGA: For connecting to a monitor for video output.
- USB Ports (x2 total, typically one front, one rear): For mouse, USB drive, or other peripherals.
- Input Audio (RCA): For connecting an external audio source.
- Input Kuasa: Untuk menyambungkan penyesuai kuasa.
4. Persediaan
4.1 Pemasangan Pemacu Keras (Pilihan)
The NVR supports one internal SATA hard drive for video storage (up to 6 TB). If a hard drive is not pre-installed, follow these steps:
- Buka skru dan tanggalkan penutup atas NVR.
- Sambungkan kabel data SATA dan kabel kuasa ke cakera keras.
- Align the hard drive with the mounting holes and secure it with the provided screws.
- Replace the NVR's top cover and secure it with screws.
4.2 Menyambung Peranti
- Pantau: Sambungkan monitor ke port output HDMI atau VGA NVR.
- tetikus: Sambungkan tetikus USB ke port USB pada NVR.
- Rangkaian: Sambungkan port LAN NVR ke penghala atau suis rangkaian anda menggunakan kabel Ethernet.
- Kamera: Connect IP cameras to the NVR's PoE ports. The NVR will automatically power and detect compatible Hikvision PoE cameras.
4.3 Menghidupkan dan Konfigurasi Awal
- Sambungkan penyesuai kuasa ke input kuasa NVR dan kemudian ke soket kuasa.
- The NVR will power on automatically.
- Upon first boot, the NVR will guide you through an initialization wizard. Follow the on-screen prompts to set up a strong password, network settings, and hard drive formatting (if applicable).
- Ensure the hard drive is formatted before recording can begin.
5. Operasi
5.1 Langsung View
After initial setup, the NVR will display the live video feed from connected cameras on the monitor. You can switch between single-camera view dan grid berbilang kamera view menggunakan kawalan pada skrin atau tetikus.
5.2 Rakaman
NVR menyokong pelbagai mod rakaman:
- Rakaman Berterusan: Records video constantly.
- Rakaman Pengesanan Gerak: Merakam hanya apabila gerakan dikesan dalam kamera view.
- Rakaman Berjadual: Rekod berdasarkan jadual yang telah ditetapkan.
Configure recording settings via the NVR's menu interface (typically accessible by right-clicking on the live view screen and selecting 'Menu').
5.3 Main semula
Untuk kembaliview dirakam footage:
- Akses menu 'Main Semula' daripada antara muka utama NVR.
- Pilih kamera dan julat tarikh/masa yang dikehendaki.
- Gunakan kawalan main balik (main, jeda, mara pantas, undur) untuk menavigasi melalui menutage.
5.4 Akses Jauh
Untuk jarak jauh viewing and management, download the Hik-Connect app on your mobile device or use the Hik-Connect web portal. The NVR must be connected to the internet, and you will need to register the device with your Hik-Connect account. Refer to the Hik-Connect documentation for detailed instructions.
6. Penyelenggaraan
6.1 Kemas Kini Perisian Tegar
Semak Hikvision rasmi secara berkala weblaman web untuk kemas kini perisian tegar. Mengemas kini perisian tegar boleh meningkatkan prestasi, menambah ciri baharu dan mempertingkatkan keselamatan. Ikut arahan yang disediakan bersama pakej kemas kini perisian tegar dengan teliti.
6.2 Pengurusan Cakera Keras
Regularly check the health status of your hard drive through the NVR's menu. If the hard drive shows errors or is nearing its end of life, consider replacing it to prevent data loss. You may also need to format the hard drive periodically, which will erase all recorded data.
6.3 Pembersihan
Bersihkan bahagian luar NVR dengan kain lembut dan kering. Jangan gunakan pembersih cecair atau aerosol. Pastikan bukaan pengudaraan bebas daripada habuk dan serpihan.
7. Penyelesaian masalah
| Masalah | Kemungkinan Punca | Penyelesaian |
|---|---|---|
| Tiada paparan video pada monitor | Sambungan kabel longgar, sumber input tidak betul pada monitor, NVR tidak dihidupkan. | Check HDMI/VGA cable connections. Ensure monitor is set to correct input. Verify NVR power. |
| Tiada imej kamera | Camera not powered, network issue, camera not added/activated. | Check PoE cable connection. Ensure camera is powered. Verify camera IP address and add it to the NVR. |
| Tidak dapat merakam video | No hard drive, hard drive not formatted, hard drive full, recording schedule not set. | Install and format a hard drive. Check hard drive status. Configure recording schedule. |
| Akses jauh tidak berfungsi | NVR not connected to internet, incorrect network settings, Hik-Connect account issue. | Verify NVR network connection. Check network settings (IP, DNS). Ensure NVR is added to Hik-Connect. |
8. Spesifikasi
| Ciri | Spesifikasi |
|---|---|
| Nombor Model | DS-7604NI-K1/4P |
| Jenama | Hikvision |
| Teknologi Ketersambungan | Ethernet |
| Peranti Serasi | Kamera |
| Dimensi Produk (L x W x H) | 8.5 x 29.8 x 42.1 cm |
| Kapasiti Penyimpanan Memori | 6 TB |
| Saiz Cakera Keras | 6 TB |
| Bilangan Saluran | 4 |
| Berat Barang | 2.2 paun |
| Digital Video Media Format | Cakera Keras |
| Input Audio | RCA |
| Jumlah Port USB | 2 |
| Input Video | VGA, HDMI |
| Kiraan Unit | 1.0 Kiraan |
| Pengeluar | Hikvision |
| Nombor Pengenalan Perdagangan Global | 06954273652883 |
| Nombor Bahagian | KNVRDS7604NI-K1/4P |
9. Waranti dan Sokongan
Untuk maklumat jaminan, sokongan teknikal dan pertanyaan perkhidmatan, sila rujuk laman web rasmi Hikvision. weblaman web atau hubungi pengedar Hikvision sah anda. Simpan resit pembelian anda sebagai bukti pembelian untuk tuntutan jaminan.
Sumber Dalam Talian: Visit the official Hikvision support page for FAQs, downloads, and contact information.