
1. Produk Lebihview
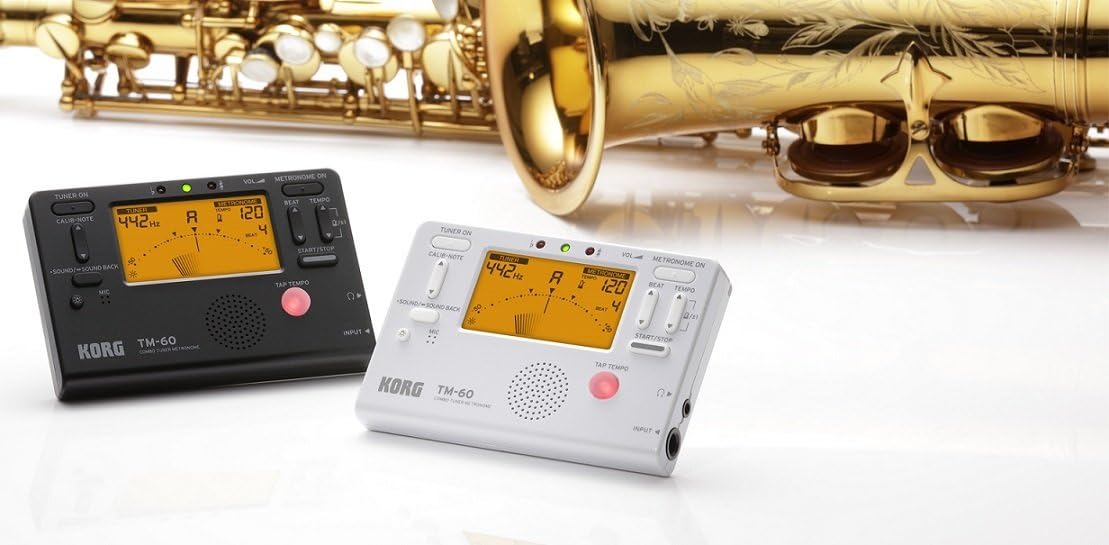
The KORG TM60CBK is a versatile combo tuner and metronome designed for musicians. It features a high-precision tuner function and a metronome function that can be used simultaneously. This model includes a CM-200 Contact Clip-on Microphone for enhanced tuning accuracy, especially in noisy environments. The large screen displays both tuner and metronome functions clearly, making it an essential tool for practicing.
- Dwi Fungsi: High-precision tuner and metronome functions can be used concurrently.
- Mikrofon yang disertakan: Comes with a CM-200 Contact Clip-on Microphone for direct instrument tuning.
- Paparan Jelas: Features a new, larger screen for simultaneous display of tuner and metronome.
- warna: Hitam.
2. Persediaan
2.1 Pemasangan Bateri
The KORG TM60CBK operates on AAA batteries. To install or replace batteries:
- Buka penutup petak bateri yang terletak di bahagian belakang unit.
- Masukkan bateri AAA, pastikan kekutuban yang betul (+/-).
- Tutup penutup petak bateri dengan selamat.
2.2 Connecting the CM-200 Contact Clip-on Microphone
For precise tuning, especially with acoustic instruments or in loud settings, connect the included clip-on microphone:
- Plug the microphone's 1/4-inch (6.35mm) jack into the INPUT jack on the side of the TM60CBK unit.
- Attach the clip to the headstock or bell of your instrument. Ensure the clip is securely fastened and the microphone is positioned to pick up vibrations effectively.
3. Arahan Operasi
3.1 Mod Penala
To use the tuner function:
- Press the 'TUNER ON' button to activate the tuner.
- Select the desired instrument mode (Chromatic, Guitar, Bass, Violin, Ukulele) using the 'ITEM' button.
- Adjust the A4 calibration pitch (default 440Hz) using the 'CALIB./NOTE' buttons if needed.
- Play a single note on your instrument. The display will show the detected note and indicate if it is sharp, flat, or in tune using the needle-style meter and LED indicators.
3.2 Metronome Mode
To use the metronome function:
- Press the 'METRONOME ON' button to activate the metronome.
- Set the desired tempo (BPM) using the 'TEMPO' buttons.
- Adjust the beat (time signature) using the 'BEAT' buttons.
- Select different rhythm patterns using the 'RHYTHM' button.
- Press 'START/STOP' to begin or pause the metronome.
- Adjust the volume using the 'VOL' slider on the side of the unit.
- For private practice, plug headphones into the 3.5mm headphone jack.
- Use the 'TAP TEMPO' button to set the tempo by tapping along to a desired rhythm.
3.3 Penjana Nada
The TM60CBK can also generate reference tones:
- In Tuner Mode, press the 'SOUND/SOUND BACK' button to activate the tone generator.
- Use the 'CALIB./NOTE' buttons to select the desired reference note.
- Listen to the generated tone and tune your instrument by ear.
4. Imej Produk



5. Spesifikasi
| Ciri | Perincian |
|---|---|
| Nama Model | TM60 |
| Nombor Model | TM60C-BK |
| warna | Hitam |
| Dimensi Item (L x W x H) | 4.37 x 2.91 x 0.71 inci |
| Berat Barang | 0.16 Gram |
| Komponen yang Disertakan | Beg |
| Jenis Penyambung | USB (for power, not data) |
6. Penyelenggaraan
To ensure the longevity and optimal performance of your KORG TM60CBK:
- Pembersihan: Wipe the unit with a soft, dry cloth. Avoid using abrasive cleaners or solvents.
- Penjagaan Bateri: Tanggalkan bateri jika unit tidak akan digunakan untuk tempoh yang lama untuk mengelakkan kebocoran.
- Storan: Simpan unit di tempat yang sejuk dan kering jauh dari cahaya matahari langsung dan suhu yang melampau.
7. Penyelesaian masalah
- Unit tidak menghidupkan: Periksa pemasangan bateri dan pastikan bateri tidak kehabisan kuasa.
- Tuner is inaccurate: Ensure the CM-200 microphone is securely attached to the instrument. Verify the correct instrument mode is selected. Check the A4 calibration pitch.
- No sound from metronome: Check the volume level. Ensure headphones are not plugged in if you intend to use the internal speaker.
8. Waranti dan Sokongan
For warranty information, technical support, or service inquiries, please refer to the official KORG website or contact KORG customer service directly. Keep your purchase receipt as proof of purchase for warranty claims.