1. Pengenalan
This manual provides essential information for the safe and efficient operation of your ANSMANN Future 3in1 LED Flashlight. Please read these instructions carefully before using the product and retain them for future reference.
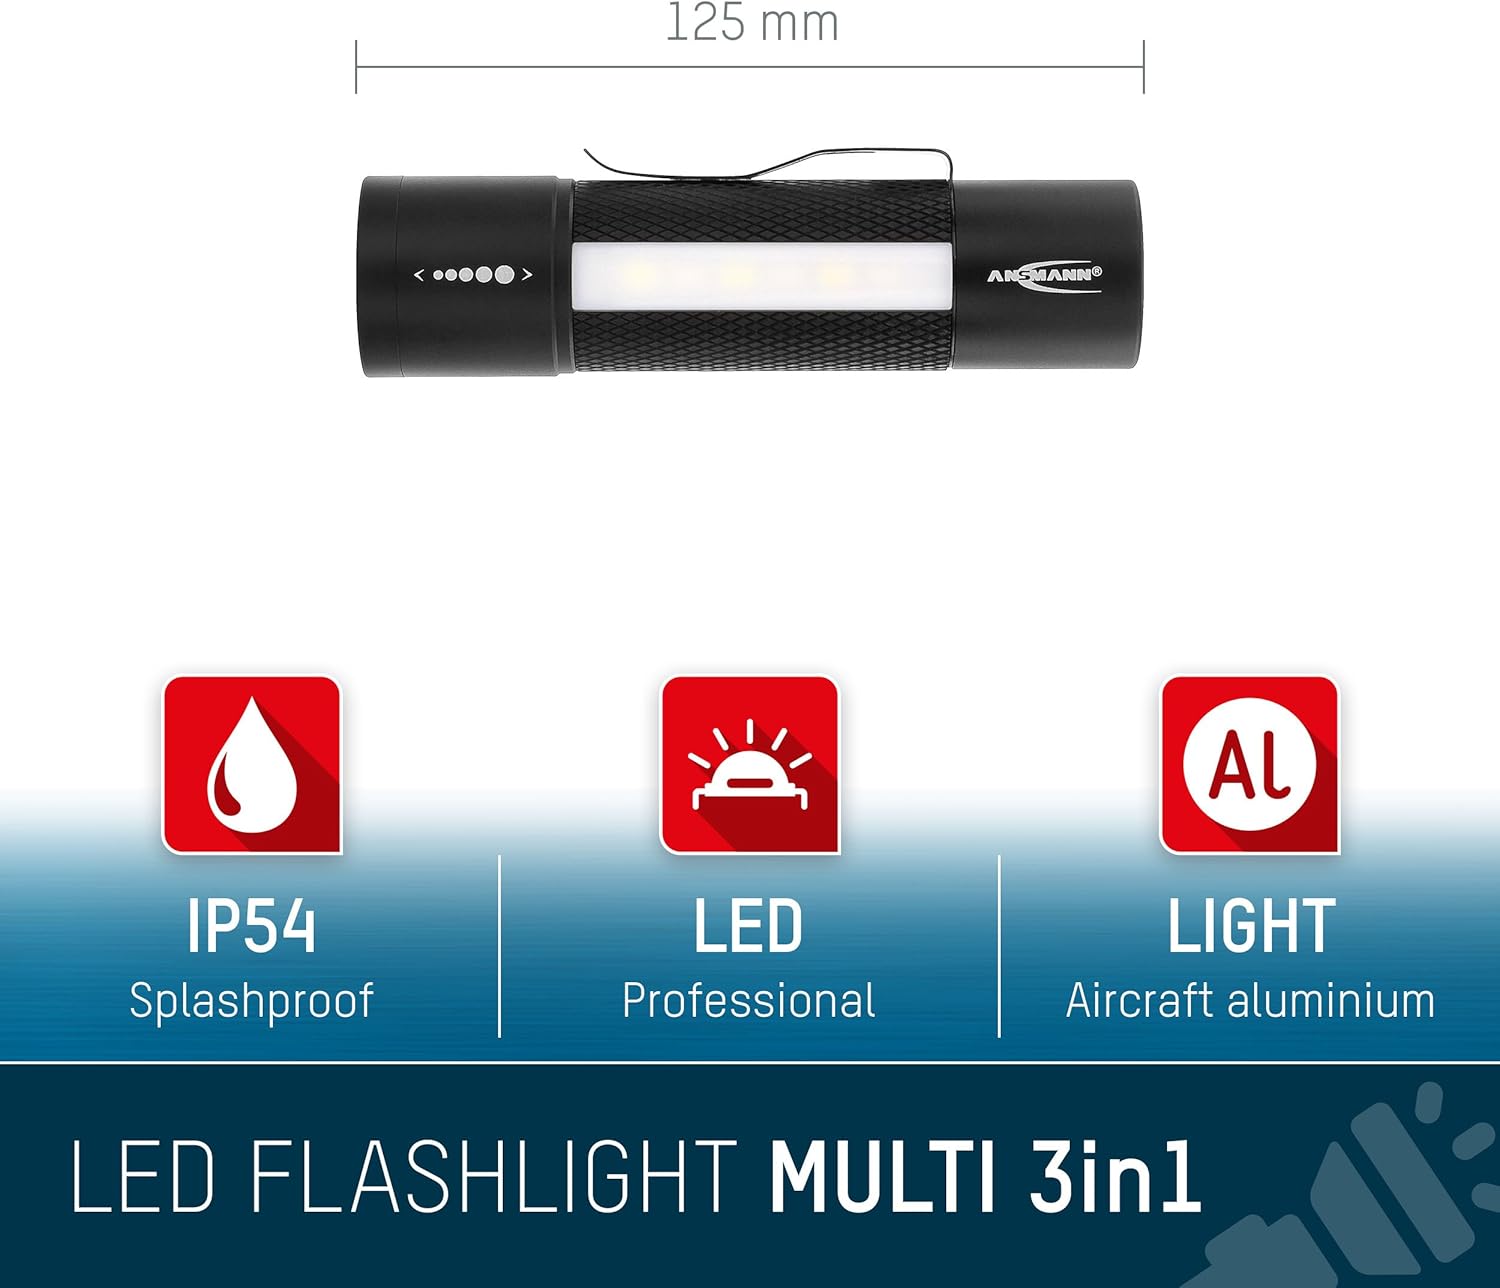
Figure 1: ANSMANN Future 3in1 LED Flashlight overview, highlighting its compact size, IP54 splashproof rating, professional LED, and aircraft-grade aluminum construction.
2. Arahan Keselamatan
Patuhi langkah keselamatan berikut untuk mengelakkan kecederaan atau kerosakan pada produk:
- Do not look directly into the LED beam. The intense light can cause temporary vision impairment or eye damage.
- Ensure batteries are inserted with correct polarity (+/-). Incorrect insertion can damage the device.
- Jangan campurkan bateri lama dan baharu, atau jenis bateri yang berlainan.
- Tanggalkan bateri jika lampu suluh tidak akan digunakan untuk tempoh yang lama bagi mengelakkan kebocoran.
- This flashlight is IP54 rated, meaning it is protected against dust ingress and splashing water. It is not designed for submersion in water.
- Jauhkan daripada kanak-kanak.
3. Produk Lebihview
The ANSMANN Future 3in1 LED Flashlight features a robust aluminum housing and offers three distinct lighting functions:
- Main LED Beam: Located at the front, with adjustable focus.
- Side Work Light: A bright white LED panel on the side for area illumination.
- Side Signal Light: A red LED panel on the side for warning or signaling purposes.
Additional features include a powerful magnetic base for hands-free operation and a sturdy pocket clip.

Figure 2: The seamless optic focusing system allows for quick adjustment of the light beam.
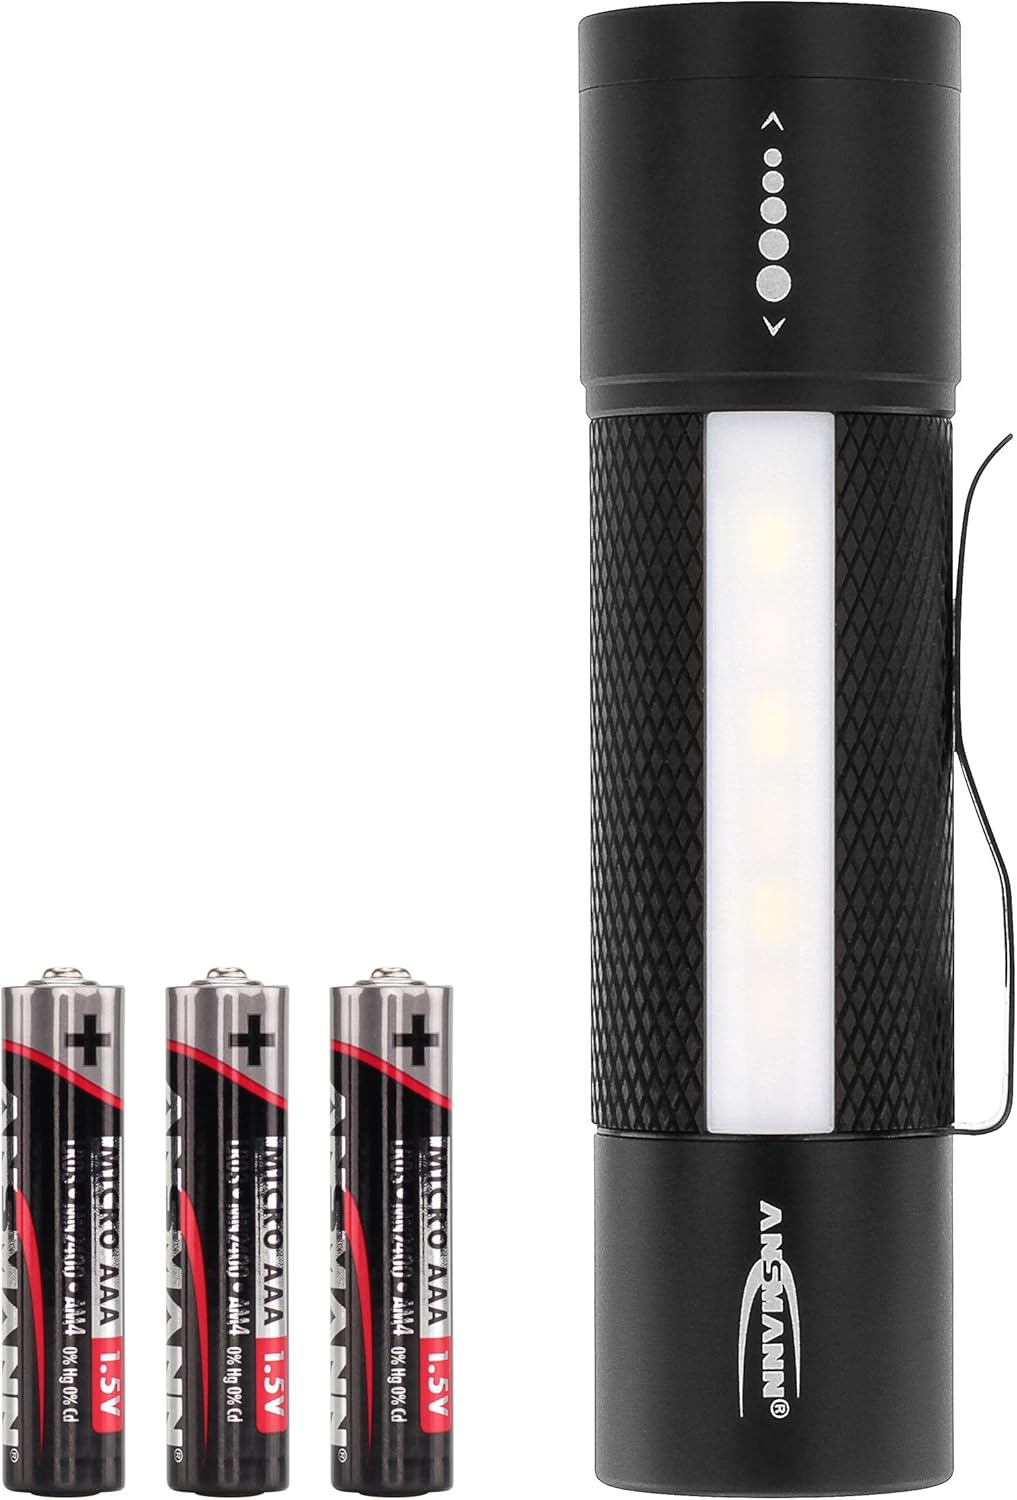
Figure 3: The powerful magnetic base enables convenient hands-free operation by attaching to metal surfaces.
4. Persediaan
4.1. Pemasangan Bateri
- Unscrew the end cap of the flashlight by turning it counter-clockwise.
- Insert three (3) AAA 1.5V alkaline batteries into the battery holder, ensuring correct polarity (+ and -) as indicated inside the holder.
- Carefully reinsert the battery holder into the flashlight body.
- Screw the end cap back on clockwise until it is securely tightened.

Figure 4: Battery compartment with the end cap removed, showing the battery holder for three AAA batteries.
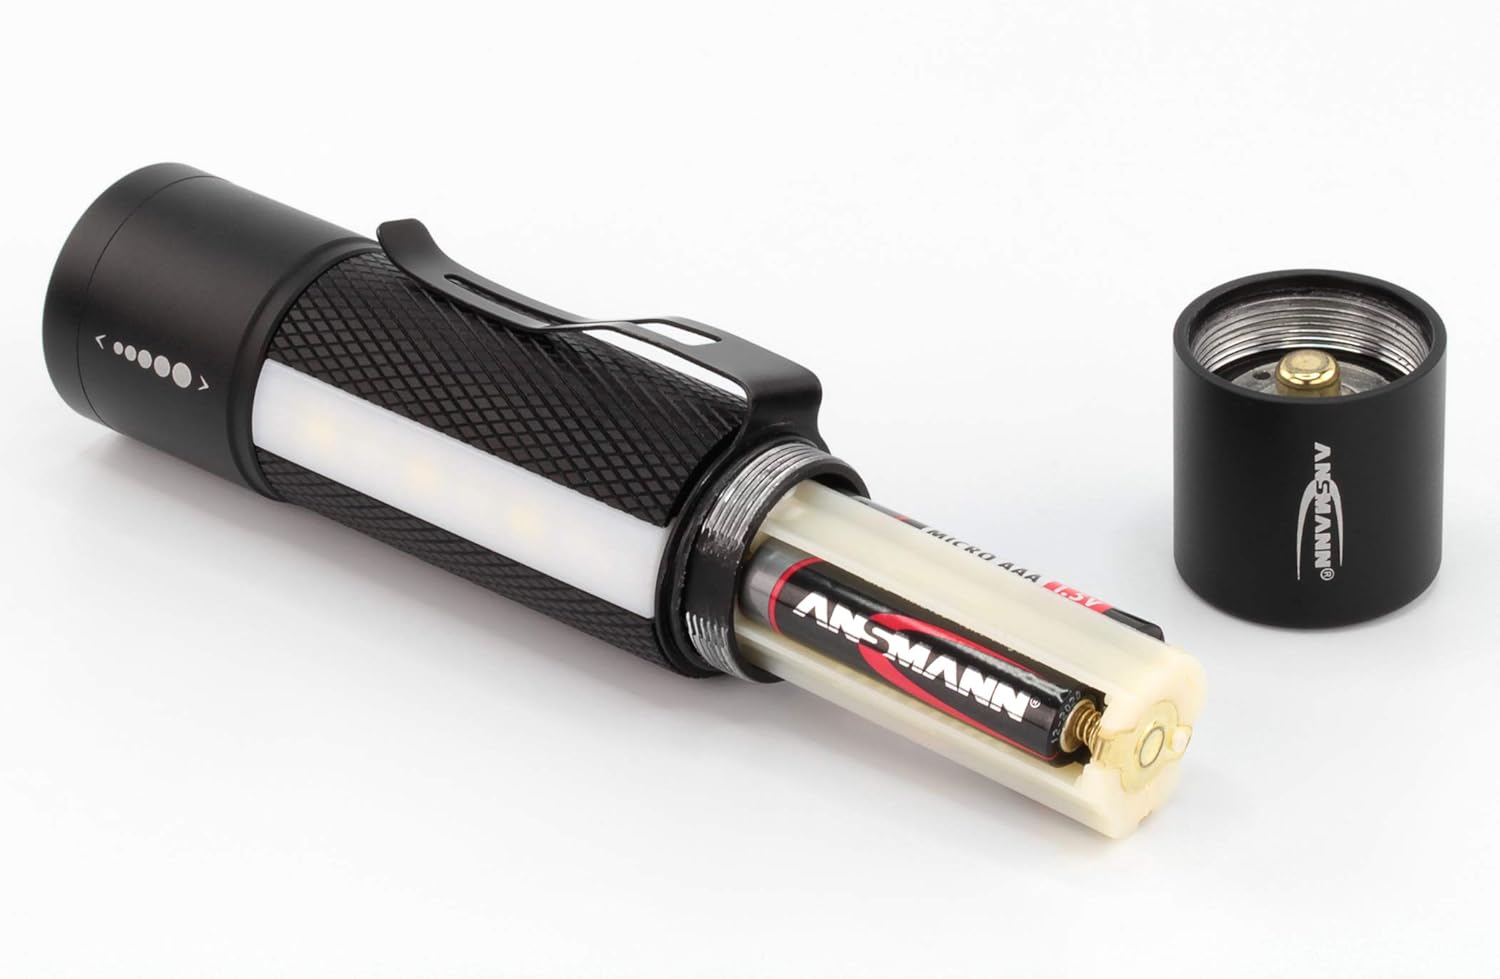
Figure 5: The flashlight requires three AAA batteries for operation.
5. Arahan Operasi
5.1. Hidupkan/Mati Kuasa dan Pemilihan Mod
The flashlight features a single button located on the end cap to cycle through its functions:
- Akhbar Pertama: Activates the main LED beam.
- Akhbar Kedua: Switches to the white side work light.
- Akhbar Ketiga: Switches to the red side signal light.
- Akhbar Keempat: Turns the flashlight off.
- Mati Pantas: To turn off the flashlight from any mode, press and hold the button for approximately 2 seconds.

Figure 6: The main LED beam provides powerful illumination for various tasks.

Figure 7: The white side work light is ideal for close-range illumination and hands-free tasks.

Figure 8: The red side signal light can be used for emergencies or to maintain night vision.
5.2. Pelarasan Fokus
To adjust the focus of the main LED beam, simply slide the head of the flashlight forward or backward. Sliding it forward narrows the beam for a focused spot, while sliding it backward widens the beam for a broad floodlight.
6. Penyelenggaraan
- Pembersihan: Lap badan lampu suluh dengan lembut, damp kain. Jangan gunakan pembersih atau pelarut yang melelas.
- Penjagaan Bateri: Always replace all three AAA batteries simultaneously with new, identical batteries. Do not attempt to recharge non-rechargeable batteries.
- Storan: If the flashlight will not be used for an extended period, remove the batteries to prevent potential leakage and damage. Store in a cool, dry place.
7. Penyelesaian masalah
| Masalah | Kemungkinan Punca | Penyelesaian |
|---|---|---|
| Lampu suluh tidak menyala. | Bateri habis atau salah dimasukkan. | Gantikan bateri dengan yang baharu, memastikan kekutuban yang betul. |
| Cahaya malap atau berkelip. | Bateri hampir habis. | Ganti semua bateri dengan yang baru. |
| Mode switching is inconsistent. | Butang tidak ditekan dengan kuat atau cukup cepat. | Ensure firm and distinct presses of the power button. |
8. Spesifikasi
| Jenama | ANSMANN |
| Nombor Model | 1600-0137 |
| Dimensi (L x W x H) | 12.55 x 3.3 x 3.3 cm |
| Berat badan | 183 g |
| Sumber Kuasa | 3 x Bateri Alkali AAA 1.5V (termasuk) |
| Sumber Cahaya | LED |
| Luminous Flux (Main Beam) | 180 lumen |
| Jarak Pancaran | Sehingga 130 meter |
| Masa Larian | Sehingga 11 jam |
| kuasa | 3 Watt |
| Penarafan IP | IP54 (kalis percikan) |
| bahan | Aluminium gred pesawat |
| Ciri Khas | Stepless focus, White side work light, Red side signal light, Magnetic base, Pocket clip |

Figure 9: Product packaging illustrating key features and the 3-year warranty.
9. Waranti dan Sokongan
9.1. Maklumat Waranti
The ANSMANN Future 3in1 LED Flashlight is covered by a Waranti pengilang selama 3 tahun dari tarikh pembelian. Waranti ini melindungi kecacatan pada bahan dan mutu kerja di bawah penggunaan biasa. Sila simpan bukti pembelian anda untuk tuntutan waranti.
9.2. Sokongan Pelanggan
For technical support, warranty claims, or any questions regarding your ANSMANN Future 3in1 LED Flashlight, please contact ANSMANN customer service:
- e-mel: info@ansmann.de
- Maklumat Produk EPREL: https://eprel.ec.europa.eu/qr/721168