1. Pengenalan
Thank you for choosing the GEWA HH-600-V3 Double Braced Hi-Hat Cymbal Stand. This manual provides essential information for the proper assembly, operation, maintenance, and troubleshooting of your new hi-hat stand. Please read these instructions carefully before use to ensure safe and optimal performance. Keep this manual for future reference.
2. Produk Lebihview
The GEWA HH-600-V3 is a robust and reliable hi-hat cymbal stand designed for drummers requiring stability and precise control. Its heavy-duty construction ensures durability and consistent performance.
Ciri-ciri Utama:
- Double-Braced Design: Provides enhanced stability and durability during play.
- Heavy Model: Constructed for professional use and demanding performance environments.
- Nylon Lining: Ensures smooth operation and reduces metal-on-metal contact.
- Cast Iron Hi-Hat Clutch: Securely holds hi-hat cymbals in place.
- Pemacu Rantai: Offers a responsive and consistent pedal feel.
- Adjustable Spring Tension: Allows customization of pedal resistance for personalized playability.
- Tinggi boleh laras: Accommodates various setups with a height range of approximately 60cm to 90cm.
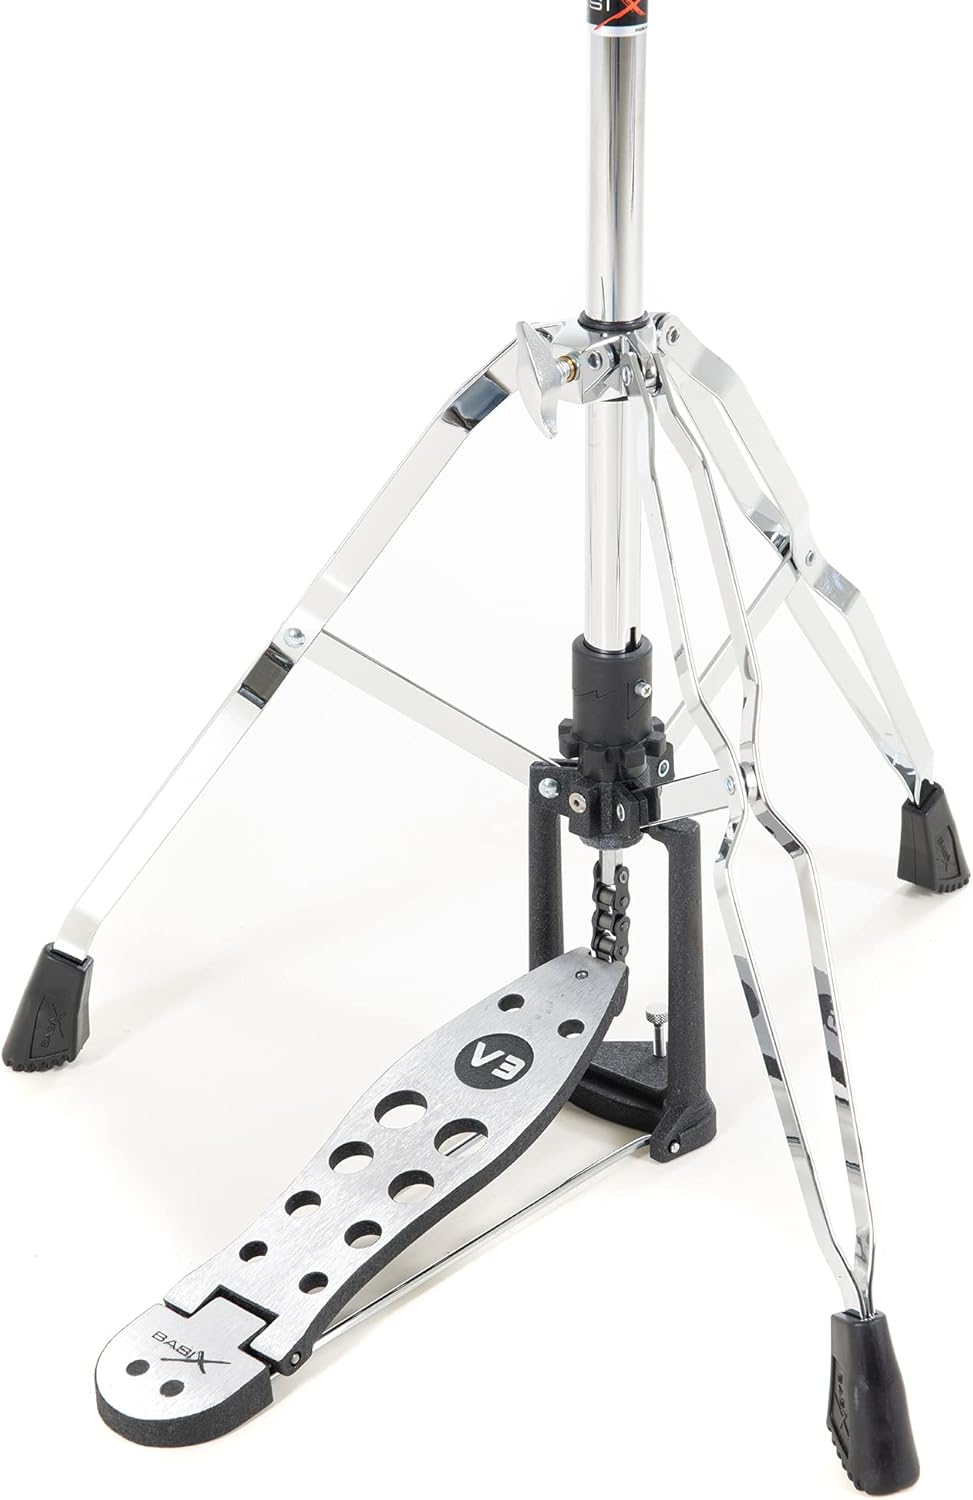
Rajah 2.1: Depan view of the GEWA HH-600-V3 Hi-Hat Stand, showcasing its double-braced legs and pedal mechanism.
3. Arahan Persediaan
Follow these steps to correctly assemble your GEWA HH-600-V3 Hi-Hat Stand.
- Buka Pembungkusan Komponen: Carefully remove all parts from the packaging. Verify that all components listed in the 'Product Overview' section are present.
- Panjangkan Kaki: Place the stand base on a flat surface. Loosen the wing nut on the leg assembly and spread the double-braced legs to a stable position. Tighten the wing nut securely to lock the legs in place.
- Insert Lower Rod: Insert the lower section of the main rod into the stand base. Secure it by tightening the appropriate clamp.
- Insert Upper Rod: Slide the upper rod (the thinner rod) into the lower rod. Adjust the height to your preference and secure it with the memory lock and clamp. Ensure the memory lock is set to prevent the rod from slipping during use.
- Pasangkan Klac Hi-Hat: The hi-hat clutch consists of several parts: a bottom nut, felt washers, the bottom cymbal seat, the top cymbal seat, and the top nut. Place the bottom hi-hat cymbal onto the stand's cymbal seat. Then, attach the hi-hat clutch to the top hi-hat cymbal. The clutch typically involves a threaded rod, felt washers, and a locking mechanism. Ensure the top cymbal is securely fastened to the clutch.
- Mount Cymbals: Place the bottom hi-hat cymbal directly onto the stand's lower cymbal seat. Then, slide the top hi-hat cymbal (with the clutch attached) onto the upper rod. Adjust the clutch to allow the top cymbal to move freely when the pedal is operated, or to be clamped tightly for a closed sound.
- Laraskan Ketinggian dan Ketegangan: Fine-tune the overall height of the stand using the main height adjustment clamp. Adjust the spring tension knob, usually located near the pedal, to achieve your desired pedal feel and response.
4. Arahan Operasi
Understanding the controls of your hi-hat stand will allow for optimal musical expression.
4.1. Adjusting Hi-Hat Height
To adjust the overall height of your hi-hat cymbals, loosen the main height adjustment clamp on the stand's central tube. Raise or lower the upper section to the desired height, then securely tighten the clamp. For consistent setup, utilize the memory lock feature by positioning it just below the clamp and tightening it.
4.2. Melaraskan Ketegangan Spring
The spring tension knob, typically located near the pedal mechanism, controls the resistance of the hi-hat pedal. Turn the knob clockwise to increase spring tension for a faster, more responsive pedal action. Turn it counter-clockwise to decrease tension for a lighter feel. Experiment to find the setting that suits your playing style.
4.3. Using the Hi-Hat Clutch
The cast iron hi-hat clutch secures the top hi-hat cymbal to the pull rod. It allows for various cymbal sounds:
- Hi-Hat Tertutup: Tighten the clutch nuts firmly to hold the top cymbal against the bottom cymbal.
- Buka Hi-Hat: Loosen the clutch nuts to allow the top cymbal to separate from the bottom cymbal when the pedal is released.
- Loose Hi-Hat: Adjust the clutch to allow a slight gap between the cymbals when the pedal is fully up, creating a 'sizzly' sound.

Rajah 4.1: Jarak dekat view of the hi-hat clutch and upper rod, showing the felt washers and adjustment points.
4.4. Pedal Operation
The chain drive pedal mechanism connects to the pull rod. Pressing the pedal lowers the top hi-hat cymbal, closing it against the bottom cymbal. Releasing the pedal allows the spring tension to raise the top cymbal. Practice varying pressure and release techniques to achieve different sounds, from tight closed sounds to splashing open sounds.
5. Penyelenggaraan
Regular maintenance will extend the life and ensure the smooth operation of your hi-hat stand.
- Pembersihan: Wipe down chrome and metal parts with a soft, dry cloth after each use to remove fingerprints and sweat. For stubborn grime, use a damp cloth with a mild, non-abrasive cleaner, then dry thoroughly. Avoid harsh chemicals that can damage the finish.
- Pelinciran: Periodically apply a small amount of silicone-based lubricant to moving parts such as the pedal hinge, chain, and the inside of the main tubes where they slide. This ensures smooth action and prevents squeaking. Do not over-lubricate.
- Semak Pemakaian: Regularly inspect all nuts, bolts, and clamps for tightness. Check the nylon lining for any signs of wear or damage. Ensure the rubber feet are intact to prevent slipping. Replace any worn or damaged parts promptly.
- Storan: When not in use, collapse the stand and store it in a dry, temperature-controlled environment. Avoid extreme temperatures and humidity, which can cause corrosion or damage to materials.
6. Penyelesaian masalah
If you encounter issues with your hi-hat stand, refer to the following common problems and solutions:
| Masalah | Kemungkinan Punca | Penyelesaian |
|---|---|---|
| Stand is unstable or wobbly. | Legs not fully extended or clamps longgar. | Ensure legs are fully spread and all wing nuts/clamps are securely tightened. Check that the stand is on a flat surface. |
| Hi-hat cymbals do not open/close properly. | Clutch too tight/loose, spring tension incorrect, or pull rod obstructed. | Adjust the hi-hat clutch. Check spring tension. Ensure the pull rod moves freely and is not bent or obstructed. |
| Pedal feels stiff or squeaks. | Lack of lubrication or dirt in moving parts. | Apply a small amount of silicone-based lubricant to the pedal hinge and chain. Clean any visible dirt or debris. |
| Top cymbal slips on the clutch. | Clutch nuts are loose or felt washers are worn. | Tighten the clutch nuts firmly. If slipping persists, inspect and replace worn felt washers. |
7. Spesifikasi
Detailed technical specifications for the GEWA HH-600-V3 Hi-Hat Stand:
- model: HH-600-V3
- Nombor Model Item: PS803621
- Reka bentuk: Double-braced, heavy-duty
- Material (Lining/Pedal Components): nilon
- Clutch Type: Cast Iron Hi-Hat Clutch
- Sistem Pemacu: Pemacu Berantai
- Ketegangan Spring: Boleh laras
- Julat Ketinggian: Approximately 60 cm to 90 cm (23.6 to 35.4 inches)
- Jenis Selesai: Digilap
- warna: Perak
- Berat Barang: Kira-kira 3.2 kg (7.05 lbs)
- Dimensi Pakej: 62.5 x 14.5 x 14.5 cm (24.6 x 5.7 x 5.7 inci)
- Pengeluar: GEWA
- UPC: 647139376028
8. Waranti & Sokongan
For specific warranty information regarding your GEWA HH-600-V3 Hi-Hat Stand, please refer to the documentation provided at the time of purchase or visit the official GEWA website. If you require technical assistance, spare parts, or have questions not covered in this manual, please contact GEWA customer support through their official channels.
Always ensure you are using genuine GEWA replacement parts to maintain the integrity and performance of your stand.