
pengenalan
Thank you for choosing the Whistler D14VR Automotive DVR Dash Camera. This manual provides detailed instructions for the proper installation, operation, and maintenance of your device. Please read this manual thoroughly before using the product to ensure optimal performance and safety.
Kandungan Pakej
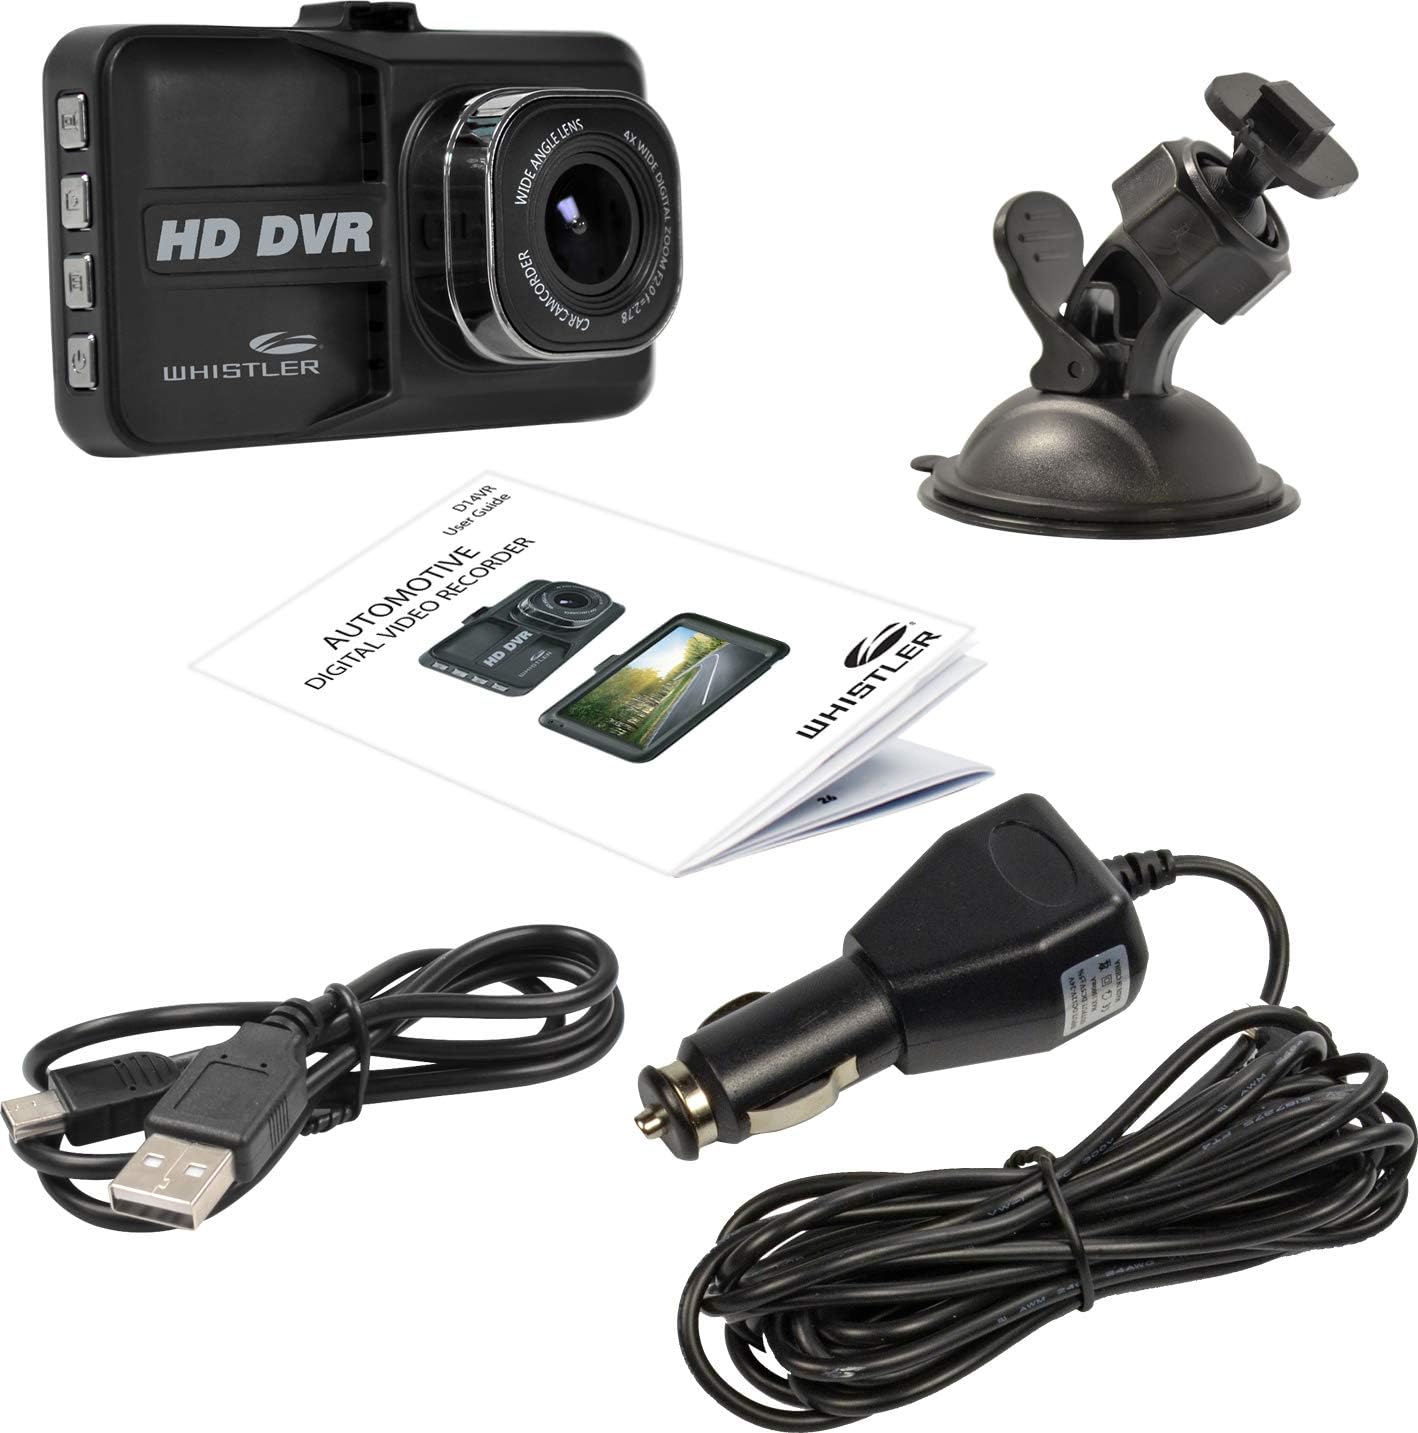
Image: The Whistler D14VR Dash Camera, suction cup mount, car charger, USB cable, and user guide.
Sila sahkan bahawa semua item yang disenaraikan di bawah disertakan dalam pakej anda:
- Whistler D14VR Dash Camera
- Mount Piala Sedutan
- Pengecas Kereta
- Kabel USB
- Panduan Pengguna
Produk Selesaiview
Depan View

Image: The front of the Whistler D14VR Dash Camera, showing the 3-inch LCD monitor displaying a road scene, along with recording indicators and date/time stamp.
The front of the dash camera features a 3-inch LCD monitor for live view and playback, and the main lens for recording. Indicators for recording status and power are also visible.
sebelah Views

Image: The left side of the dash camera, displaying four control buttons for various functions.
The left side of the camera houses the primary control buttons, including the power button and mode selection buttons.
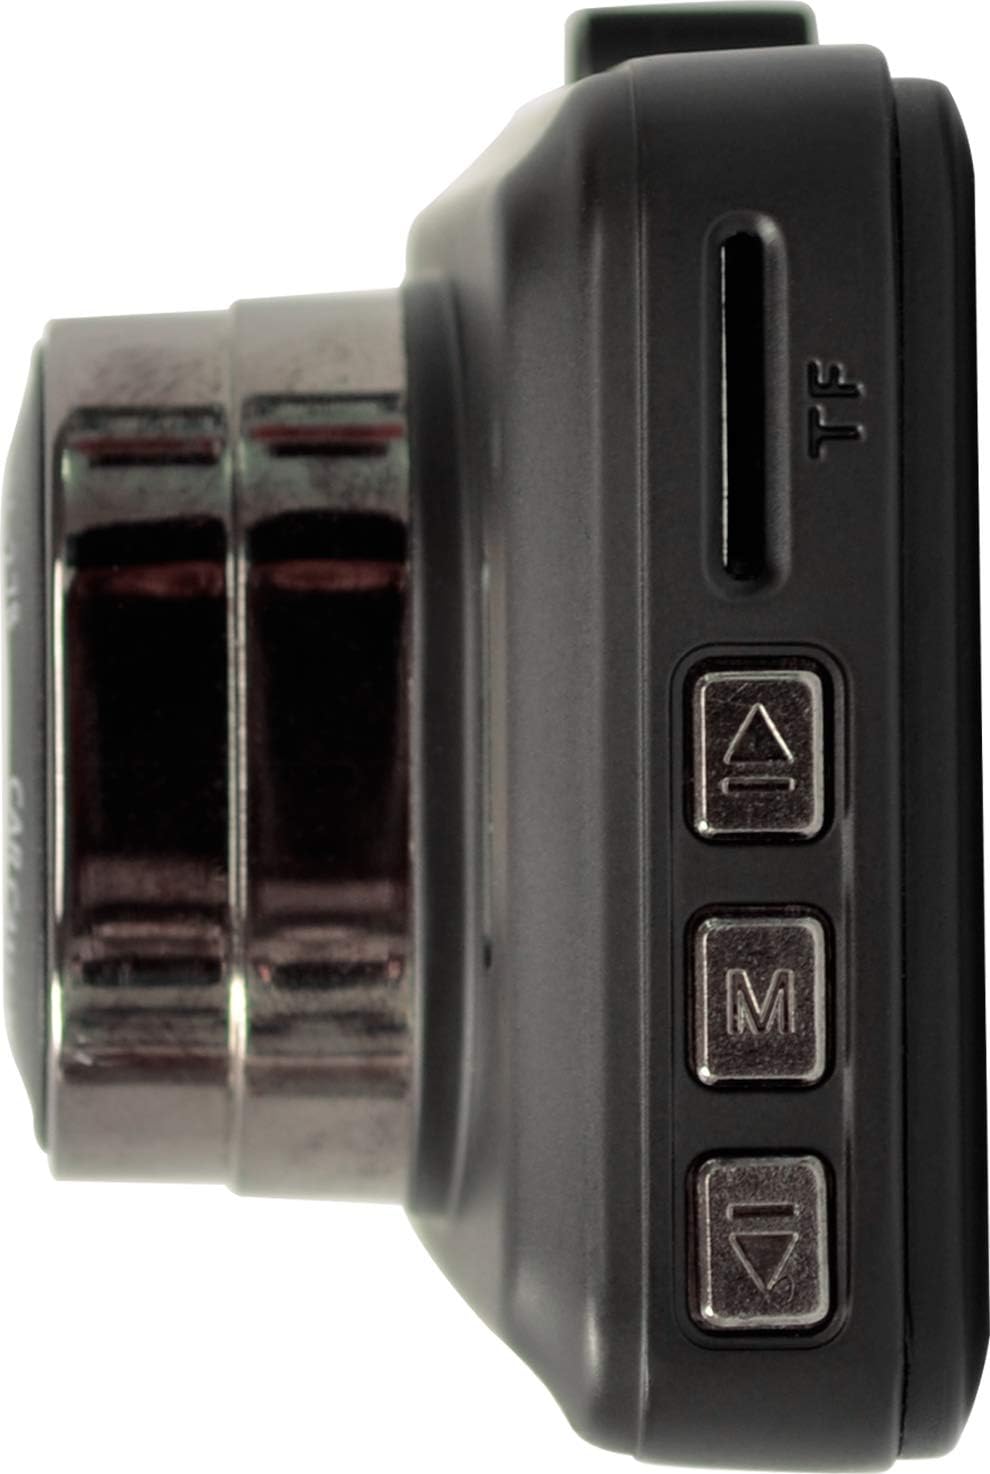
Image: The right side of the dash camera, featuring the Micro SD card slot and additional menu navigation buttons.
The right side includes the Micro SD card slot for memory expansion and additional buttons for menu navigation (Up, Menu, Down).
Atas View

Image: The top edge of the dash camera, showing the HDMI output port and the Mini-USB power/data port.
The top of the camera features the HDMI output port for connecting to external displays and a Mini-USB port for power and data transfer.
Persediaan
Memasang Kamera Dash

Image: The Whistler D14VR Dash Camera connected to its suction cup mount.
- Attach the suction cup mount to the top slot of the dash camera.
- Clean the desired area on your vehicle's windshield. Ensure the surface is dry and free of dust or grease.
- Tekan cawan sedutan dengan kuat pada cermin depan dan balikkan tuil untuk menguncinya. Letakkan kamera untuk memastikan jelas view of the road without obstructing your driving visibility.

Image: The Whistler D14VR Dash Camera mounted on a car windshield, powered on and displaying a road view.
Sambungan Kuasa
- Connect the included car charger to the Mini-USB port on the top of the dash camera.
- Pasangkan hujung pengecas kereta yang satu lagi ke soket kuasa 12V kenderaan anda (soket pemetik api).
- Kamera biasanya akan dihidupkan secara automatik apabila penyalaan kenderaan dihidupkan.
Memasukkan Kad SD Mikro
A Micro SD card (not included) is required for recording video. The device supports Micro SD cards up to 32GB.
- With the camera powered off, locate the Micro SD card slot on the right side of the device.
- Masukkan kad Micro SD dengan sesentuh emas menghadap ke belakang kamera sehingga ia terkunci pada tempatnya.
- Untuk mengalih keluar, tolak kad masuk perlahan-lahan sehingga ia mengklik, kemudian lepaskan dan ia akan keluar.
- It is recommended to format the Micro SD card within the camera's settings before first use and periodically thereafter to ensure optimal performance.
Arahan Operasi
Menghidupkan/Mematikan
- automatik: When connected to your vehicle's power, the camera will automatically power on and begin recording when the ignition is turned on, and power off when the ignition is turned off.
- Manual: Press and hold the Power button (located on the left side) for a few seconds to manually turn the camera on or off.
Rakaman Asas
- Once powered on, the camera will automatically start recording in a continuous loop.
- Video files are saved in segments (e.g., 1, 3, 5 minutes) to the Micro SD card. When the card is full, the oldest unprotected files akan ditimpa.
- To manually start/stop recording, press the Record button (usually indicated by a camera icon).
Navigasi dan Tetapan Menu
Use the 'M' (Menu) button to enter the menu, and the 'Up' and 'Down' arrow buttons to navigate. Press 'M' again or the 'OK' button (often the record button) to confirm selections.
- Resolusi Video: Select between 1080p HD (1920x1080) or 720p HD (1280x720) for recording quality. Higher resolution consumes more storage space.
- Rakaman Gelung: Tetapkan tempoh segmen video (cth, 1, 3, 5 minit).
- G-Sensor: This feature detects sudden impacts or collisions and automatically locks the current video file to prevent it from being overwritten. Adjust sensitivity as needed.
- Pengesanan Pergerakan: When enabled, the camera will start recording automatically if motion is detected in front of the lens while parked.
- Monitor Tempat Letak Kereta: Provides surveillance when the vehicle is parked, often triggered by vibrations.
- Tarikh/Masa Stamp: Ensure the correct date and time are set for accurate record-keeping. This information is embedded in the video footage.
- Zum Digital: The camera features 4x digital zoom. Use the appropriate buttons to adjust zoom during live view.
Main balik
- Main Balik Pada Peranti: Switch to playback mode using the mode button. Navigate through recorded files using the Up/Down buttons and press OK to play.
- HDMI Playback: Connect the camera to an external display (TV, monitor) using an HDMI cable (not included) to view recordings on a larger screen.
- Main balik Komputer: Connect the camera to a computer via the USB cable, or insert the Micro SD card directly into a computer's card reader to access and play video files.
Penyelenggaraan
- Pembersihan: Use a soft, dry cloth to clean the camera lens and LCD screen. Avoid abrasive cleaners or solvents.
- Penjagaan Kad SD: Regularly format your Micro SD card (at least once a month) to prevent data corruption and ensure smooth recording. Replace the card if you experience frequent errors or recording issues.
- Suhu: Avoid exposing the camera to extreme temperatures for extended periods, as this can affect battery life and device performance.
Menyelesaikan masalah
| Isu | Kemungkinan Punca / Penyelesaian |
|---|---|
| Kamera tidak dihidupkan. | Ensure the car charger is securely connected to both the camera and the vehicle's 12V outlet. Check if the vehicle's ignition is on. The internal battery may be depleted; charge it for a few hours. |
| Date and time settings reset. | The internal battery that maintains date/time settings may be low. Keep the camera connected to power to allow the internal battery to charge. |
| Rakaman berhenti atau files rosak. | The Micro SD card may be full or corrupted. Format the SD card in the camera's settings. Ensure you are using a compatible Micro SD card (up to 32GB). |
| Kualiti video kurang baik atau kabur. | Clean the camera lens with a soft cloth. Check the video resolution settings in the menu and ensure it is set to 1080p or 720p. Ensure the protective film has been removed from the lens. |
| Suction cup mount does not hold. | Ensure the windshield surface is clean and dry before attaching. Apply firm pressure and flip the lever to create a strong seal. Avoid mounting on cold windshields, as temperature changes can affect adhesion. |
Spesifikasi
| Ciri | Perincian |
|---|---|
| Nama Model | D14VR |
| Resolusi Tangkapan Video | 1080p (1920 x 1080 @ 25fps), 720p (1280 x 720 @ 30fps) |
| Saiz Skrin Paparan | LCD 3 Inci |
| Viewsudut | 120 darjah |
| Zum Digital | 4x |
| Ciri Khas | Anti-Shake, Infrared, Night Vision, G-Sensor, Motion Detection, Parking Monitor |
| Teknologi Ketersambungan | HDMI, USB |
| Penyimpanan | Micro SD up to 32GB (Class 10 recommended) |
| Jenis Pemasangan | Windshield Suction Mount |
| Dimensi Produk | 4 x 1.76 x 3.5 inci |
| Berat Barang | 6.2 auns (0.39 paun) |
Waranti dan Sokongan
This Whistler D14VR Automotive DVR Dash Camera comes with a Waranti Terhad Setahun dari tarikh pembelian. Waranti ini melindungi kecacatan pada bahan dan mutu kerja di bawah penggunaan biasa.
For warranty service, technical support, or further inquiries, please visit the official Whistler webtapak di www.whistler.com atau rujuk maklumat hubungan yang diberikan dalam pembungkusan produk anda.
Sila simpan bukti pembelian anda untuk tuntutan waranti.