
1. Pengenalan dan Maklumat Keselamatan
This manual provides essential information for the safe and efficient operation, maintenance, and troubleshooting of your Holzmann BT1220 Belt and Disc Sander. Please read and understand all instructions before operating the machine. Keep this manual for future reference.
1.1 Tujuan Penggunaan
The Holzmann BT1220 is designed for sanding wood, plastics, and similar materials using both a sanding belt and a sanding disc. It is intended for use in workshops and by skilled individuals. Any other use is considered improper and may lead to hazards.
1.2 Amaran Keselamatan Am
- Sentiasa memakai peralatan pelindung diri (PPE) yang sesuai, termasuk cermin mata keselamatan, perlindungan pendengaran dan topeng habuk.
- Pastikan kawasan kerja bersih, terang dan bebas daripada halangan.
- Jauhkan kanak-kanak dan orang ramai daripada mesin pengendalian.
- Jangan kendalikan sander dalam damp atau keadaan basah.
- Always disconnect the power supply before making adjustments, changing accessories, or performing maintenance.
- Securely fasten the workpiece before sanding. Never sand freehand.
- Do not force the tool. Allow the machine to work at its intended speed.
- Periksa kord kuasa dengan kerap untuk kerosakan.
2. Produk Lebihview
The Holzmann BT1220 is a versatile sanding machine featuring both a belt sanding unit and a disc sanding unit. This combination allows for a wide range of sanding tasks, from rough material removal to fine finishing.
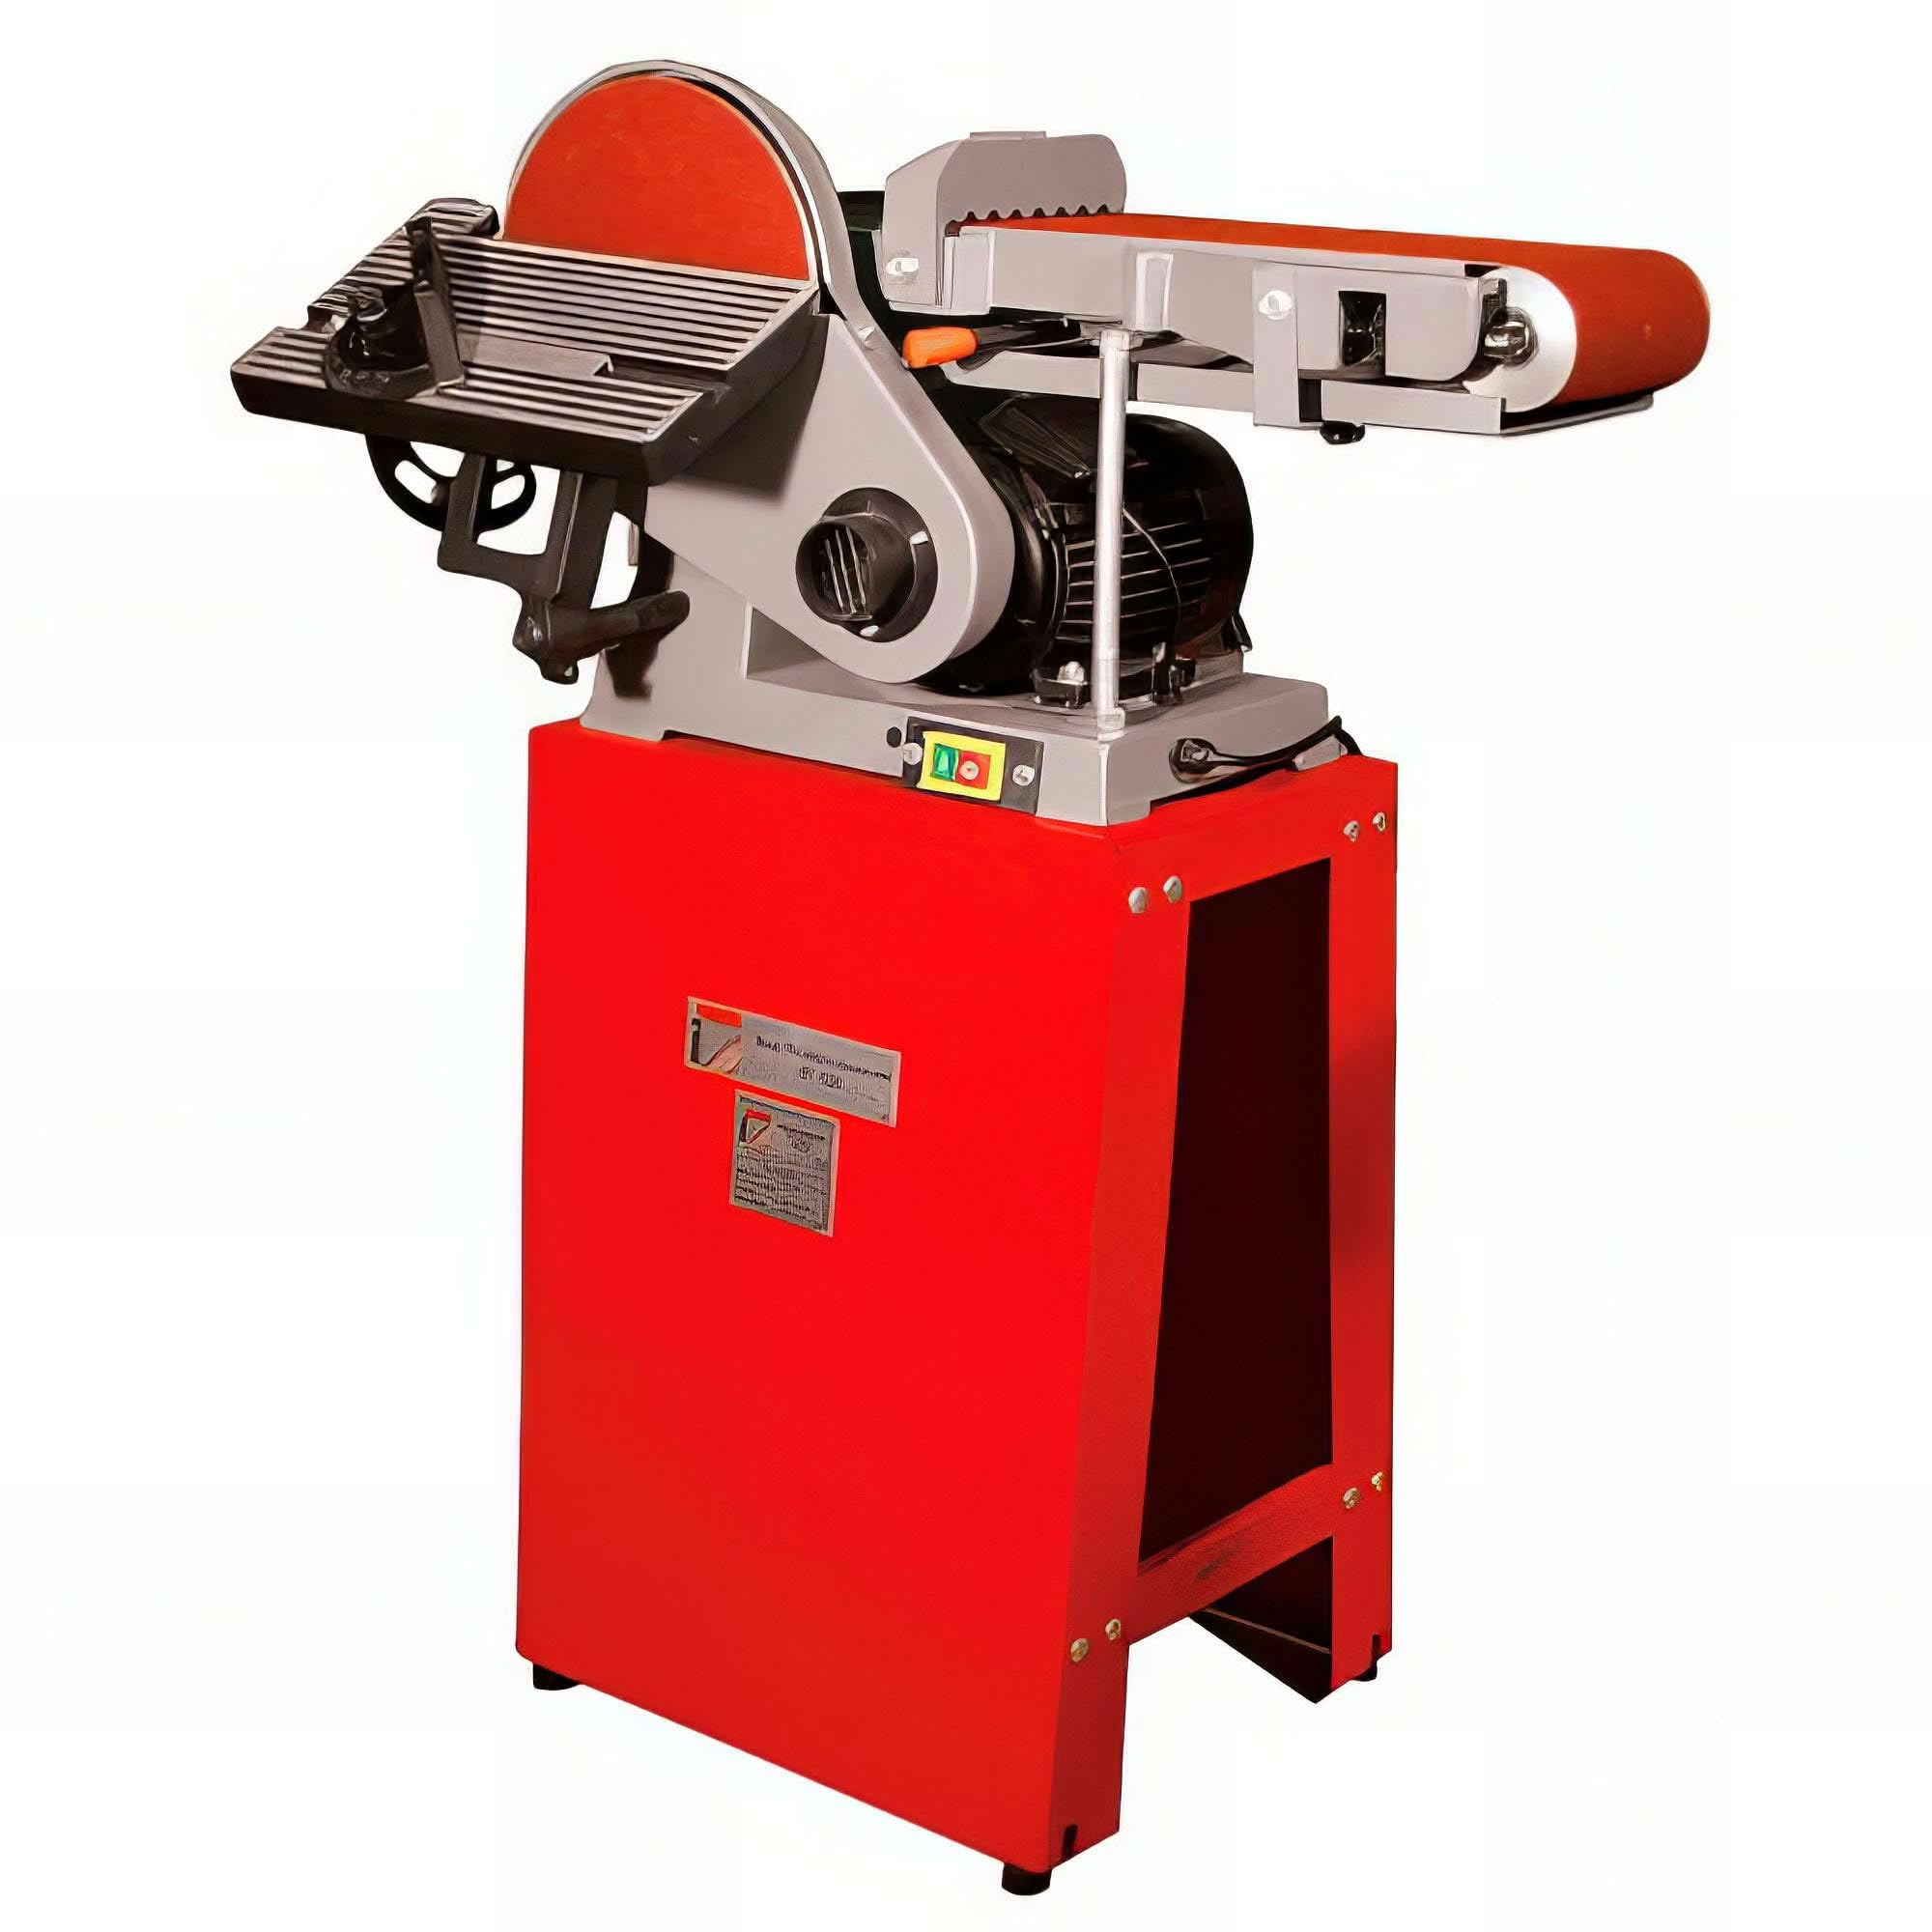
Rajah 1: Holzmann BT1220 Belt and Disc Sander. This image shows the complete sanding machine with both the belt and disc sanding units visible, ready for operation.
2.1 Komponen Utama
- Sanding Belt Unit: Untuk operasi pengamplasan linear.
- Sanding Disc Unit: For face sanding and shaping.
- Meja Kerja: Adjustable table for supporting workpieces during disc sanding.
- Motor: Powers both sanding units.
- Suis Hidup/Mati: For controlling power to the machine.
3. Persediaan
3.1 Membongkar dan Memasang
- Keluarkan semua komponen dari pembungkusan dengan berhati-hati.
- Inspect for any shipping damage. Report any damage immediately to your supplier.
- Assemble any detached components according to the diagrams in the separate assembly guide (if provided). Ensure all fasteners are securely tightened.
- Mount the sander on a stable workbench or stand, ensuring it is securely bolted down to prevent movement during operation.
3.2 Sambungan Elektrik
- Ensure the power supply matches the machine's requirements (230V).
- Sambungkan mesin ke soket elektrik yang dibumikan dengan betul.
- Jangan gunakan kord sambungan melainkan benar-benar perlu, dan pastikan ia dinilai untuk keperluan kuasa mesin.
4. Arahan Operasi
Before starting, ensure all safety guards are in place and the workpiece is properly secured.
4.1 Belt Sanding Operation
- Select the appropriate grit sanding belt for your task.
- Adjust the belt unit to the desired angle (horizontal or vertical).
- Hidupkan mesin menggunakan suis Hidup/Mati.
- Gently bring the workpiece into contact with the moving sanding belt. Apply even, moderate pressure.
- Move the workpiece smoothly across the belt to ensure even material removal and prevent gouging.
- When finished, turn off the machine and wait for the belt to stop completely before removing the workpiece.
4.2 Disc Sanding Operation
- Attach the desired grit sanding disc to the disc plate.
- Adjust the work table to the desired angle relative to the sanding disc.
- Hidupkan mesin.
- Present the workpiece to the sanding disc, always on the downward-rotating side of the disc (left side for most setups) to prevent the workpiece from being thrown.
- Use the work table to support the workpiece and guide it smoothly across the disc.
- Turn off the machine and allow the disc to stop before removing the workpiece.
5. Penyelenggaraan
Regular maintenance ensures the longevity and safe operation of your sander. Always disconnect the power before performing any maintenance.
5.1 Pembersihan
- After each use, clean dust and debris from the machine using a brush or vacuum cleaner.
- Pastikan bukaan pengudaraan jelas untuk mengelakkan terlalu panas.
- Do not use solvents or harsh chemicals that could damage plastic parts or paint.
5.2 Replacing Sanding Belts and Discs
- Penggantian Tali Pinggang: Release the belt tensioning lever, remove the old belt, and install a new one, ensuring it is centered and tensioned correctly.
- Penggantian Cakera: Peel off the old adhesive disc and apply a new one, aligning it carefully with the disc plate.
- Always use sanding belts and discs of the correct size and type for the machine.
6. Penyelesaian masalah
Before attempting any repairs, always disconnect the power supply.
| Masalah | Kemungkinan Punca | Penyelesaian |
|---|---|---|
| Mesin tidak bermula | No power supply; Faulty switch; Damaged power cord. | Check power connection and circuit breaker; Inspect power cord; Contact qualified service personnel. |
| Getaran yang berlebihan | Loose mounting bolts; Unbalanced sanding belt/disc; Worn bearings. | Tighten mounting bolts; Replace sanding belt/disc; Contact qualified service personnel. |
| Prestasi pengamplasan yang lemah | Worn sanding belt/disc; Incorrect grit for material; Excessive pressure. | Replace sanding belt/disc; Use appropriate grit; Reduce pressure. |
7. Spesifikasi
| Ciri | Nilai |
|---|---|
| Model | BT1220 |
| Kuasa Motor (S1) | 750 W |
| Kuasa Motor (S6) | 1125 W |
| Voltage | 230 V |
| Kelajuan Spindle | 1400 min-1 (RPM) |
| Sanding Belt Dimensions | 1220 x 150 mm |
| Diameter Cakera Pengamplasan | 228 mm |
| Dimensi Meja | 310 x 190 mm |
| Dimensi Produk (L x W x H) | 60 x 60 x 85 cm |
| Berat Bersih | 51 kg |
| Berat Kasar | 52 kg |
8. Waranti dan Sokongan
For warranty information, technical support, or spare parts, please contact your authorized Holzmann dealer or the manufacturer directly. Keep your purchase receipt as proof of purchase.