
1. Pengenalan
This user manual provides essential information for the safe and efficient installation, operation, and maintenance of your Supermicro YM-5201D ATX & EPS12V Power Supply. Please read this manual thoroughly before using the product to ensure proper functionality and to prevent damage.

Figure 1: Supermicro YM-5201D ATX & EPS12V Power Supply, showing the main unit and attached power cables.
2. Maklumat Keselamatan
Sentiasa patuhi langkah berjaga-jaga keselamatan berikut untuk mengelakkan kecederaan atau kerosakan pada bekalan kuasa dan komponen yang disambungkan:
- Ensure the power supply is disconnected from the AC outlet before installation or removal.
- Jangan buka bekalan kuasa casing. There are no user-serviceable parts inside, and opening it voids the warranty and exposes you to dangerous voltages.
- Pasang bekalan kuasa di kawasan yang mempunyai pengudaraan yang baik untuk mengelakkan terlalu panas.
- Use only the cables provided or approved by Supermicro for this power supply.
- Elakkan daripada mendedahkan bekalan kuasa kepada kelembapan atau suhu yang melampau.
- Ensure proper grounding of the computer system.
3. Kandungan Pakej
Sahkan bahawa semua item terdapat dalam pakej:
- Supermicro YM-5201D ATX & EPS12V Power Supply
- Kord Kuasa AC (khusus wilayah)
- Skru Pemasangan
- Manual Pengguna (dokumen ini)
4. Persediaan dan Pemasangan
Follow these steps to install the power supply into your computer chassis:
- Sediakan Sistem: Disconnect the computer from the AC power outlet. Open the computer case according to its manufacturer's instructions.
- Keluarkan Bekalan Kuasa Lama (jika berkenaan): Unscrew and remove the existing power supply. Disconnect all power cables from the motherboard, graphics card, drives, and other components.
- Install New Power Supply: Carefully slide the Supermicro YM-5201D power supply into the designated power supply bay in your chassis. Ensure the fan is oriented correctly for optimal airflow (typically facing downwards or towards the rear vent).
- Secure the Power Supply: Align the screw holes on the power supply with those on the chassis. Secure the power supply using the provided mounting screws.
- Sambungkan Kabel:
- Penyambung Papan Induk ATX 24-pin: Connect the large 24-pin connector to the corresponding port on your motherboard. Ensure it clicks into place.
- 8-pin (4+4) EPS12V CPU Connector: Connect the 8-pin or split 4+4-pin connector to the CPU power port on your motherboard.
- PCIe Connectors (if applicable): If your graphics card requires additional power, connect the appropriate 6-pin or 8-pin PCIe power connectors.
- Penyambung Kuasa SATA: Connect SATA power cables to your hard drives, SSDs, and optical drives.
- Molex Connectors (if applicable): Connect Molex power cables to any legacy devices or case fans that require them.
- Pengurusan Kabel: Route cables neatly to improve airflow and aesthetics within the case.
- Tutup Casis: Once all connections are secure, close the computer case.
- Sambungkan Kuasa AC: Connect the AC power cord to the power supply's inlet and then to a grounded wall outlet or surge protector.
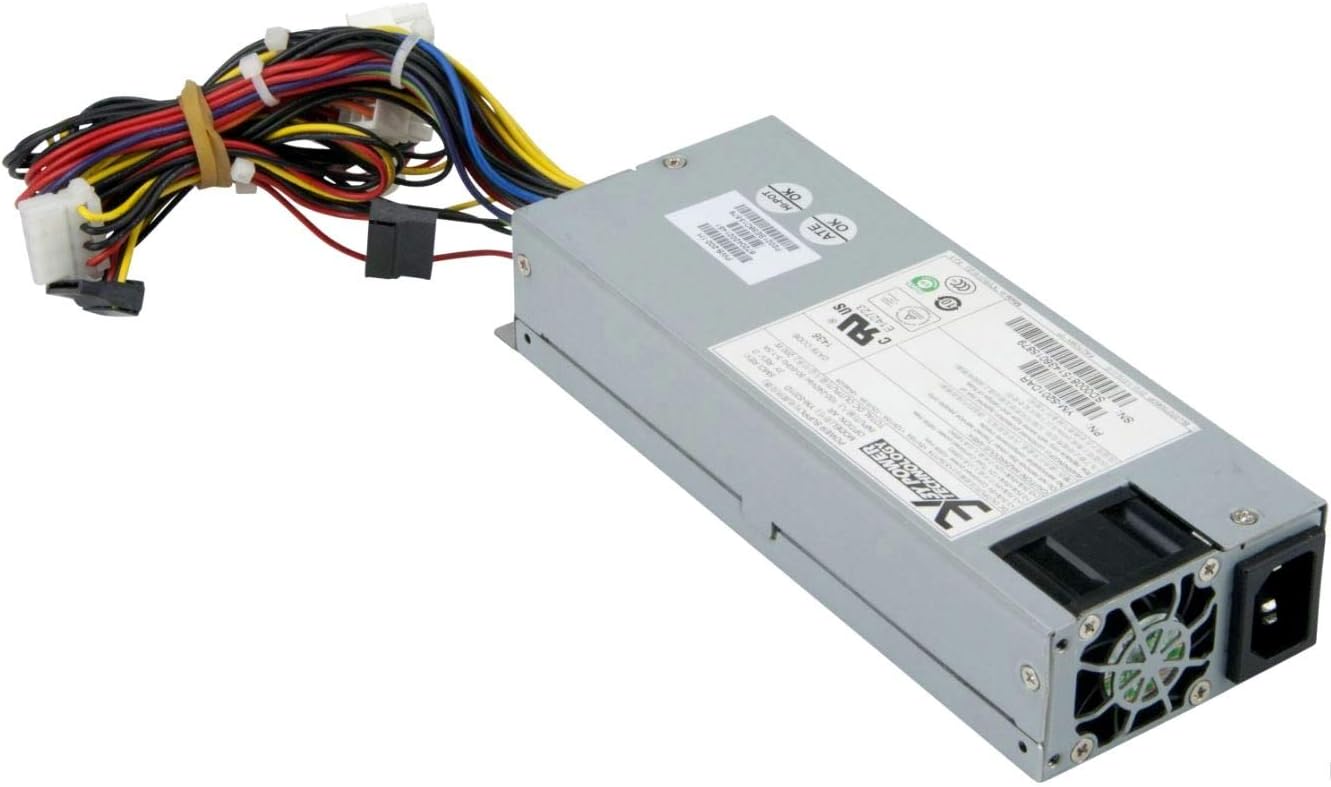
Rajah 2: Belakang view of the Supermicro YM-5201D Power Supply, highlighting the cooling fan and AC power input.
5. Arahan Operasi
After successful installation, operating the power supply is straightforward:
- Hidupkan kuasa: Ensure the power switch on the rear of the power supply (if present) is in the 'ON' (I) position. Then, press the power button on your computer case.
- Matikan: Shut down your computer through the operating system. Once the system is off, you can flip the power switch on the power supply to the 'OFF' (O) position for complete power disconnection.
- Operasi Biasa: The power supply will automatically regulate power delivery to your components based on demand. Ensure adequate ventilation around your computer to prevent heat buildup.
6. Penyelenggaraan
Regular maintenance helps prolong the life of your power supply:
- Penyingkiran habuk: Periodically (e.g., every 3-6 months), disconnect the power supply from the AC outlet and use compressed air to gently blow dust out of the power supply's fan and vents. Do not open the casing.
- Pemeriksaan Kabel: Occasionally check all power cables for any signs of wear, fraying, or loose connections.
- Pengudaraan: Ensure that the computer case's ventilation openings are not obstructed.
7. Penyelesaian masalah
Jika anda menghadapi masalah, rujuk kepada masalah dan penyelesaian biasa berikut:
| Masalah | Kemungkinan Punca | Penyelesaian |
|---|---|---|
| Komputer tidak boleh dihidupkan. | Power cable loose; Power switch off; Faulty component; Insufficient power. | Check AC power cord connection. Ensure power supply switch is ON. Verify all internal power connections (24-pin, 8-pin CPU). Test with minimal components. |
| Sistem dihidupkan tetapi dimatikan serta-merta. | Overload; Overheating; Short circuit. | Pastikan jumlah wattage draw is within PSU limits. Check for proper ventilation. Inspect for any loose screws or components that might be causing a short. |
| Bunyi kipas yang kuat dari PSU. | Dust buildup; Fan bearing issue; High load. | Clean dust from fan and vents using compressed air. If noise persists and is excessive, consider professional inspection. |
If troubleshooting steps do not resolve the issue, contact Supermicro technical support.
8. Spesifikasi
Key technical specifications for the Supermicro YM-5201D Power Supply:
| Ciri | Perincian |
|---|---|
| Nama Model | YM-5201D |
| Nombor Model Item | PWS-202-1H |
| Jenama | Supermikro |
| Faktor Bentuk | 1U |
| Output Wattage | 200 Watt |
| Jenis Penyambung | ATX |
| Peranti Serasi | Desktop Computers, Servers, Desktop Components |
| Kaedah Penyejukan | Udara |
| Dimensi Produk (L x W x H) | 1.1 x 9.7 x 6.5 inci |
| Berat Barang | 6.6 paun |
| Tarikh Mula-mula Tersedia | 14 November 2012 |
9. Waranti dan Sokongan
For warranty information and technical support, please refer to the official Supermicro webtapak atau hubungi perkhidmatan pelanggan mereka secara langsung. Simpan bukti pembelian anda untuk tuntutan waranti.
Supermicro Official Webtapak: www.supermicro.com