
1. Pengenalan
This manual provides comprehensive instructions for the installation, operation, and maintenance of the Supermicro X10SLM+-LN4F motherboard. Designed for server applications, this motherboard features an LGA1150 socket, Intel C224 PCH, DDR3 memory support, and multiple Gigabit Ethernet ports. Please read this manual thoroughly before proceeding with installation to ensure proper setup and optimal performance.
2. Produk Lebihview
The Supermicro X10SLM+-LN4F is a microATX server motherboard built for reliability and performance. Key features include:
- LGA1150 Socket for Intel Xeon E3-1200 v3/v4 and 4th Gen Core i3 processors.
- Intel C224 PCH chipset.
- Four DDR3 DIMM slots supporting up to 64GB ECC/non-ECC UDIMM.
- Multiple SATA3 (6Gbps) ports.
- Integrated quad Gigabit Ethernet ports.
- USB 3.0 and USB 2.0 support.
- VGA output for integrated graphics.
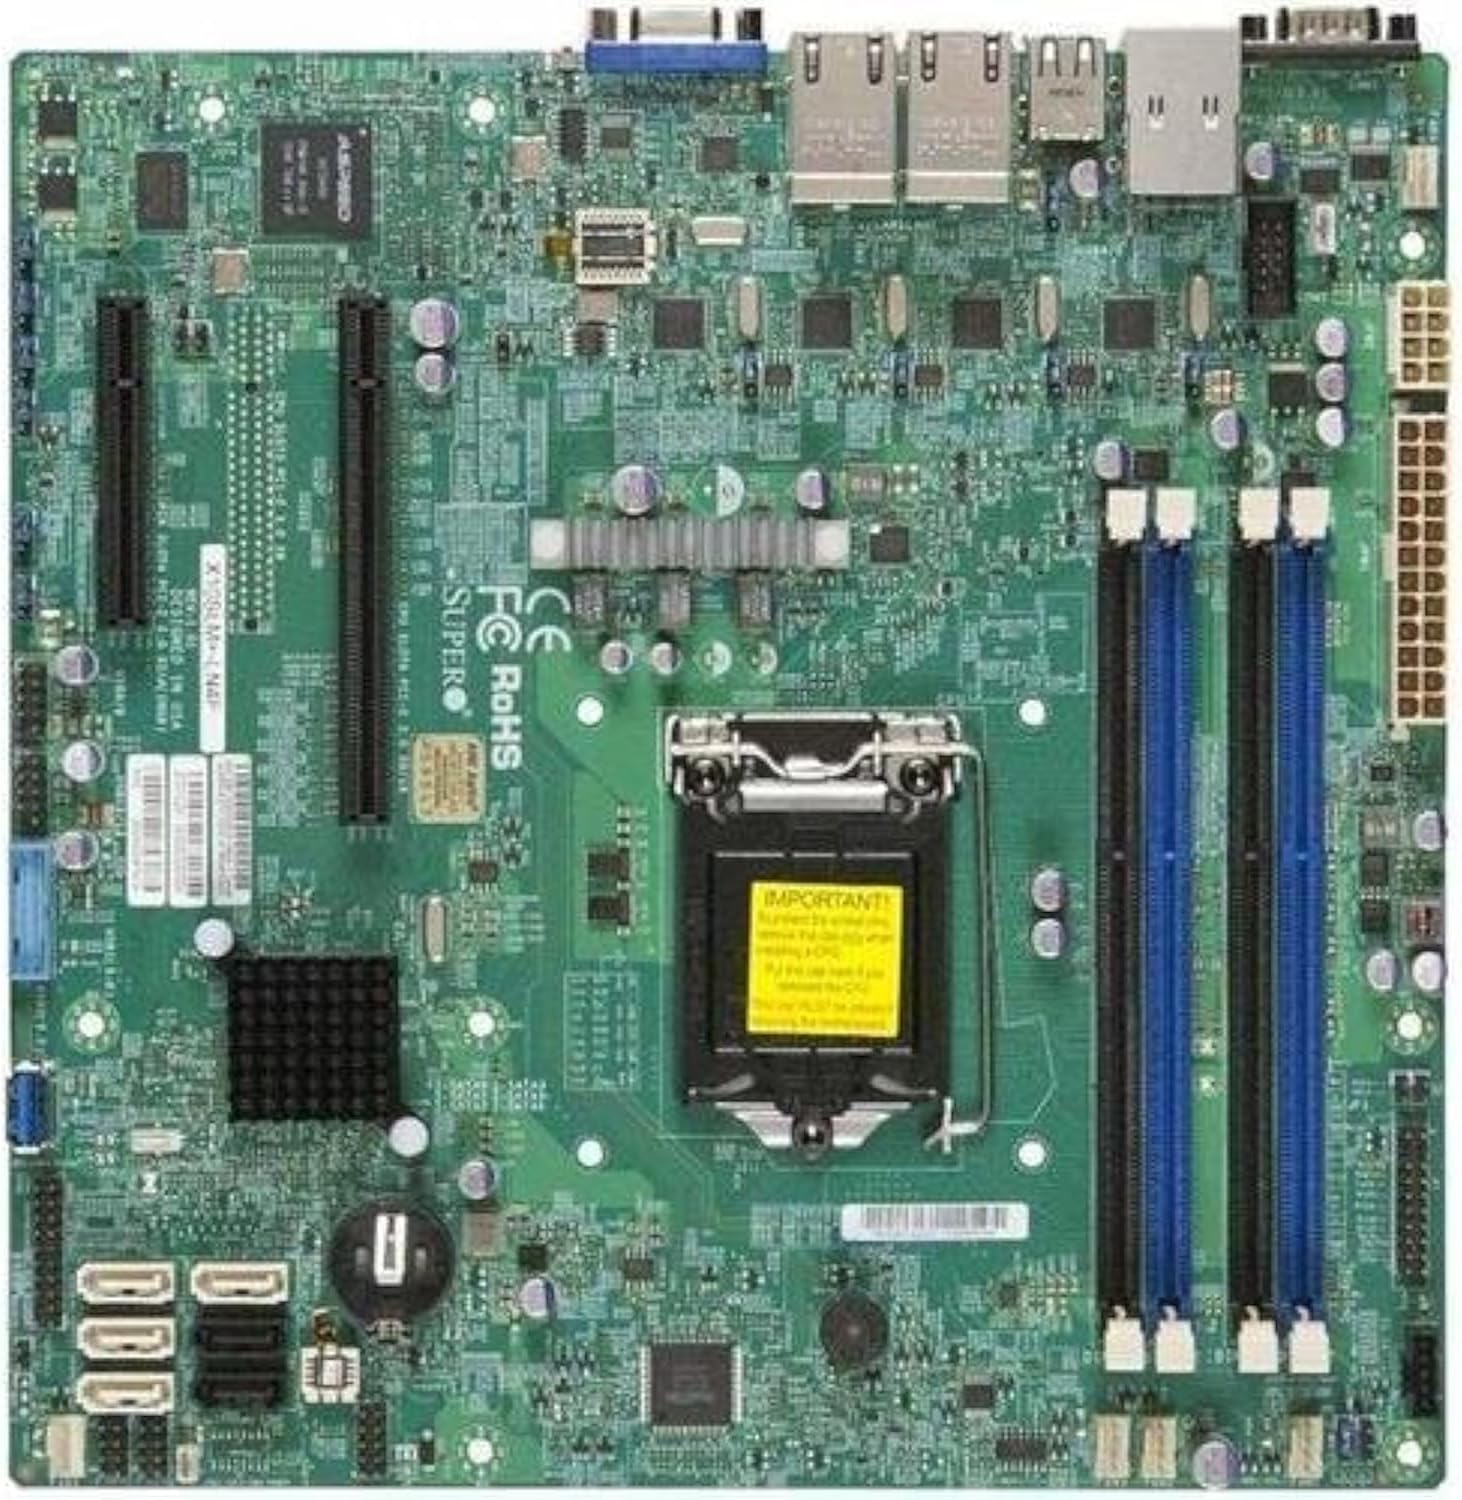
Rajah 2.1: Atas ke bawah view of the Supermicro X10SLM+-LN4F motherboard, showing the CPU socket, DIMM slots, PCIe slots, and various connectors.

Rajah 2.2: bersudut view of the motherboard, highlighting the layout of components and expansion slots.
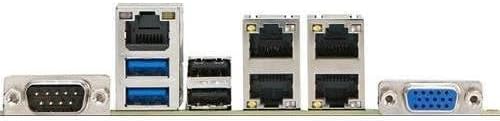
Rajah 2.3: Rear I/O panel of the Supermicro X10SLM+-LN4F motherboard, featuring multiple LAN ports, USB ports, and serial ports.
3. Persediaan dan Pemasangan
Before beginning installation, ensure your system is powered off and disconnected from the power source. Wear an anti-static wrist strap to prevent electrostatic discharge (ESD) damage to components.
3.1. Pemasangan CPU
- Cari soket CPU LGA1150 pada papan induk.
- Tekan tuil beban ke bawah dengan lembut dan tarik ke sisi untuk membuka bingkai pengekalan soket CPU.
- Selaraskan tanda segi tiga pada CPU dengan berhati-hati dengan tanda yang sepadan pada soket.
- Place the CPU into the socket without forcing it.
- Tutup bingkai penahan dan selamatkannya dengan tuil beban.
- Sapukan lapisan pes haba yang nipis dan sekata pada penyebar haba bersepadu (IHS) CPU.
- Pasang penyejuk CPU mengikut arahan pengeluarnya.
3.2. Pemasangan Memori (RAM).
- Locate the four DDR3 DIMM slots. For optimal performance, refer to the motherboard's specific memory population guidelines, typically starting with slots closest to the CPU or specific colored slots for dual-channel configurations.
- Open the retention clips at both ends of the DIMM slot.
- Selaraskan takuk pada modul memori DDR3 dengan kunci dalam slot DIMM.
- Masukkan modul memori dengan kuat ke dalam slot sehingga klip pengekalan terpasang pada tempatnya.
- Ensure both clips are fully closed and the module is seated correctly.
3.3. Pemasangan Peranti Storan
Connect SATA storage devices (HDDs/SSDs) to the SATA ports on the motherboard using SATA data cables. Connect the power cables from your power supply unit (PSU) to the storage devices.
3.4. Pemasangan Kad Pengembangan
This motherboard features PCI Express (PCIe) slots. To install an expansion card:
- Remove the corresponding slot cover from your chassis.
- Jajarkan kad pengembangan dengan slot PCIe.
- Tekan ke bawah dengan kuat sehingga kad diletakkan sepenuhnya di dalam slot.
- Secure the card with a screw or retention clip from your chassis.
3.5. Sambungan Kuasa
- Penyambung Kuasa ATX 24-pin: Connect the main 24-pin power cable from your PSU to the ATX power connector on the motherboard.
- 8-pin EPS/CPU Power Connector: Connect the 8-pin (or 4+4 pin) CPU power cable from your PSU to the EPS connector near the CPU socket.
3.6. Front Panel and Rear I/O Connections
- Penyambung Panel Depan: Connect the power switch, reset switch, power LED, and HDD activity LED cables from your chassis to the corresponding pins on the motherboard's front panel header. Refer to the motherboard's silkscreen labels for correct orientation.
- Pengepala USB: Connect front panel USB ports to the onboard USB headers.
- Pengepala Audio: Connect front panel audio jacks to the onboard audio header.
- Panel I/O Belakang: Connect peripherals such as keyboard, mouse, monitor (via VGA), and network cables (to the Gigabit Ethernet ports) to the rear I/O panel.
4. Arahan Operasi
4.1. Initial Power On and BIOS/UEFI Setup
- After all components are installed and connected, connect the power cord to the PSU and turn on the power switch on the PSU.
- Press the power button on your chassis.
- During the Power-On Self-Test (POST), repeatedly press the DEL or F2 key (or as indicated on screen) to enter the BIOS/UEFI setup utility.
- In the BIOS/UEFI, configure essential settings such as date and time, boot order, and enable/disable specific features as required for your operating system and hardware.
- Save changes and exit the BIOS/UEFI. The system will restart.
4.2. Pemasangan Sistem Pengendalian
To install an operating system (e.g., Windows, Linux, VMware ESXi):
- Insert the operating system installation media (USB drive or DVD) into the system.
- Boot from the installation media (you may need to adjust the boot order in BIOS/UEFI).
- Follow the on-screen prompts to install the operating system on your chosen storage device.
- After installation, install all necessary drivers for the motherboard components (chipset, LAN, VGA, etc.) from the Supermicro website or the provided driver disc.
5. Penyelenggaraan
Penyelenggaraan tetap membantu memastikan jangka hayat dan operasi yang stabil bagi motherboard dan sistem anda.
5.1. Pembersihan
- Periodically clean dust from the motherboard and system components using compressed air. Ensure the system is powered off and unplugged before cleaning.
- Elakkan menggunakan pembersih cecair terus pada komponen.
- Ensure proper airflow within the chassis by keeping fan vents clear.
5.2. Firmware and Driver Updates
- Periksa Supermicro website periodically for updated BIOS/UEFI firmware and drivers for your motherboard model.
- Follow the provided instructions carefully when updating firmware to avoid system instability.
5.3. Pertimbangan Alam Sekitar
- Operate the motherboard within recommended temperature and humidity ranges to prevent damage.
- Ensure adequate ventilation in the server chassis.
6. Penyelesaian masalah
Bahagian ini menyediakan penyelesaian kepada isu biasa yang mungkin anda hadapi.
6.1. Tiada Kuasa / Tiada POST (Ujian Kendiri Hidup Kuasa)
- Verify that the power supply unit (PSU) is connected correctly to the motherboard (24-pin ATX and 8-pin EPS connectors).
- Ensure the PSU is switched on and receiving power from the wall outlet.
- Periksa sama ada kabel suis kuasa panel hadapan disambungkan dengan betul ke pengepala papan induk.
- Reseat the CPU, RAM modules, and any expansion cards.
- Try booting with only essential components (CPU, one RAM stick, CPU cooler) to isolate the issue.
- Listen for beep codes from the system speaker, which can indicate specific hardware failures. Refer to the Supermicro website for beep code interpretations.
6.2. Isu Paparan
- Ensure the monitor is properly connected to the motherboard's VGA port.
- Pastikan monitor dihidupkan dan ditetapkan kepada sumber input yang betul.
- If using a discrete graphics card, ensure it is properly seated and connected to power (if required).
6.3. Operating System Not Booting
- Check the boot order in the BIOS/UEFI to ensure the correct storage device is prioritized.
- Verify that the operating system is installed correctly on the storage device.
- Ensure SATA data and power cables are securely connected to the storage device and motherboard.
7. Spesifikasi
Below are the technical specifications for the Supermicro X10SLM+-LN4F motherboard:
| Ciri | Perincian |
|---|---|
| Jenama | Supermikro |
| Nama Model | X10SLM+-LN4F-B |
| Soket CPU | LGA1150 |
| Jenis Chipset | Intel C224 |
| Teknologi Memori RAM | DDR3 SDRAM |
| Kelajuan Memori | 1600 MHz |
| Kapasiti Penyimpanan Memori | Sehingga 64 GB |
| Bilangan USB 2.0 Port | 2 (Masuk/Keluar Belakang) |
| Antara Muka Kad Grafik | Integrated, PCI |
| Peranti Serasi | pelayan |
| Platform | Windows 10 |
| Berat Barang | 5.8 paun |
| Dimensi Produk (LxWxH) | 10 x 10 x 2 inci |
| Tarikh Mula-mula Tersedia | 4 Jun 2013 |
Note: Specifications are subject to change without notice. For the most current information, please refer to the official Supermicro product page.
8. Waranti dan Sokongan
For detailed warranty information, please refer to the warranty card included with your product or visit the official Supermicro website. Technical support is available through Supermicro's customer service channels, including their support portal, email, and phone. Please have your product model number (X10SLM+-LN4F) and serial number ready when contacting support.
For the latest drivers, BIOS updates, and additional documentation, please visit: www.supermicro.com