
1. Pengenalan
Terima kasih kerana membeliasing the Lexon LR98R1 Onoff LCD Alarm Clock. This manual provides detailed instructions for the proper setup, operation, and maintenance of your device. Please read this manual thoroughly before use and retain it for future reference.
The Lexon Onoff alarm clock features a unique design where flipping the clock activates or deactivates the alarm. It includes an LCD display with a blue electroluminescent backlight for clear visibility.
2. Maklumat Keselamatan
- Jangan dedahkan peranti kepada suhu yang melampau, cahaya matahari langsung atau kelembapan yang tinggi.
- Elakkan daripada menjatuhkan peranti atau terkena impak yang kuat.
- Do not attempt to disassemble or modify the alarm clock. This will void the warranty.
- Jauhkan peranti daripada air dan cecair lain.
- Buang bateri terpakai secara bertanggungjawab mengikut peraturan tempatan.
- Gunakan hanya jenis bateri yang dinyatakan (2 x AAA).
3. Kandungan Pakej
Pastikan semua item ada dalam pakej:
- Lexon LR98R1 Onoff LCD Alarm Clock
- Manual Pengguna (dokumen ini)
Nota: Bateri AAA tidak disertakan dan mesti dibeli secara berasingan.
4. Produk Lebihview
Familiarize yourself with the components of your Lexon Onoff alarm clock.
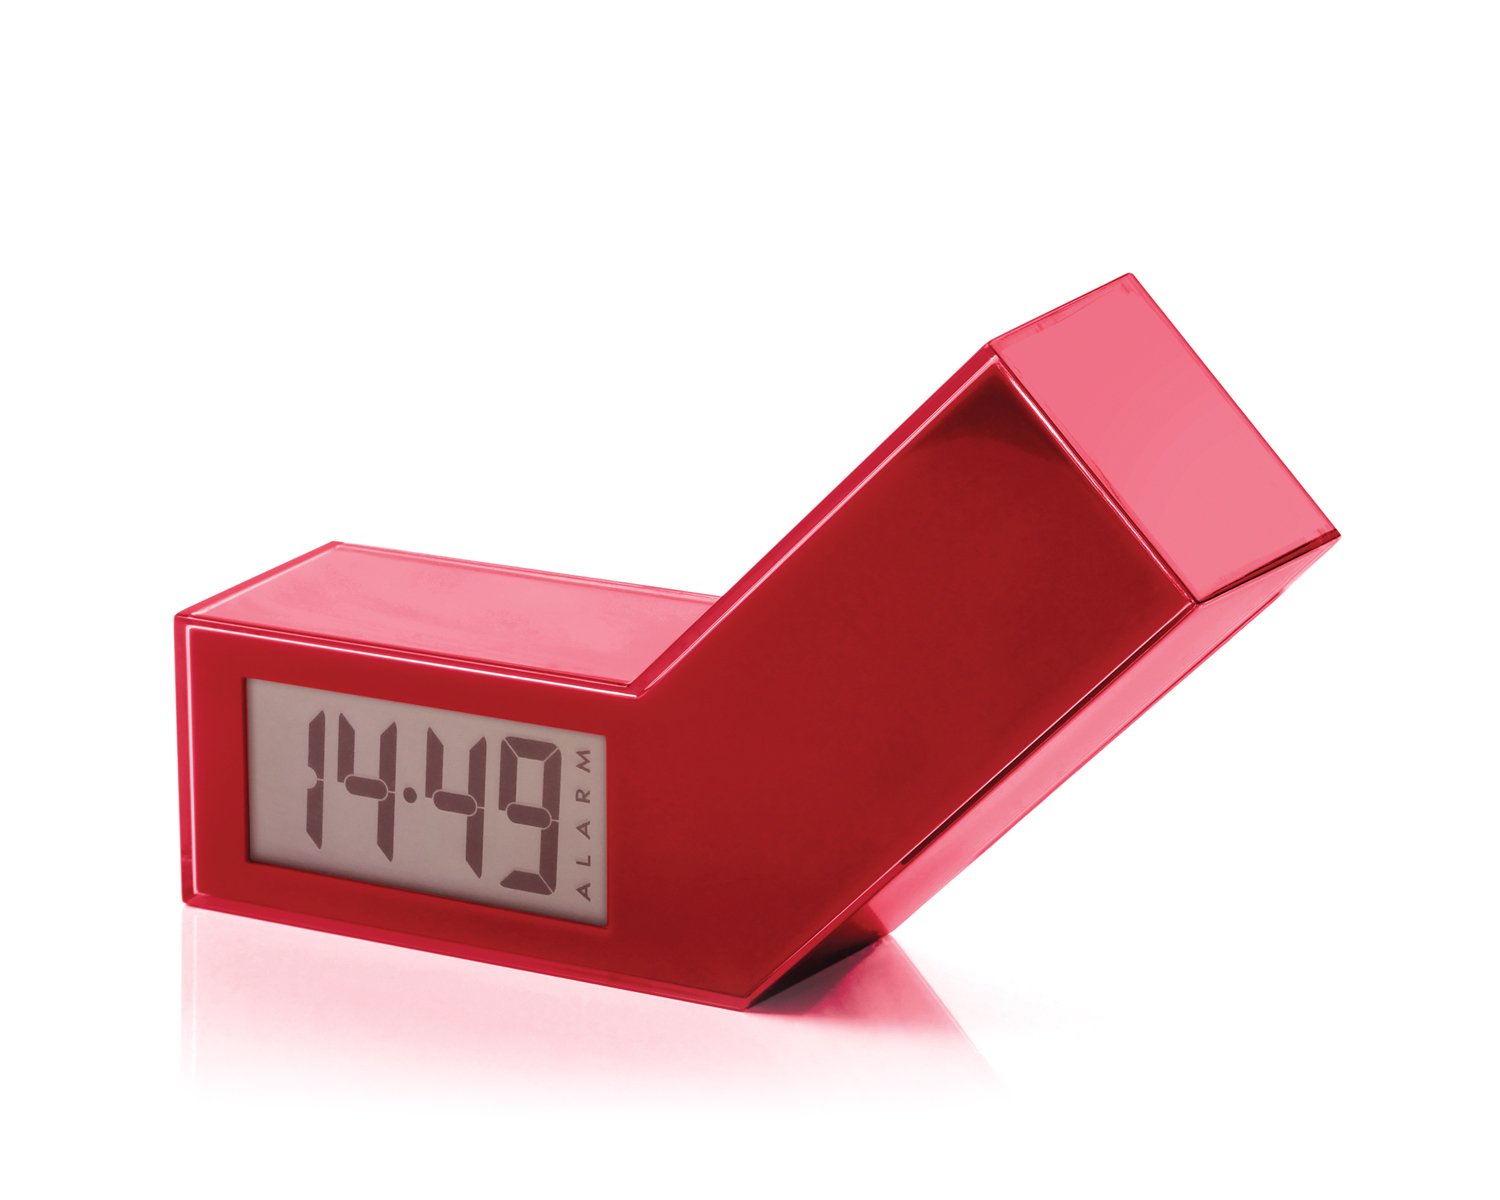
Rajah 1: Depan view of the Lexon LR98R1 Onoff LCD Alarm Clock. The image displays the alarm clock in its red casing, with the LCD screen visible. The side labeled 'ON' is facing upwards, indicating the alarm is active. The clock has a minimalist rectangular design.
While specific button labels are not visible in the provided image, typical alarm clock controls are usually located on the back or sides. These generally include:
- Butang Tetapan Masa: To adjust the current time.
- Alarm Set Button: To adjust the alarm time.
- Hour/Minute Adjustment Buttons: To change hour and minute values.
- Butang Tunda/Cahaya: To temporarily silence the alarm or activate the backlight.
- Petak Bateri: Located on the back or bottom.
5. Persediaan
5.1 Pemasangan Bateri
- Locate the battery compartment cover on the back or bottom of the alarm clock.
- Luncurkan atau angkat penutup untuk membuka petak.
- Masukkan dua (2) bateri AAA, pastikan kekutuban (+ dan -) yang betul seperti yang ditunjukkan di dalam petak.
- Gantikan penutup petak bateri dengan selamat.
Note: Batteries are not included. Please use new AAA alkaline batteries for optimal performance.
5.2 Kuasa Awal Hidup
Once batteries are installed, the LCD display should illuminate, and the clock will typically start at a default time (e.g., 12:00 AM). You will then need to set the current time and alarm.
6. Arahan Operasi
6.1 Menetapkan Masa Semasa
- Tekan dan tahan butang MASA DITETAPKAN button (or similar, refer to device markings) until the hour digits begin to flash.
- Gunakan JAM dan MINIT adjustment buttons to set the correct hour and minute.
- Tekan MASA DITETAPKAN sekali lagi untuk mengesahkan dan keluar dari mod tetapan masa.
6.2 Menetapkan Masa Penggera
- Tekan dan tahan butang SET ALARM button (or similar) until the alarm hour digits begin to flash.
- Gunakan JAM dan MINIT adjustment buttons to set your desired alarm time.
- Tekan SET ALARM again to confirm and exit alarm setting mode.
6.3 Activating/Deactivating the Alarm (Onoff Feature)
The Lexon Onoff alarm clock features a unique flip mechanism:
- Kepada AKTIFKAN the alarm, place the clock with the side labeled "ON" facing upwards. An alarm icon should appear on the LCD display.
- Kepada MATI the alarm, flip the clock so the side labeled "DIMATIKAN" is facing upwards. The alarm icon should disappear from the display.
6.4 Silencing the Alarm / Snooze Function
- Apabila penggera berbunyi, tekan SNOOZE / CAHAYA button (usually a large button on top) to temporarily silence the alarm. The alarm will sound again after a few minutes (typically 5-10 minutes).
- To completely turn off the alarm for the day, flip the clock to the "DIMATIKAN" position.
6.5 Paparan Lampu Belakang
Tekan ke SNOOZE / CAHAYA button to activate the blue electroluminescent backlight for a few seconds, allowing you to view the time in low-light conditions.
7. Penyelenggaraan
7.1 Pembersihan
Wipe the surface of the alarm clock with a soft, dry cloth. Do not use abrasive cleaners, solvents, or chemical sprays, as these may damage the finish or electronic components.
7.2 Penggantian Bateri
When the display dims or the alarm function becomes unreliable, it is time to replace the batteries. Follow the battery installation steps in Section 5.1. Always replace both AAA batteries at the same time.
8. Penyelesaian masalah
| Masalah | Kemungkinan Punca | Penyelesaian |
|---|---|---|
| Paparan kosong atau malap. | Bateri mati atau tidak dipasang dengan betul. | Gantikan bateri dengan bateri AAA baharu, memastikan kekutuban yang betul. |
| Penggera tidak berbunyi. | Alarm is not activated (clock is in "OFF" position) or alarm time is not set. | Flip the clock to the "ON" position. Verify the alarm time is set correctly (Section 6.2). Ensure batteries are not low. |
| Masa tidak betul. | Time was not set correctly or batteries were removed/replaced. | Reset the current time (Section 6.1). |
| Lampu latar tidak berfungsi. | Bateri lemah. | Gantikan bateri. |
9. Spesifikasi
| Nombor Model | LR98R1 |
| Jenama | Lexon |
| Jenis Paparan | LCD with Blue Electroluminescent Backlight |
| Sumber Kuasa | 2 x Bateri AAA (tidak termasuk) |
| bahan | ABS / Injected Polycarbonate |
| Dimensi (L x W x H) | 13.5 x 3.5 x 8 cm (kira-kira 5.3 x 1.4 x 3.1 inci) |
| Jenis Pergerakan | Kuarza |
| Ciri Khas | Onoff flip alarm activation/deactivation, Snooze function |
10. Waranti dan Sokongan
The Lexon LR98R1 Onoff LCD Alarm Clock comes with a Waranti pengilang selama 2 tahun dari tarikh pembelian. Waranti ini melindungi kecacatan pada bahan dan mutu kerja di bawah penggunaan biasa.
Waranti tidak meliputi:
- Kerosakan yang disebabkan oleh kemalangan, penderaan, penyalahgunaan, banjir, kebakaran, gempa bumi atau sebab luaran yang lain.
- Damage caused by operating the product outside the permitted or intended uses described in this manual.
- Damage caused by service performed by anyone who is not an authorized representative of Lexon.
- Products or parts that have been modified to alter functionality or capability without the written permission of Lexon.
For warranty claims or technical support, please contact Lexon customer service through their official website or your retailer. Please have your proof of purchase and model number (LR98R1) ready.