
1. Pengenalan
The Polaroid PLRTC18 Shutter Release Timer Remote Control is designed to provide precise control over your camera's shutter, enabling advanced photographic techniques such as time-lapse, long exposures, and delayed shots. This device connects directly to your compatible Canon DSLR camera via a dedicated cable, allowing you to program various timing functions with accuracy.

Figure 1.1: User operating the PLRTC18 remote control with a camera on a tripod.
Please read this manual thoroughly to understand the features and proper operation of your new remote control.
2. Kandungan Pakej
- Polaroid PLRTC18 Shutter Release Timer Remote Control
- Camera Connection Cables (2 types for broad compatibility)
- Manual Pengguna
- Bateri AAA (2)
3. Persediaan
3.1. Pemasangan Bateri
The PLRTC18 requires two AAA batteries for operation. To install:
- Cari penutup petak bateri di belakang alat kawalan jauh.
- Geser penutup terbuka ke arah yang ditunjukkan oleh anak panah.
- Masukkan dua bateri AAA, pastikan kekutuban (+/-) yang betul seperti yang ditanda di dalam petak.
- Tutup penutup petak bateri sehingga ia berbunyi klik dengan selamat pada tempatnya.

Figure 3.1: Battery compartment with two AAA batteries.
Nota: To conserve battery life, it is recommended to remove the batteries when the remote control will not be used for an extended period, as there is no dedicated ON/OFF switch.
3.2. Connecting to Your Camera
The remote control connects to your camera using one of the provided cables. Identify the correct cable for your specific Canon DSLR model.
- Plug one end of the appropriate connection cable into the remote control's port.
- Plug the other end of the cable into your camera's remote control terminal. This is typically a 3-pin or mini headphone jack style port, often located on the side of the camera body.
- Pastikan kedua-dua sambungan selamat.

Figure 3.2: Connecting the remote control cable to a Canon camera.
4. Arahan Operasi
4.1. Kawalan Ke Atasview
Familiarize yourself with the buttons and LCD display on the remote control:

Figure 4.1: PLRTC18 Remote Control Layout.
- Paparan LCD: Shows current settings for DELAY, LONG, INTVL (Interval), and N (Number of exposures).
- Butang SET: Digunakan untuk memasuki mod tetapan dan mengesahkan pilihan.
- Butang Anak Panah (Atas/Bawah/Kiri/Kanan): Used to navigate between settings and adjust values.
- TIMER START/STOP Button: Initiates or stops the programmed timer sequence.
- /LOCK Button: Functions as a manual shutter release (half-press for focus, full-press for shutter) and can lock the remote.
4.2. Setting Timer Functions
The remote control allows you to set four primary timing parameters: Delay, Long Exposure, Interval, and Number of Exposures. All settings can be adjusted up to 99 hours, 59 minutes, and 59 seconds in one-second increments.
- Tekan ke SET button to enter the setting mode. The first parameter (DELAY) will begin to flash.
- Gunakan Anak panah Kiri/Kanan buttons to navigate between DELAY, LONG, INTVL, and N.
- Gunakan Arus Atas / Bawah buttons to adjust the values for the selected parameter (hours, minutes, seconds).
- After setting a value, press SET again to move to the next digit or parameter.
- Once all desired parameters are set, press SET until the display stops flashing and returns to standby mode.
4.2.1. DELAY (Self-Timer)
This sets the amount of time before the first exposure sequence begins. Useful for getting into the shot or allowing camera vibrations to settle.
4.2.2. LONG (Exposure Time)
This sets the duration the camera's shutter will remain open for each exposure. Set your camera to Bulb mode for this function to work correctly.
4.2.3. INTVL (Interval Time)
This sets the time between the end of one exposure and the start of the next. Essential for time-lapse photography.
4.2.4. N (Number of Exposures)
This sets the total number of exposures the remote will trigger. Set to "---" for an unlimited number of shots.
4.3. Memulakan dan Menghentikan Pemasa
Once your desired settings are programmed:
- Tekan ke TIMER START/STOP button to begin the programmed sequence. The LCD will display a countdown or active timer.
- To stop an ongoing sequence, press the TIMER START/STOP butang lagi.
4.4. Manual Shutter Release
The remote control can also function as a simple wired shutter release.
- Separuh Tekan: Tekan ke /KUNCI button halfway down to activate your camera's autofocus.
- Tekan Penuh: Tekan ke /KUNCI button fully down to trigger the shutter.
- Locking the Shutter: For continuous shooting or long exposures in Bulb mode (without using the LONG timer function), press the /KUNCI button fully down and slide it forward to lock it in the depressed position. Slide it back to release.
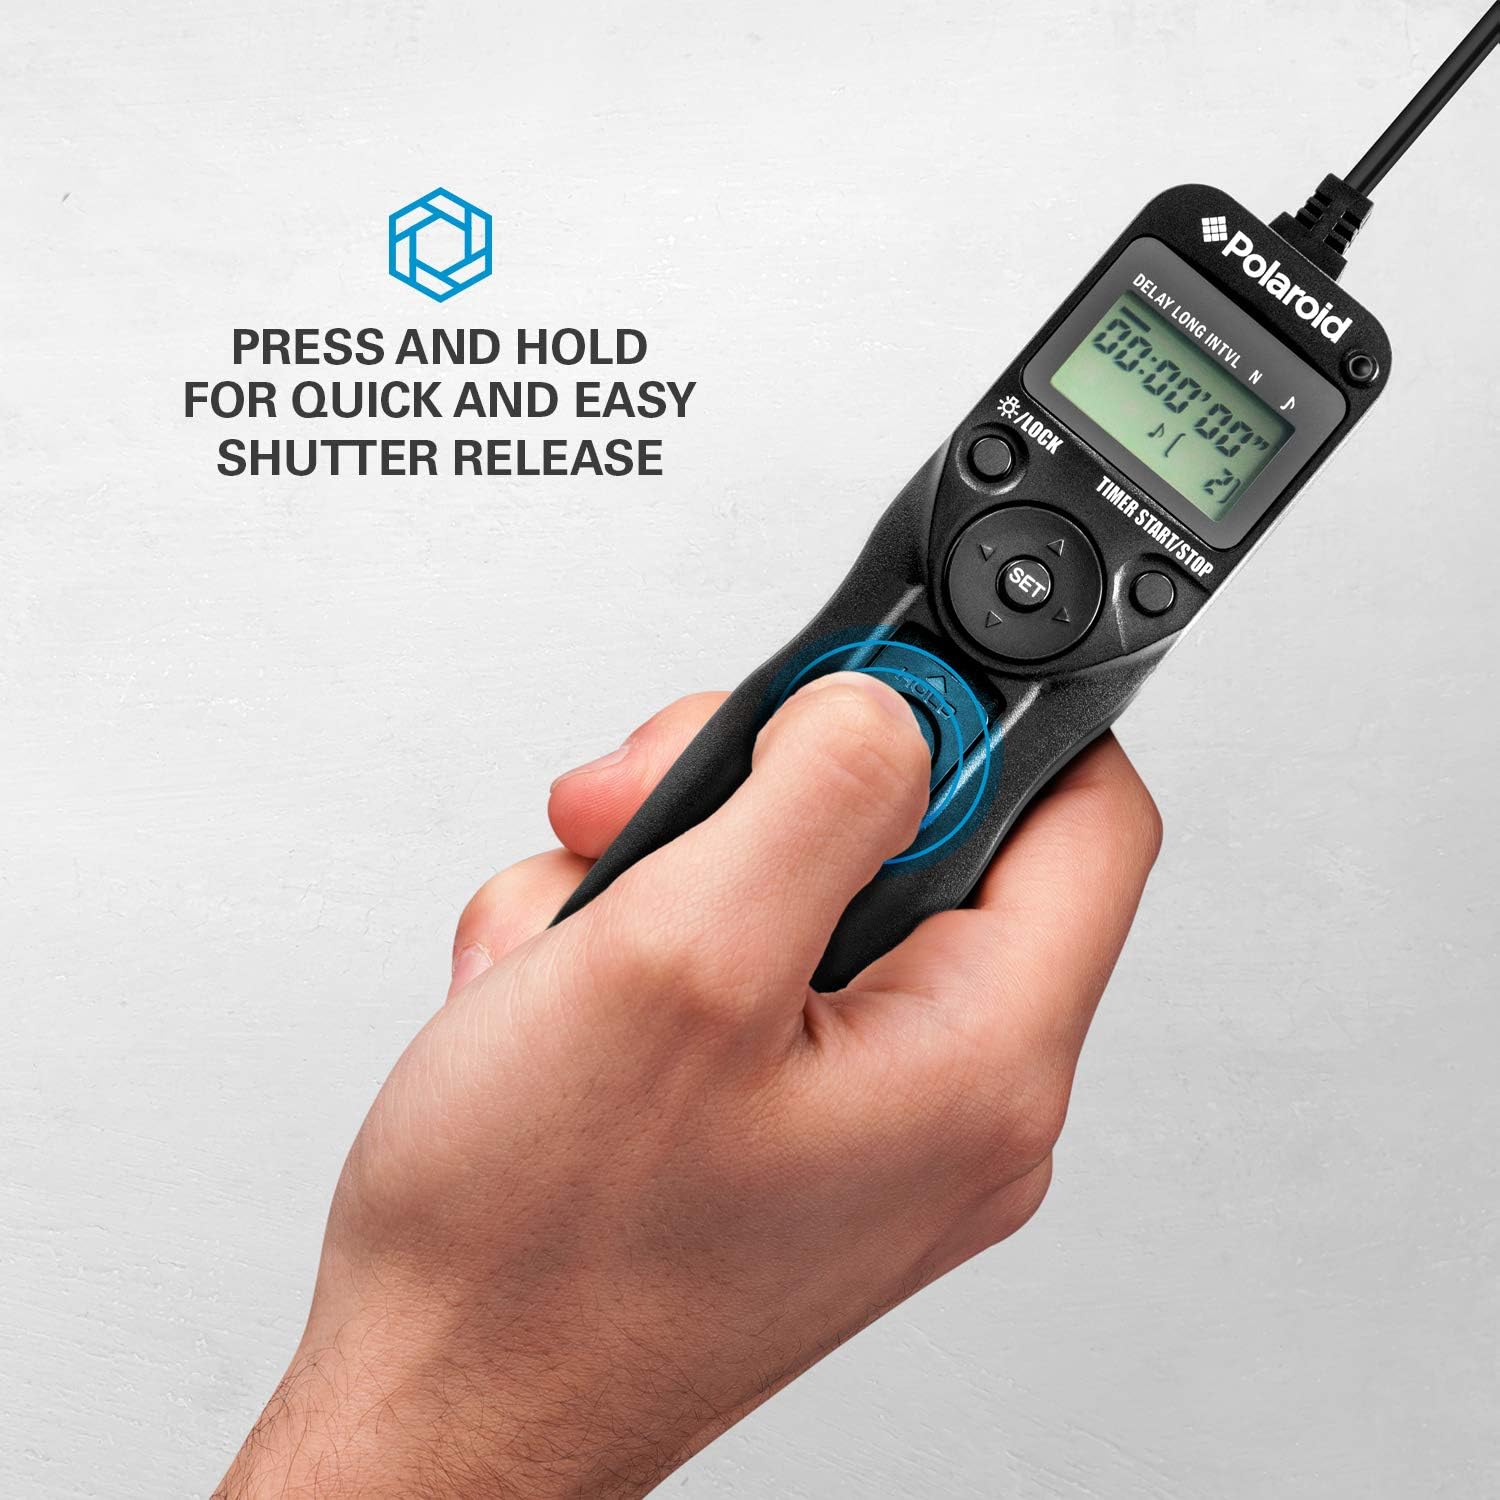
Figure 4.2: Manual shutter release operation.
5. Penyelenggaraan
- Pembersihan: Wipe the remote control with a soft, dry cloth. Do not use liquid cleaners or solvents.
- Penjagaan Bateri: Remove batteries if the unit will not be used for an extended period to prevent leakage. Replace batteries when the low battery indicator appears on the LCD.
- Storan: Simpan alat kawalan jauh di tempat yang sejuk dan kering, jauh daripada cahaya matahari langsung dan suhu yang melampau.
- Penjagaan Kabel: Avoid bending or twisting the connection cables excessively to prevent damage.
6. Penyelesaian masalah
| Masalah | Kemungkinan Punca | Penyelesaian |
|---|---|---|
| Alat kawalan jauh tidak boleh dihidupkan. | Bateri mati atau tidak dipasang dengan betul. | Periksa polariti bateri. Gantikan dengan bateri AAA yang baru. |
| Camera does not trigger. |
|
|
| Timer sequence does not start. | Settings not confirmed or START button not pressed. | Ensure all settings are confirmed with SET dan kemudian tekan TIMER START/STOP. |
| Paparan LCD malap atau berkelip-kelip. | Bateri lemah. | Gantikan bateri AAA. |
7. Spesifikasi
- model: PLRTC18
- Jenama: Polaroid
- Ketersambungan: berwayar
- Fungsi Pemasa: Delay, Long Exposure, Interval, Number of Exposures
- Tetapan Pemasa: 1 second to 99 hours, 59 minutes, 59 seconds (in 1-second increments)
- Bilangan Pukulan: 1 to 9999, or unlimited (---)
- paparan: LCD bercahaya belakang
- Sumber Kuasa: 2 x bateri AAA
- warna: Hitam
8. Keserasian Kamera
The Polaroid PLRTC18 is compatible with a wide range of Canon Digital SLR cameras that utilize a 3-pin or mini headphone jack style remote control terminal. Compatible models include, but are not limited to:
- Canon G10, G11, G12, G16
- Canon EOS Digital Rebel series
- Canon 60D, 70D
- Canon Elan II/IIE, Elan 7/7E
- Canon Rebel Ti /2000/G/GII/X/XS
- Canon IX/IX Lite
- Canon SX50 HS
- Canon EOS Rebel T1i, T2, T2i, T3, T3i, T4i, T5, T5i, T6
- And similar models with compatible shutter release ports.
Please consult your camera's manual to confirm the type of remote control port it uses.
9. Waranti dan Sokongan
For warranty information or technical support, please refer to the documentation included with your purchase or visit the official Polaroid webtapak. Simpan bukti pembelian anda untuk tuntutan waranti.