
1. Pengenalan
This manual provides detailed instructions for the proper setup, operation, and maintenance of your AVerMedia AVerVision CP135 Document Camera. Please read this manual thoroughly before using the device to ensure optimal performance and safety. The AVerVision CP135 is designed to capture and display documents, objects, and images with clarity, making it suitable for educational and presentation environments.
2. Maklumat Keselamatan
- Bekalan Kuasa: Use only the power adapter supplied with the unit. Using an unauthorized adapter may damage the device and void the warranty.
- Pengudaraan: Pastikan pengudaraan yang betul di sekitar unit. Jangan halang bukaan pengudaraan.
- Persekitaran: Elakkan mendedahkan peranti kepada kelembapan, suhu ekstrem atau cahaya matahari langsung. Kendalikan di persekitaran yang bersih dan kering.
- Pengendalian: Handle the flexible arm and camera head with care. Avoid excessive force or sudden movements.
- Servis: Jangan cuba membuka atau menservis unit ini sendiri. Rujuk semua servis kepada kakitangan yang berkelayakan.
3. Kandungan Pakej
Sila semak kandungan pakej untuk memastikan semua item ada:
- AVerMedia AVerVision CP135 Document Camera Unit
- Penyesuai Kuasa
- Kabel VGA
- Kabel USB
- Alat Kawalan Jauh (dengan bateri)
- Quick Guide / User Manual CD (if applicable)
4. Produk Lebihview
Familiarize yourself with the various components and ports of the AVerVision CP135.

Figure 4.1: Front-Side View of the CP135. This image displays the overall structure of the AVerVision CP135, including the base unit, flexible arm, and camera head. The control panel is visible on the base.

Rajah 4.2: Sisi View of the CP135. ini view highlights the flexible gooseneck arm, which allows for versatile positioning of the camera head to capture various angles and objects.

Figure 4.3: Camera Head with Integrated LED Lighting. A close-up of the camera lens and the built-in LED lights, which provide illumination for clear image capture, especially in low-light conditions.

Figure 4.4: Rear Connectivity Ports. This image shows the various input and output ports on the rear of the base unit, including VGA input (RGB INPUT), VGA output (RGB OUT), Composite Video output (VIDEO OUTPUT), and S-Video output (S-VIDEO OUTPUT).

Rajah 4.5: Bawah View of the CP135. The underside of the unit, displaying the product label with model information, serial number, and power requirements. Note the warning: "DO NOT OPEN THE CASE".
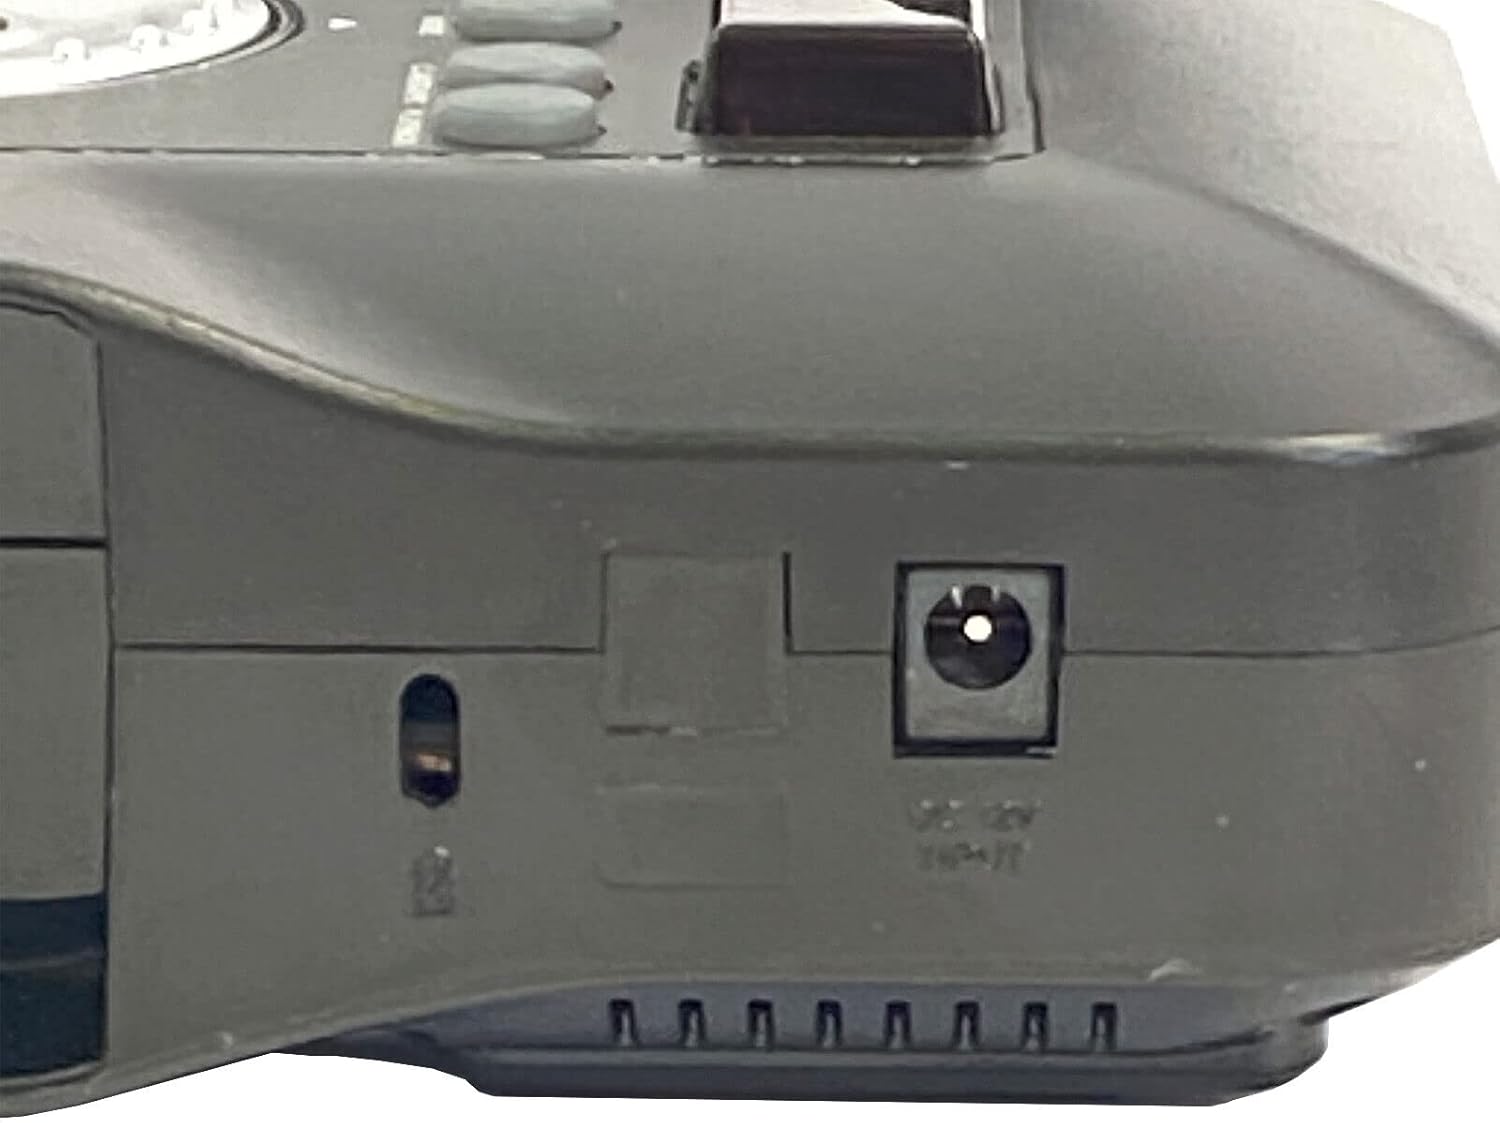
Figure 4.6: DC 12V Power Input. A close-up of the DC 12V power input port located on the side of the base unit, where the power adapter connects.

Figure 4.7: Top Control Panel. This image shows the main control panel on the base unit, featuring buttons for power, mode selection, camera/PC toggle, zoom, focus, menu, freeze, effects, auto tune, and capture/delete functions.
5. Persediaan
- Buka bungkusan Unit: Carefully remove the AVerVision CP135 from its packaging.
- Letakkan Kamera: Place the base unit on a stable, flat surface. Adjust the flexible arm to position the camera head over the desired object or document.
- Sambungkan Kuasa: Insert the DC plug of the power adapter into the DC 12V IN port on the side of the base unit (refer to Figure 4.6). Plug the power adapter into a standard electrical outlet.
- Connect to Display/Computer:
- For Projector/Monitor: Connect a VGA cable from the VGA OUT port (RGB OUT) on the CP135 to the VGA input of your projector or monitor.
- For Computer: Connect a USB cable from the USB port on the CP135 (if available, typically on the side or rear) to a USB port on your computer. Install any necessary drivers or software provided by AVerMedia.
- For TV/VCR: Use the Composite Video (VIDEO OUTPUT) or S-Video (S-VIDEO OUTPUT) ports for connection to compatible devices.
- Hidupkan kuasa: Tekan ke KUASA button on the control panel (Figure 4.7) to turn on the unit.
6. Arahan Operasi
6.1 Operasi Asas
- Hidupkan/Mati Kuasa: Tekan ke KUASA butang untuk menghidupkan atau mematikan unit.
- Camera/PC Mode: Tekan ke CAMERA/PC button to switch between displaying the camera's live image and a connected computer's output.
- Zum: Gunakan ZOOM MASUK (+) dan ZUM KELUAR (-) buttons to adjust the magnification of the image.
- Fokus: Tekan ke AUTO TALA button for automatic focus adjustment. Manual focus may also be available via menu options.
- Pembekuan Imej: Tekan ke BEKUKAN button to pause the live image. Press again to resume.
- Pencahayaan LED: The integrated LED lights (Figure 4.3) can be toggled on/off or adjusted for brightness via the control panel or remote control, if available.
6.2 Advanced Functions (via Menu)
Tekan ke MENU button to access advanced settings. Use the directional buttons and MASUK to navigate and select options. Common menu options include:
- Pelarasan Imej: Brightness, Contrast, Color, White Balance.
- Kesan: Positive/Negative, Black & White, Mirror, Rotate.
- Resolusi: Adjust output resolution to match your display.
- Capture/Delete: If the unit has internal memory or a connected storage device, these buttons allow capturing images or deleting stored files.
7. Penyelenggaraan
- Membersihkan Lensa: Use a soft, lint-free cloth specifically designed for optical lenses to gently wipe the camera lens. Do not use abrasive cleaners or solvents.
- Membersihkan Unit: Wipe the exterior of the unit with a soft, dry cloth. For stubborn dirt, a slightly damp cloth can be used, followed by a dry cloth. Ensure no liquid enters the unit.
- Storan: When not in use, store the document camera in a cool, dry place, away from direct sunlight and dust.
8. Penyelesaian masalah
| Masalah | Kemungkinan Punca | Penyelesaian |
|---|---|---|
| Tiada kuasa | Power adapter not connected; Power outlet faulty; Unit not turned on. | Ensure power adapter is securely connected to the unit and a working outlet. Press the POWER button. |
| Tiada imej dipamerkan | Incorrect input selected on display; Cable not connected properly; Camera/PC mode incorrect. | Select the correct input source on your projector/monitor. Check all cable connections. Press CAMERA/PC button to switch modes. |
| Imej kabur | Out of focus; Object too close/far; Lens dirty. | Press AUTO TUNE for auto-focus. Adjust the distance of the object from the camera. Clean the camera lens. |
| Imej terlalu gelap/terang | Insufficient/excessive lighting; Brightness/contrast settings incorrect. | Adjust ambient lighting. Use the built-in LED lights. Adjust brightness and contrast settings via the menu. |
9. Spesifikasi
- Jenama: AVerMedia
- model: AVerVision CP135
- Peranti Serasi: Camera (Document Camera)
- Ketersambungan: VGA Input, VGA Output, Composite Video Output, S-Video Output, DC 12V Power Input
- Berat Barang: Lebih kurang 8.82 paun (4 kg)
- Pengeluar: AVer Information
- UPC: 848090001183
- ASIN: B006V664TI
10. Waranti dan Sokongan
For information regarding warranty coverage, technical support, and service, please refer to the warranty card included with your product or visit the official AVerMedia website. AVerMedia provides resources and contact information for customer assistance.
AVerMedia Official Webtapak: www.avermedia.com