
RadioShack 320-1258
170MHz VHF Single-Channel Wireless Microphone System
Model: 320-1258
Jenama: RadioShack
pengenalan
This manual provides instructions for the setup, operation, and maintenance of your RadioShack 170MHz VHF Single-Channel Wireless Microphone System. This system is designed for clear audio transmission over a range of up to 200 feet, making it suitable for various applications.
The system comprises a wireless receiver and a wireless handheld microphone. It features 170MHz VHF operation, low distortion, and built-in compander noise reduction for enhanced clarity. The receiver includes a MIC level output for easy connection to amplifiers, mixing boards, or recorders, along with volume and squelch controls for optimal sound balance and sensitivity adjustment.
Maklumat Keselamatan
Sila baca dan fahami semua arahan keselamatan sebelum mengendalikan peranti ini. Simpan manual ini untuk rujukan pada masa hadapan.
- Jangan dedahkan unit kepada hujan atau lembapan.
- Jangan buka unit ini. Rujuk semua servis kepada kakitangan yang berkelayakan.
- Gunakan hanya penyesuai kuasa dan bateri yang dinyatakan.
- Jauhkan unit dari sumber haba dan cahaya matahari langsung.
- Makluman Pengguna: Kebanyakan pengguna tidak memerlukan lesen untuk mengendalikan sistem mikrofon wayarles ini. Namun begitu, mengendalikan sistem mikrofon ini tanpa lesen adalah tertakluk kepada sekatan tertentu: sistem mungkin tidak menyebabkan gangguan berbahaya; ia mesti beroperasi pada tahap kuasa rendah (tidak melebihi 50 miliwatt); dan ia tidak mempunyai perlindungan daripada gangguan yang diterima daripada mana-mana peranti lain.
Kandungan Pakej
Sahkan bahawa semua item yang disenaraikan di bawah disertakan dalam pakej anda:
- Mikrofon Tanpa Wayar
- Penerima Tanpa Wayar
- Penyesuai AC 9V
- Panduan Pengguna
Note: 2 "AA" batteries are required for the microphone and are not included. Shielded audio cables (e.g., 1/4" audio cable) for connecting the receiver to an audio system are also not included.
Produk Selesaiview
Familiarize yourself with the components and controls of your wireless microphone system.
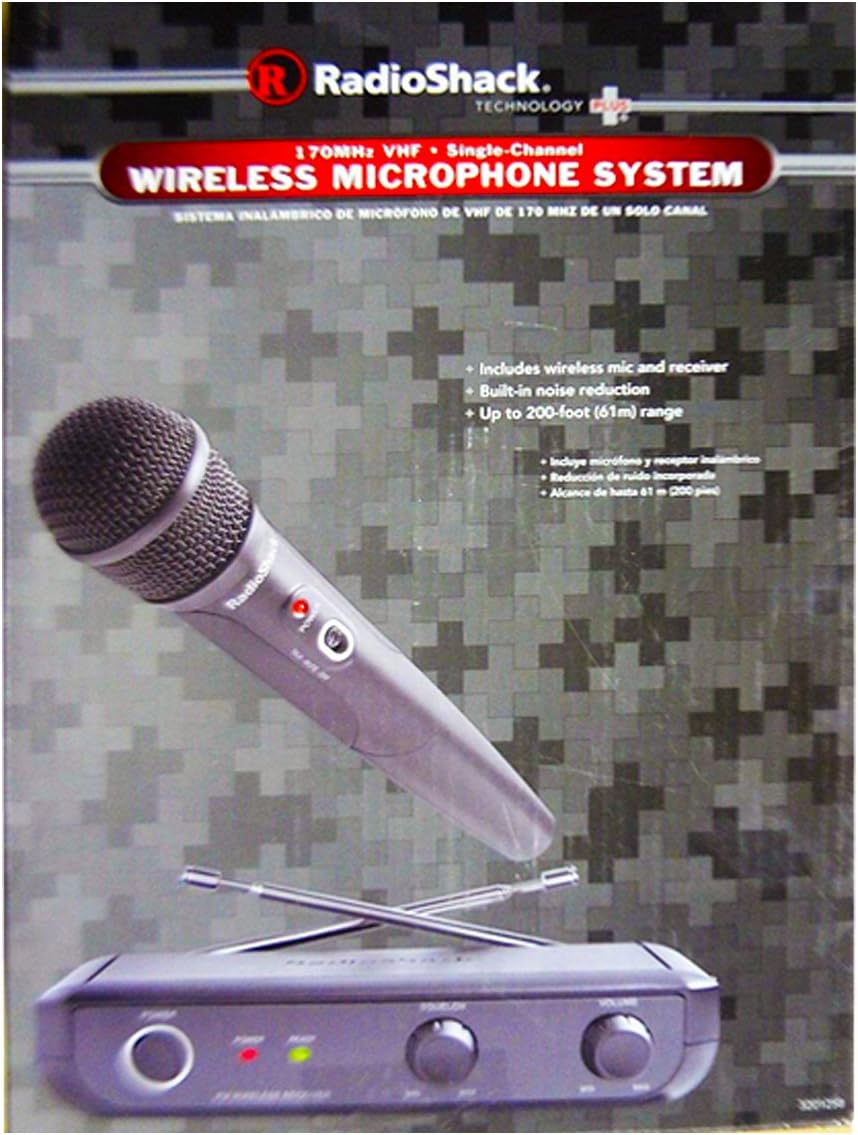
Figure 1: RadioShack 170MHz VHF Single-Channel Wireless Microphone System components.
This image displays the wireless microphone and the receiver unit, highlighting their compact design.

Figure 2: Detailed diagram of the Wireless Microphone System with labeled controls and connections.
This diagram illustrates the front and back panels of the receiver and the microphone, pointing out key features such as power indicators, volume, squelch, and output jacks.
Receiver Controls and Indicators:
- READY Indicator: Lights when microphone signals are within range of the receiver.
- Penunjuk KUASA: Menyala apabila kuasa dihidupkan.
- Tombol VOLUME: Rotate to adjust your microphone's output volume.
- Tombol SQUELCH: Turn to limit background noise and control transmitting distance. Rotate to MIN to increase transmitting distance.
- Suis kuasa: Menghidupkan/mematikan penerima.
Receiver Connections (Back View):
- DC 9V/250mA Input: Untuk menyambungkan penyesuai AC.
- LINE Output Jack: Untuk menyambung ke amppenguat, pengadun, atau perakam.
- MICROPHONE Output Jack (Optional): Another output option.
Kawalan Mikrofon:
- Suis kuasa: Turns the microphone on/off.
- TALK-MUTE-OFF Switch: Selects operational mode for the microphone.
Persediaan
- Install Batteries in Microphone: Open the battery compartment of the microphone and insert two "AA" batteries, observing the correct polarity.
- Connect Receiver Power: Plug the 9V AC adapter into the DC 9V/250mA input on the back of the receiver, then plug the adapter into a standard AC outlet.
- Connect Receiver to Audio System:
- Using a shielded audio cable (not included), connect the LINE Output Jack on the receiver to an available input on your amplifier, mixing board, or recorder.
- Alternatively, use the MICROPHONE Output Jack if your audio system requires it.
- Antena Kedudukan: Extend the receiver's antennas fully for optimal signal reception.
Arahan Operasi
- Kuasa Hidupkan Penerima: Turn the POWER switch on the receiver to the ON position. The POWER indicator light will illuminate.
- Power On Microphone: Slide the switch on the microphone to the TALK position. The READY indicator on the receiver should light up, indicating a signal is being received.
- Laraskan Kelantangan: Slowly turn the VOLUME knob on the receiver clockwise to increase the microphone's output level. Adjust to a comfortable listening level on your connected audio system.
- Adjust Squelch: The SQUELCH control helps eliminate background noise when the microphone is not in use. Turn the SQUELCH knob clockwise to increase noise suppression. If the microphone signal drops out or sounds weak, turn the SQUELCH knob counter-clockwise towards MIN.
- Menggunakan Mikrofon: Speak into the microphone. For best results, hold the microphone approximately 2-6 inches from your mouth.
- Meredamkan Mikrofon: To temporarily mute the microphone, slide its switch to the MUTE position. The READY indicator on the receiver will turn off.
- Mematikan: When finished, slide the microphone switch to the OFF position, then turn off the receiver using its POWER switch.
Penyelenggaraan
Proper care will ensure long-lasting performance from your wireless microphone system.
- Pembersihan: Lap unit dengan kain lembut dan kering. Jangan gunakan pembersih atau pelarut yang melelas.
- Penggantian Bateri: Replace the microphone batteries when the audio quality degrades or the microphone's power indicator (if present) dims. Always remove batteries if the unit will not be used for an extended period.
- Storan: Simpan sistem di tempat yang sejuk dan kering jauh dari cahaya matahari langsung dan suhu yang melampau.
Menyelesaikan masalah
| Masalah | Kemungkinan Punca | Penyelesaian |
|---|---|---|
| Tiada bunyi dari mikrofon. |
|
|
| Sound is distorted or has static. |
|
|
| Microphone gets very hot. |
|
|
Spesifikasi
| Jenama | RadioShack |
| Nombor Model | 320-1258 |
| Kekerapan | 169.505 MHz VHF |
| Bilangan Saluran | 1 |
| Julat Operasi | Up to 200 feet (61 meters) typical |
| Sumber Kuasa (Penerima) | 9V AC Adapter (250mA) |
| Sumber Kuasa (Mikrofon) | 2 "AA" batteries |
| Microphone RF Power | 10dBm |
| Kepekaan Mikrofon | 106dB SPL at 7kHz FM |
| Sensitiviti Penerima | 1uV S/N 20dB |
| Receiver S/N Ratio (at 1mV RF Input) | 75dB |
| Receiver Image Rejection | 55dB |
| Receiver Line Output | 510mV |
| Receiver Microphone Output | 10mV |
| Receiver Dimensions (H x W) | 2.2 x 9.8 inci (55 x 110 mm) |
| Item Weight (Product) | 1.3 paun |
| Teknologi Ketersambungan | XLR |
| Corak Kutub | Satu arah |
Waranti dan Sokongan
For warranty information or technical support, please refer to the original product packaging or contact RadioShack customer service. Keep your purchase receipt as proof of purchase.
For environmental protection, please dispose of electronic waste responsibly. Visit www.recycle.com to find a recycling location near you.
Ask a question about this manual
Ask about setup, troubleshooting, compatibility, parts, safety, or missing instructions. Manuals+ will review the question and use this page’s manual context to help answer it.