
pengenalan
This manual provides detailed instructions for the installation, operation, and maintenance of your DB DRIVE A3 2250.5 Okur Series A3 Class AB 1000 Watt 5-Channel Amppenghawa dingin. Sila baca manual ini dengan teliti sebelum cuba memasang atau mengendalikannya bagi memastikan penggunaan yang betul dan untuk mengelakkan kerosakan pada unit atau sistem audio kenderaan anda.
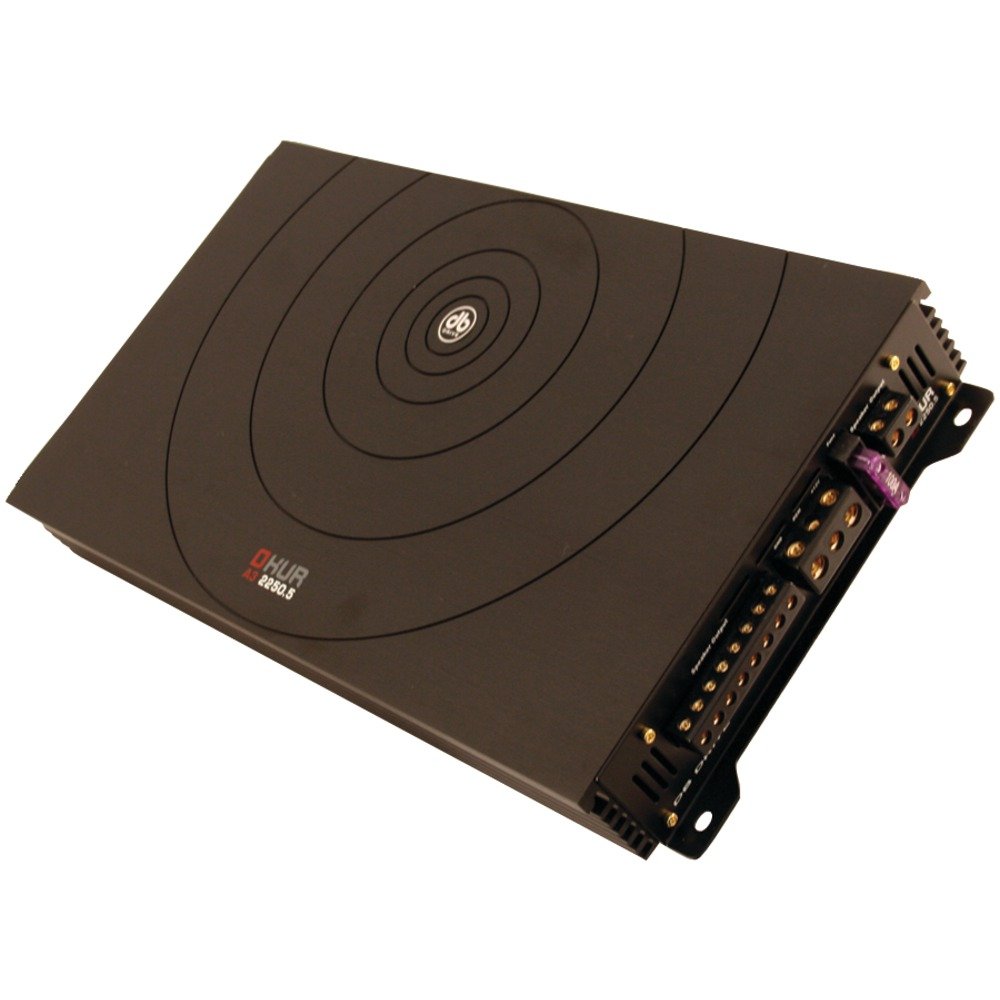
Image: DB DRIVE A3 2250.5 Okur Series A3 Class AB 1000 Watt 5-Channel Amplifier. This image shows the amplifier's top view, highlighting its compact design and branding.
Maklumat Keselamatan
Sentiasa patuhi langkah keselamatan berikut untuk mengelakkan kecederaan atau kerosakan:
- Disconnect the vehicle's battery negative terminal before making any power connections.
- Ensure all wiring is properly routed and secured to prevent pinching or short circuits.
- Gunakan pendawaian tolok yang sesuai untuk sambungan kuasa dan pembumian seperti yang dinyatakan dalam bahagian pemasangan.
- Pasangkan amppemanas di lokasi yang membolehkan pengudaraan yang mencukupi bagi mengelakkan kepanasan melampau.
- Elakkan memasang amppenghawa dingin di kawasan yang terdedah kepada kelembapan atau getaran berlebihan.
- Rujuk pemasang audio kereta profesional jika anda tidak pasti tentang mana-mana bahagian proses pemasangan.
Persediaan dan Pemasangan
1. Membongkar dan Pemeriksaan
Buang dengan berhati-hati amplifier from its packaging. Inspect the unit for any signs of damage that may have occurred during shipping. Contact your dealer immediately if any damage is found.
2. Memasang Amplebih hidup
Choose a mounting location that is dry, well-ventilated, and secure. Common locations include under a seat, in the trunk, or behind a panel. Ensure there is sufficient airflow around the ampheatsink lifier.
- Tandakan lubang pelekap menggunakan amplifier sebagai templat.
- Drill pilot holes if necessary, being careful not to damage any vehicle components.
- Selamatkan amppengalir menggunakan skru pelekap yang disediakan.
3. Sambungan Pendawaian
Proper wiring is crucial for performance and safety. Refer to the following guidelines:
- Power (BATT+): Connect a heavy-gauge wire (e.g., 4 AWG or 8 AWG depending on total power) directly from the positive terminal of the vehicle's battery. Install an inline fuse holder within 18 inches (45 cm) of the battery.
- Tanah (GND): Connect a heavy-gauge wire of the same size as the power wire to a clean, unpainted metal surface of the vehicle's chassis. Ensure a solid, low-resistance connection.
- Jauh (REM): Connect a smaller gauge wire (e.g., 18 AWG) from the amplifier's remote terminal to the remote output of your head unit. This turns the amplifier on and off with the head unit.
- Input RCA: Connect RCA cables from your head unit's pre-amp output kepada amplifier's RCA input jacks. Ensure correct channel matching (Front L/R, Rear L/R, Sub).
- Output Speaker: Connect speaker wires from the amplifier's speaker terminals to your speakers. Observe correct polarity (+ to + and - to -). This is a 5-channel amplifier, typically 4 channels for full-range speakers and 1 channel for a subwoofer.
4. Gain, Crossover, and Bass Boost Settings
These settings allow you to fine-tune the amplifier's output to match your audio system and preferences.
- Dapatkan Kawalan: Adjust the gain to match the output voltage of your head unit. Start with the gain at minimum, then slowly increase it until you hear distortion, then back off slightly. This is not a volume control.
- Crossover (LPF/HPF):
- Penapis Lulus Rendah (LPF): For the subwoofer channel, set the LPF to allow only low frequencies to pass (e.g., 80-120 Hz).
- Penapis Lulus Tinggi (HPF): For the full-range channels, set the HPF to block low frequencies from reaching your main speakers (e.g., 80-100 Hz) to prevent distortion and improve sound clarity.
- Bass Boost: Use the bass boost sparingly. Excessive bass boost can lead to distortion and speaker damage. Adjust to taste, ensuring sound remains clear.
Arahan Operasi
Once installed and configured, the amplifier will power on automatically with your head unit via the remote turn-on wire. Adjust volume and tone controls primarily from your head unit. The amplifier's settings (gain, crossover) are set during installation and generally do not require frequent adjustment.
Penyelenggaraan
The DB DRIVE A3 2250.5 amppenghawa dingin memerlukan penyelenggaraan yang minimum.
- Pembersihan: Periodically wipe the amplifier's exterior with a soft, dry cloth to remove dust. Do not use harsh chemicals or abrasive cleaners.
- Pemeriksaan: Occasionally check all wiring connections to ensure they are secure and free from corrosion. Ensure the amplifier's ventilation fins are not obstructed.
Menyelesaikan masalah
Jika anda mengalami masalah dengan anda amplifier, rujuk kepada masalah dan penyelesaian biasa berikut:
| Masalah | Kemungkinan Punca | Penyelesaian |
|---|---|---|
| Tiada Kuasa / Amppenyangga tidak dihidupkan |
|
|
| Tiada Keluaran Bunyi |
|
|
| Bunyi Herot |
|
|
| Amplifier Overheating (Protection Mode) |
|
|
Spesifikasi
| Ciri | Perincian |
|---|---|
| Nombor Model | A3 2250.5 |
| Output Kuasa Maksimum | 1000 Watt |
| Saluran | 5-Channel (4 stereo, 1 mono for subwoofer) |
| AmpKelas yang lebih hidup | Kelas AB |
| Komponen | Audiophile Grade |
| Dimensi (L x W x H) | 53.59 x 30.48 x 10.92 cm |
| Berat badan | 6.53 kg |
| Pengurusan Haba | DRIVESINK (Okur Series A3 feature) |
Waranti dan Sokongan
DB Drive products are designed for reliability and performance. This product is covered by a limited warranty. Please refer to the warranty card included with your product or visit the official DB Drive webtapak untuk terma dan syarat jaminan terperinci.
For technical support, service, or warranty claims, please contact your authorized DB Drive dealer or visit the DB Drive official webtapak untuk maklumat hubungan dan sumber sokongan.